Pioneer PDR-W839 Owner's Manual - Page 14
Getting Started - compact disc recorder
 |
View all Pioneer PDR-W839 manuals
Add to My Manuals
Save this manual to your list of manuals |
Page 14 highlights
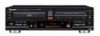
4 Getting Started TIME MENU/ DELETE 4 ¢ ENTER REC THIS OPEN/CLOSE 10 COMPACT DISC RECORDER / MULTI-CD CHANGER ◊ÛB¿ˆ˘≤/ 3 - COMPACT DISC MULTI CHANGER POWER - OFF _ ON CD=CD-R START REC THIS COMPACT DISC DIGITAL RECORDER OPEN/CLOSE 0 ¶ REC VOL PUSH ENTER CD TEXT LegatoLinkConversion Quick CD recording Although the PDR-W839 has many advanced recording features, duplicating a CD is pretty much a one-touch operation. Before starting, make sure that the recorder is connected to your amplifer and that everything is plugged in to a power outlet. For detailed information on other recording features, see chapters 5, 6, 8, and 9. 1 Press the POWER button to switch on. The display lights up. 6 Press CD= CD-R START (REC THIS). The recorder automatically copies at double speed, so if you're listening to the recording as it's being made it will sound a little strange! After the CD in the changer has finished playing, the recorder will finalize the CD-R to make it playable on most ordinary CD players (for more information on this process, turn to page 8). This process takes just a few minutes after the CD has been copied. Remove the disc from the recorder before switching off. Recording tracks during playback 2 Press OPEN/CLOSE 10 to eject the You also have the option of choosing to record the track that's 3-CD changer disc tray. Place the CD you want to copy, with the label face up, on to the disc tray, making sure that it is seated properly in the disc guide. Note: Do not use an adapter with 8cm CD-singles. The currently playing in the changer. Make sure there is a CD-R or CDRW in the recorder, then simply press CD= CD-R START (REC THIS) while the track is playing, and the CD changer will jump to the beginning of the track and the CD-R starts recording. The recorder stops automatically at the end of the track. disc tray has guides for both 12cm and 8cm discs. Setting the headphone level 3 Press OPEN/CLOSE 10 to close the disc tray. 4 Press OPEN/CLOSE 0 to eject the CD-R disc tray. Place a blank CD-R or CD-RW disc, with the label/nonrecording side face up, on to the disc tray. Again, make certain that it is seated correctly in the disc guide. You can set the headphone level so that the output is relatively louder or softer. 1 Press MENU/DELETE. 2 Turn the jog dial until H.P. LEVEL appears in the display, then press to ENTER. The display shows the current level: H (high), or L (low). Be careful when handling CD-R and CD-RW discs not to leave fingerprints on the recording surface. 3 Turn the jog dial (4 and ¢ on 5 Press OPEN/CLOSE 0 to close the the remote)to change the level. disc tray. 4 Press the jog dial (ENTER) to confirm The recorder reads the disc to see what you've loaded. After a the new level. few seconds it should tell you that you've loaded a NEW DISC. 14 En
-
 1
1 -
2
-
3
-
4
-
5
-
6
-
7
-
8
-
 9
9 -
 10
10 -
 11
11 -
 12
12 -
 13
13 -
 14
14 -
 15
15 -
 16
16 -
 17
17 -
 18
18 -
 19
19 -
20
-
21
-
22
-
23
-
24
-
25
-
26
-
27
-
28
-
29
-
30
-
31
-
32
-
33
-
34
-
35
-
36
-
37
-
38
-
39
-
40
-
41
-
42
-
43
-
44
-
45
-
46
-
47
-
48
-
49
-
50
-
51
-
52
 |
 |
