Pioneer PDR-W839 Owner's Manual - Page 9
Connecting Up - cd recorder
 |
View all Pioneer PDR-W839 manuals
Add to My Manuals
Save this manual to your list of manuals |
Page 9 highlights
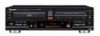
Rear panel Important: Before making or changing any rear panel connections, make sure that all the components are switched off and unplugged from the power supply. 2 Connecting Up Connect to the OPTICAL OUT or COAXIAL OUT of a CD, MiniDisc, DAT or other digital equipment for digital recording. Connect to the OPTICAL IN or COAXIAL IN of a CD-R, MiniDisc or DAT recorder, or other digital recording device to be able to record from this unit. LINE REC PLAY IN OUT L R After completing all other connections, connect the power cord and plug into a DIGITAL IN DIGITAL OUT CONTROL standard AC wall outlet. AC IN IN OPTICAL COAXIAL COAXIAL OPTICAL Connect to the TAPE/MD/ CD-R LINE IN/OUT jacks of your amplifier or receiver. Connect to the CONTROL OUT of a Pioneer amplifer or receiver to be able to use the amp/receiver's remote control with this unit. Connecting optical cords Before plugging in an optical cord, pull OPTICAL out the protective cover from the optical jack. Optical interconnects only plug in one way, so make sure the plug is correctly lined up with the jack before inserting. You should hear it click into position when fully inserted. Avoid using optical interconnects longer than 3 meters. Optical interconnects are available from any good audio dealer. Connecting coaxial cords Use a regular interconnect with a pin- COAXIAL type (also called RCA or phono) plug on each end to connect components with digital coaxial-type jacks. These are available from any good audio dealer. Make sure that the plug is pushed fully home. Connecting stereo audio cords The two sets of stereo audio cords supplied connect this unit to your amplifier/receiver's analog line LINE inputs/outputs. Be sure to fully insert each plug for the best connection. The plugs and jacks are color-coded to make connection easier. Connecting the control cord Use a stereo miniplug cord (not supplied) to connect the CONTROL OUT of your Pioneer amplifier or receiver to the CONTROL IN of this unit. If you plan to use this feature, you must also connect the analog audio LINE IN/OUTs. Plugging in After double-checking all the connections, connect the power cord to this unit and plug the other end into a standard wall outlet. Congratulations! You're done setting up. 9 En
-
 1
1 -
2
-
3
-
 4
4 -
 5
5 -
 6
6 -
 7
7 -
 8
8 -
 9
9 -
 10
10 -
 11
11 -
 12
12 -
 13
13 -
 14
14 -
15
-
16
-
17
-
18
-
19
-
20
-
21
-
22
-
23
-
24
-
25
-
26
-
27
-
28
-
29
-
30
-
31
-
32
-
33
-
34
-
35
-
36
-
37
-
38
-
39
-
40
-
41
-
42
-
43
-
44
-
45
-
46
-
47
-
48
-
49
-
50
-
51
-
52
 |
 |
