Pioneer PDR-W839 Owner's Manual - Page 42
Manual recording analog or digital
 |
View all Pioneer PDR-W839 manuals
Add to My Manuals
Save this manual to your list of manuals |
Page 42 highlights
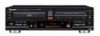
8 Recording Other Sources COMPACT DISC RECORDER / MULTI-CD CHANGER ◊ÛB¿ˆ˘≤/ 3 - COMPACT DISC MULTI CHANGER INPUT 7 COMPACT DISC DIGITAL RECORDER OPEN/CLOSE 0 REC/ REC MUTE ¶ ¶ ¡ ¢ DISPLAY CHARACTER REC VOL 6 7 PUSH ENTER CD TEXT LegatoLinkConversion Manual recording (analog or digital) The main use for manual recording mode is when there are no specific start and/or end points in the source material -when you're recording from a tuner or a satellite decoder, for example. 1 Make sure that any discs loaded in the CD changer are stopped. 5 For digital sources, check that the signal is compatible. Set the source playing (if it isn't already) and check the display. If you see the message Can't REC the digital signal is either a format that the recorder doesn't recognize, or the source is copy protected. Record through the analog line inputs if you see either message. 2 Load a CD-R or CD-RW disc. 6 Adjust the recording level, if If it's a blank disc, the display shows NEW DISC. necessary: If the disc isn't blank, use the DISPLAY button to check that • To adjust the recording level, see step 4 of Digital synchro there's enough space on it for what you want to record. recording on page 40. 3 Press INPUT to choose the input to use. • To adjust the analog recording level, see step 4 of Analog synchro recording on page 41. Pressing INPUT repeatedly switches the active input: ANALOG - OPTICAL - COAXIAL The recorder's display indicates the current input. 4 Press REC. The recorder indicates that it's in record-pause mode. 7 Press 6 (CD-R side) to start recording. 8 Start the source playing. During recording, press ¡ ¢ (CD-R side) anywhere you want a new track to start (auto track numbering must be off-see page 27 to do this). 9 When you're finished, press 7 to stop recording. If you want to finalize the disc after recording, see page 31. 42 En
-
 1
1 -
2
-
3
-
4
-
5
-
6
-
7
-
8
-
9
-
10
-
11
-
12
-
13
-
14
-
15
-
16
-
17
-
18
-
19
-
20
-
21
-
22
-
23
-
24
-
25
-
26
-
27
-
28
-
29
-
30
-
31
-
32
-
33
-
34
-
35
-
36
-
 37
37 -
 38
38 -
 39
39 -
 40
40 -
 41
41 -
 42
42 -
 43
43 -
 44
44 -
 45
45 -
 46
46 -
 47
47 -
48
-
49
-
50
-
51
-
52
 |
 |
