Pioneer VSX-816-K Owner's Manual - Page 37
Acoustic Calibration EQ
 |
UPC - 012562785851
View all Pioneer VSX-816-K manuals
Add to My Manuals
Save this manual to your list of manuals |
Page 37 highlights
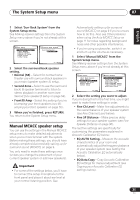
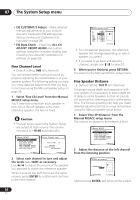
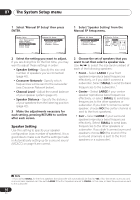
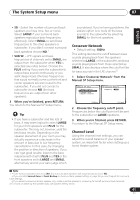
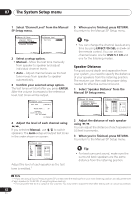
The System Setup menu 07 English Deutsch Français Italiano Nederlands Español 3 Select each channel in turn and adjust the distance as necessary. Use / to adjust the delay of the speaker you selected to match the reference speaker. The delay is measured in terms of speaker distance from 0.5 to 45.0 feet. 3b.Fine SP Distance L R C LS RS SBL SBR SW 10.0ft (Reference) [ 9.0ft ] 9.5ft [ 6.0ft ] [ 6.5ft ] [ 6.0ft ] [ 6.5ft ] [ 12.5ft ] :Finish Listen to the reference speaker and use it to measure the target channel. From the listening position, face the two speakers with your arms outstretched pointing at each speaker. Try to make the two tones sound as if they are arriving simultaneously at a position slightly in front of you and between your arm span. When it sounds like the delay settings are matched up, press ENTER to confirm and continue to the next channel. • For comparison purposes, the reference speaker will change depending on which speaker you select. • If you want to go back and adjust a channel, simply use / to select it. 4 When you're finished, press RETURN. You return to the Manual MCACC setup menu. Acoustic Calibration EQ Acoustic Calibration Equalization is a kind of room equalizer for your speakers (excluding the subwoofer). It works by measuring the acoustic characteristics of your room and neutralizing the ambient characteristics that can color the original source material. This provides a 'flat' equalization setting. If you're not satisfied with the automatic adjustment, you can also adjust these settings manually to get a frequency balance that suits your tastes. Setting the Acoustic Calibration EQ automatically If you have already completed Automatically setting up for surround sound (MCACC) on page 9, ALL CH ADJUST and FRONT ALIGN (below) should already be set. Therefore, if you want to adjust your settings manually, you can skip to Setting the Acoustic Calibration EQ manually below. 1 Select 'EQ AUTO Setting' from the Manual MCACC setup menu. 3.Manual MCACC a.Fine Ch Level b.Fine SP Distance c.EQ AUTO Setting d.EQ Data Copy e.EQ CUSTOM1 Adjust f .EQ CUSTOM2 Adjust g.EQ Data Check :Return 3c.EQ AUTO Setting Set microphone. Turn on Subwoofar. :Cancel • Make sure the microphone is connected. • If you're using a subwoofer, it is automatically detected every time you switch on the system. Make sure it is on and the volume is at the middle position. • See Other problems when using the Auto MCACC Setup on page 11 for notes regarding high background noise levels and other possible interference. 2 Wait for the Auto MCACC Setup to finish. 3c.EQ AUTO Setting Now Analyzing Environment Check Ambient Noise [ ] Microphone [ ] Speaker YES/NO [ ] :Cancel 3c.EQ AUTO Setting Now Analyzing Surround Analyzing Channel Level [ ] Acoustic Cal EQ [ ] :Cancel As the receiver outputs test tones, the frequency balance is adjusted automatically for the following settings: 37 En
-
 1
1 -
2
-
3
-
4
-
5
-
6
-
7
-
8
-
9
-
10
-
11
-
12
-
13
-
14
-
15
-
16
-
17
-
18
-
19
-
20
-
21
-
22
-
23
-
24
-
25
-
26
-
27
-
28
-
29
-
30
-
31
-
 32
32 -
 33
33 -
 34
34 -
 35
35 -
 36
36 -
 37
37 -
 38
38 -
 39
39 -
 40
40 -
 41
41 -
 42
42 -
43
-
44
-
45
-
46
-
47
-
48
-
49
-
50
-
51
-
52
-
53
-
54
-
55
-
56
-
57
-
58
-
59
-
60
-
61
-
62
-
63
-
64
-
65
-
66
-
67
-
68
 |
 |