Polaroid T737 User Guide - Page 42
Setting the Date Stamp On/Off, Selecting Paper Size, Printing
 |
UPC - 826219008787
View all Polaroid T737 manuals
Add to My Manuals
Save this manual to your list of manuals |
Page 42 highlights
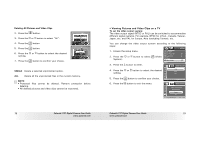
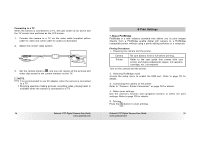
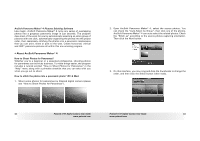
Setting the Date Stamp On/Off 1. Press the or button to select "DATE STAMPING". 2. Press the or button to select "DEFAULT", "ON" or "OFF". Date Stamping 01 Default Default Default Default DEFAULT Print settings differ according to the printer model. ON Add the date stamp to the printed image. OFF Print without the date stamp. Selecting Paper Size 1. Press the "SIZE". or button to select 2. Press the or button to select the paper size. The following paper sizes are supported: 8" x 10", 4" x 6", A4, A6, 11" x 17", B5, postcard and default. 01 Default Default Default Default Size DEFAULT Print settings differ according to the printer model. Printing 1. Press the 2. Press the 3. Press the button. or button to select "OK". button. Press the button to return to the print setting window. 82 Polaroid t737 Digital Camera User Guide www.polaroid.com • About DPOF DPOF stands for "Digital Print Order Format", which is a format for recording on a memory card or other medium which digital camera images should be printed and how many copies of the image should be printed. You can print on a DPOF-compatible printer or at a professional print service from the memory card in accordance with the file name and number of copies settings recorded on the card. With this camera, you should always select images by viewing them on the LCD screen. Do not specify images by file name without viewing the file contents. NOTE: • Print settings are configured for images only. Make sure there are no video clips or other file besides images in the memory before printing. 1. Insert an SD card into the camera. 2. Turn on the camera. DPOF Pictbridge PRINT SETTING 3. Press the button to set the camera to Playback mode. 4. Press the button and press the button to enter print setting. 5. Press or button to select the DPOF option. DPOF Select Images All Images 6. Press the button to enter. Polaroid t737 Digital Camera User Guide 83 www.polaroid.com
-
 1
1 -
2
-
3
-
4
-
5
-
6
-
7
-
8
-
9
-
10
-
11
-
12
-
13
-
14
-
15
-
16
-
17
-
18
-
19
-
20
-
21
-
22
-
23
-
24
-
25
-
26
-
27
-
28
-
29
-
30
-
31
-
32
-
33
-
34
-
35
-
36
-
 37
37 -
 38
38 -
 39
39 -
 40
40 -
 41
41 -
 42
42 -
 43
43 -
 44
44 -
 45
45 -
 46
46 -
 47
47 -
48
-
49
-
50
-
51
-
52
-
53
-
54
-
55
-
56
-
57
-
58
 |
 |
