Poulan PPB4000C User Manual - Page 13
Service And Adjustments, Storage - pro
 |
View all Poulan PPB4000C manuals
Add to My Manuals
Save this manual to your list of manuals |
Page 13 highlights
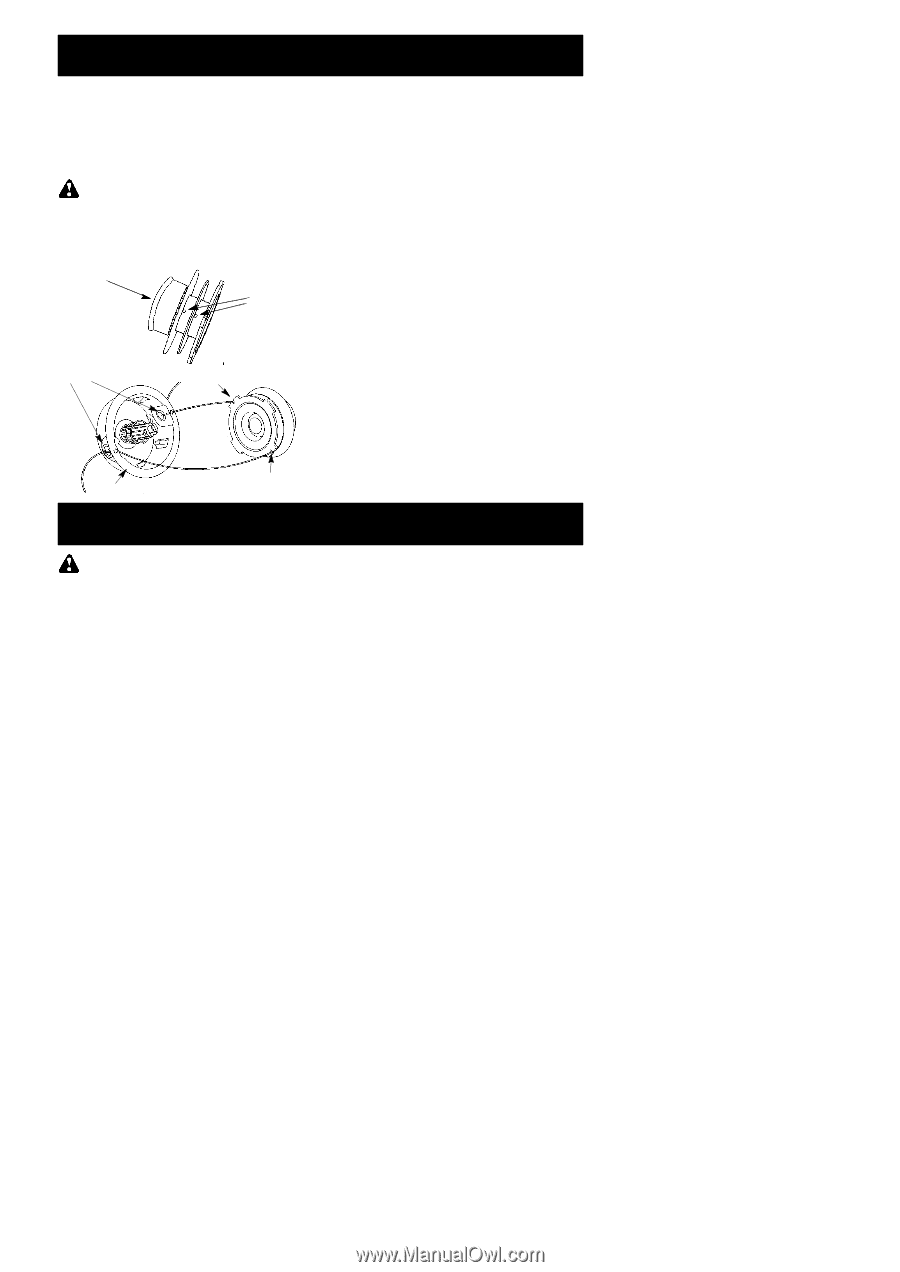
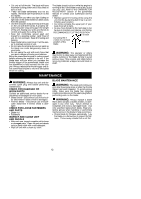
SERVICE AND ADJUSTMENTS REPLACING THE LINE 1. Remove spool by firmly pulling on tap button. 2. Clean entire surface of hub and spool. 3. Replace with a pre-wound spool, or cut two lengths of 12-1/2 feet of 0.080″ (2 mm) diameter Poulan PRO brand line. WARNING: Never use wire, rope, string, etc., which can break off and become a dangerous missile. 4. Insert ends of the lines about 1/2 inch (1 cm) into the small holes on the inside of spool. Spool Small Holes 5. Wind the line evenly and tightly onto the spool. Wind in the direction of the arrows found on the spool. 6. Push the lines into the notches, leaving 3 to 5 inches (7 -- 12 cm) unwound. 7. Insert the lines into the the exit holes in the hub as shown in the illustration. 8. Align the notches with the line exit holes. 9. Push spool into hub until it snaps into place. 10. Pull the lines extending outside of the hub to release the lines from the notches. TRIMMER HEAD REPLACEMENT Refer to the ASSEMBLY section for trimmer head replacement instructions and illustrations. BLADE REPLACEMENT Refer to the ASSEMBLY section for blade replacement instructions and illustrations. Line exit holes Line in Notch Hub Line in Notch STORAGE WARNING: Perform the following steps after each use: S Allow attachment and gearbox to cool before storing or transporting. S Store attachment with blade shield in place. Position attachment so that any sharp object cannot accidentally cause injury. S Store the attachment in a dry, well ventilated area out of the reach of children. SEASONAL STORAGE Prepare attachment for storage at end of season or if it will not be used for 30 days or more. If your brushcutter attachment is to be stored for a period of time: S Clean the entire attachment. S Inspect the blade shield area and clean any dirt, grass, leaves, or debris that has collected. Inspect the blade and blade shield; replace a blade that is bent, warped, cracked, broken or damaged in any other way. S Lightly oil external metal surfaces. S Apply a coating of oil to the entire surface of the blade; wrap it in heavy paper or cloth. S Check entire attachment for loose screws or nuts. Replace any damaged, worn or broken parts. S At the beginning of the next season, use only fresh fuel having the proper gasoline to oil ratio. 13
-
 1
1 -
2
-
3
-
4
-
5
-
6
-
7
-
 8
8 -
 9
9 -
 10
10 -
 11
11 -
 12
12 -
 13
13 -
 14
14
 |
 |