ProForm 405 Spx Instruction Manual - Page 6
make sure that the Saddle is level and is, pointing straight ahead.
 |
View all ProForm 405 Spx manuals
Add to My Manuals
Save this manual to your list of manuals |
Page 6 highlights
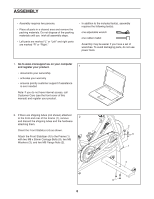
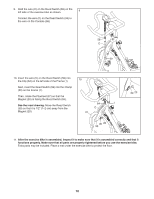
3. Attach the Rear Stabilizer (5) to the Frame (1) with two M8 x 55mm Carriage Bolts (9), two M8 3 Washers (3), and two M8 Flange Nuts (2). 2 53 1 9 4. Orient the Saddle (31) as shown. 4 Slide the Saddle (31) onto the Saddle Carriage (32); make sure that the Saddle is level and is pointing straight ahead. Then, tighten the two 31 nuts (A) beneath the Saddle. 32 A 7
-
 1
1 -
 2
2 -
 3
3 -
 4
4 -
 5
5 -
 6
6 -
 7
7 -
 8
8 -
 9
9 -
 10
10 -
 11
11 -
 12
12 -
13
-
14
-
15
-
16
-
17
-
18
-
19
 |
 |

7
2
9
3
5
1
3
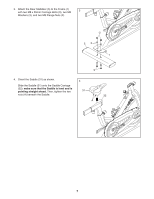
3.
Attach the Rear Stabilizer (5) to the Frame (1)
with two M8 x 55mm Carriage Bolts (9), two M8
Washers (3), and two M8 Flange Nuts (2).
4
4.
Orient the Saddle (31) as shown.
Slide the Saddle (31) onto the Saddle Carriage
(32);
make sure that the Saddle is level and is
pointing straight ahead.
Then, tighten the two
nuts (A) beneath the Saddle.
32
A
31