ProForm Endurance 520 E Elliptical English Manual - Page 30
Maintenance And Troubleshooting
 |
View all ProForm Endurance 520 E Elliptical manuals
Add to My Manuals
Save this manual to your list of manuals |
Page 30 highlights
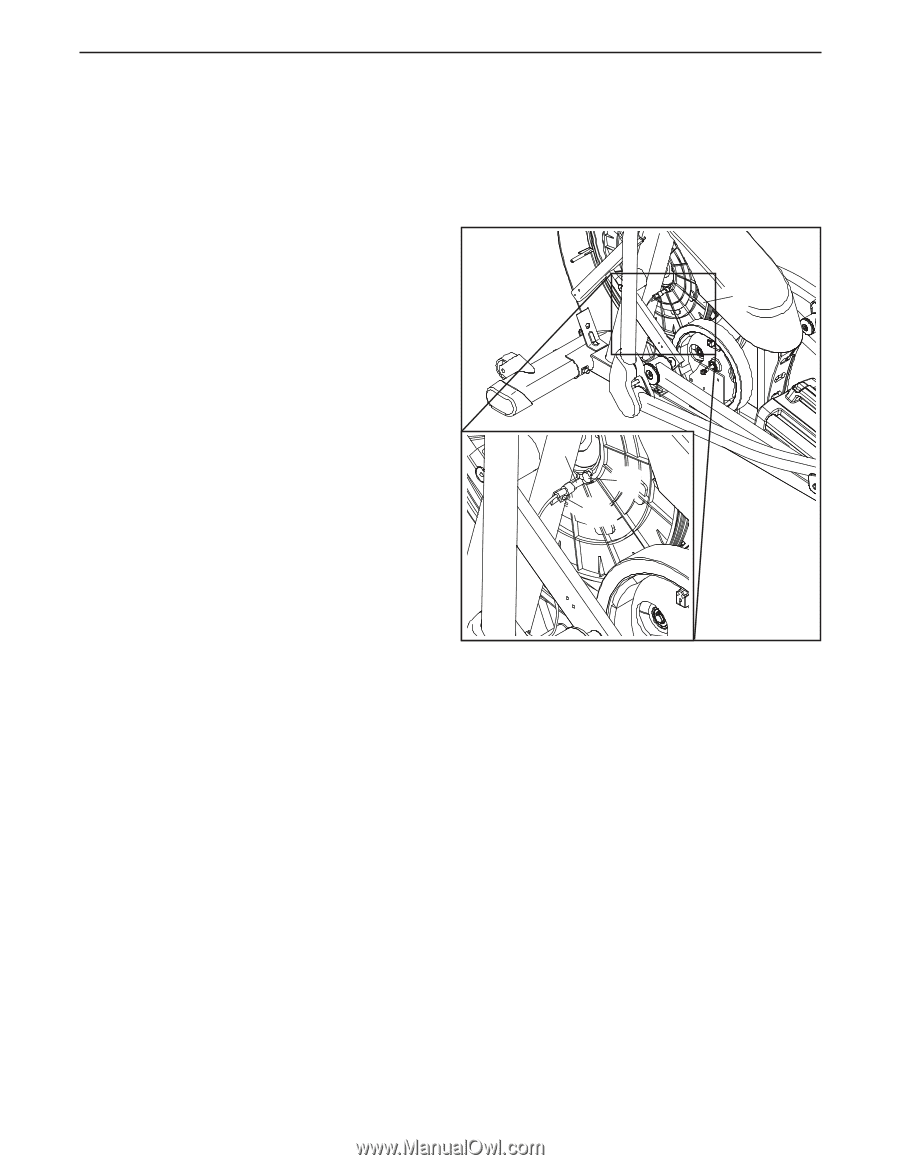
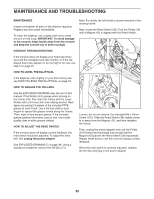
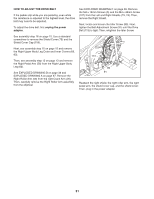
MAINTENANCE AND TROUBLESHOOTING MAINTENANCE Inspect and tighten all parts of the elliptical regularly. Replace any worn parts immediately. To clean the elliptical, use a damp cloth and a small amount of mild soap. IMPORTANT: To avoid damage to the console, keep liquids away from the console and keep the console out of direct sunlight. CONSOLE TROUBLESHOOTING If the console does not display your heart rate when you hold the handgrip heart rate monitor, or if the displayed heart rate appears to be too high or too low, see step 5 on page 22. Note: For clarity, the left shield is shown removed in the drawing below. Next, locate the Reed Switch (38). Turn the Pulley (19) until a Magnet (43) is aligned with the Reed Switch. 19 HOW TO LEVEL THE ELLIPTICAL If the elliptical rocks slightly on your floor during use, see HOW TO LEVEL THE ELLIPTICAL on page 18. HOW TO GREASE THE ROLLERS See the EXPLODED DRAWING near the end of this manual. If the Rollers (51) squeak when moving on the Tracks (16), first clean the Tracks and the Large Rollers with a lint-free cloth and rubbing alcohol. Next, apply one packet (3 grams) of the included PTFE grease to each Track. Use a lint-free cloth or your fingers to spread the grease evenly along the Tracks. Then, wipe off any excess grease. If the included grease packets have been used or lost, use a highquality clear or white grease instead. HOW TO ADJUST THE REED SWITCH If the console does not display correct feedback, the reed switch should be adjusted. To adjust the drive belt, first unplug the power adapter. See EXPLODED DRAWING C on page 39. Using a standard screwdriver, remove the left Disc (71). 38 43 101 Loosen, but do not remove, the indicated M4 x 16mm Screw (101). Slide the Reed Switch (38) slightly closer to or away from the Magnet (43), and then retighten the Screw. Then, unplug the power adapter and rock the Pulley (19) forward and backward just enough that the Magnet (43) passes the Reed Switch (38) repeatedly. Repeat these actions until the console displays correct feedback. When the reed switch is correctly adjusted, reattach the left disc and plug in the power adapter. 30
-
 1
1 -
2
-
3
-
4
-
5
-
6
-
7
-
8
-
9
-
10
-
11
-
12
-
13
-
14
-
15
-
16
-
17
-
18
-
19
-
20
-
21
-
22
-
23
-
24
-
 25
25 -
 26
26 -
 27
27 -
 28
28 -
 29
29 -
 30
30 -
 31
31 -
 32
32 -
 33
33 -
 34
34 -
 35
35 -
36
-
37
-
38
-
39
-
40
 |
 |