RCA 20F410T User Guide & Warranty - Page 16
Using the TV's Features
 |
UPC - 034909212073
View all RCA 20F410T manuals
Add to My Manuals
Save this manual to your list of manuals |
Page 16 highlights
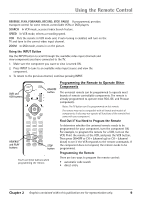
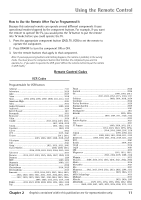
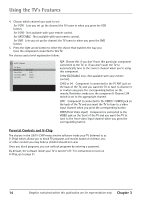
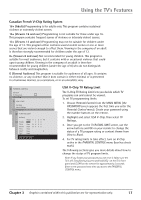
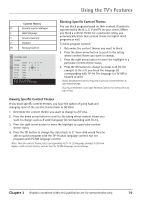
Using the TV's Features 4. Choose which channel you want to set: Set VCR1 Lets you set up the channel the TV tunes to when you press the VCR button. Set VCR2 Not available with your remote control. Set SAT/CABLE Not available with your remote control. Set DVD Lets you set up the channel the TV tunes to when you press the DVD button. 5. Press the right arrow button to select the choice that matches the way you have the component connected to this TV. The choices and a brief explanation follow: AUTO TUNING Go Back Set VCR1 Set VCR2 Set SAT/CABLE Set DVD VID1 . . . VID1 . . . CH02 . . . CH03 . . . N/A Choose this if you don't have this particular component connected to the TV, or if you don't want the TV to automatically tune to the correct channel when you're using this component. CH02 (SAT/CABLE only- Not available with your remote control). CH03 or 04 Component is connected to the TV ANT jack on the back of the TV, and you want the TV to tune to channel 3 or 4 when you press the corresponding button on the remote. Reminder: make sure the component's Channel 3/4 switch is set to the appropriate channel. VID1 Component is connected to the VIDEO 1 VIDEO jack on the back of the TV and you want the TV to tune to a video input channel when you press the corresponding button. FRNT (Front Video Input) Component is connected to the VIDEO jack on the front of the TV and you want the TV to tune to the front video input channel when you press the corresponding button. Parental Controls and V-Chip The choices in the USA V-CHIP menu involve software inside your TV (referred to as V-Chip) which allows you to block TV programs and movies based on violence, sex, or other content you may believe children should not view. Once you block programs, you can unblock programs by entering a password. By default, the software inside your TV is turned "off." For instructions to turn on V-Chip, go to page 21. 14 Graphics contained within this publication are for representation only. Chapter 3
-
 1
1 -
2
-
3
-
4
-
5
-
6
-
7
-
8
-
9
-
10
-
 11
11 -
 12
12 -
 13
13 -
 14
14 -
 15
15 -
 16
16 -
 17
17 -
 18
18 -
 19
19 -
 20
20 -
 21
21 -
22
-
23
-
24
-
25
-
26
-
27
-
28
-
29
-
30
-
31
-
32
 |
 |