RCA 25250RE1 User Guide - Page 15
Programming the Telephone
 |
UPC - 044319703566
View all RCA 25250RE1 manuals
Add to My Manuals
Save this manual to your list of manuals |
Page 15 highlights
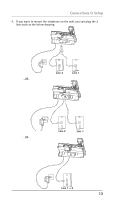
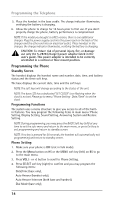
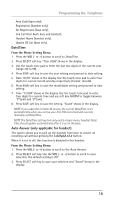
Programming the Telephone Area Code (base only), Registration (handset only), De-Registration (base only), 2nd Call Alert (both base and handset), Handset Name (handset only), Update HS List (base only). Date/Time From the Phone Setting Menu: 1. Press the VOL (- or +) button to scroll to Date/Time. 2. Press SELECT soft key. "Year 2008" shows in the display. 3. Use the touch-tone pad to enter the last two digits of the current year (range: 00 to 99). 4. Press SAVE soft key to save the year setting and proceed to date setting. 5. Date "01/01" shows in the display. Use the touch-tone pad to enter two digits for current month and day respectively (format: mm:dd). 6. Press SAVE soft key to save the month/date setting and proceed to time setting. 7. Time "12:00A" shows in the display. Use the touch-tone pad to enter four digits for current time and use soft key AM/PM to toggle between "P" (pm) and "A" (am). 8. Press SAVE soft key to save the setting. "Saved" shows in the display. NOTE: If you subscribe to Caller ID service, the current Date/Time is set automatically when you receive your first CID record and will override manually set Date/Time. NOTE: The Date/Time setting item only exists in base menu, handset Date/ Time should update automatically after it is set in the base. Auto Answer (only applicable for handset) This option allows you to pick up the handset from base to answer an incoming call without pressing the Talk/Spk/L1/L2 button. When it is set to off, this function is disabled in this handset. From the Phone Setting Menu: 1. Press the VOL (- or +) button to scroll to the Auto Answer. 2. Press SELECT soft key. Use the VOL (- or +) button to scroll to your selection. The default setting is Off. 3. Press SELECT soft key to save your selection and "Saved" shows in the display. 15
-
 1
1 -
2
-
3
-
4
-
5
-
6
-
7
-
8
-
9
-
 10
10 -
 11
11 -
 12
12 -
 13
13 -
 14
14 -
 15
15 -
 16
16 -
 17
17 -
 18
18 -
 19
19 -
 20
20 -
21
-
22
-
23
-
24
-
25
-
26
-
27
-
28
-
29
-
30
-
31
-
32
-
33
-
34
-
35
-
36
-
37
-
38
-
39
-
40
-
41
-
42
-
43
-
44
-
45
-
46
-
47
-
48
-
49
-
50
-
51
-
52
-
53
-
54
-
55
-
56
-
57
-
58
-
59
-
60
-
61
-
62
-
63
-
64
-
65
-
66
-
67
-
68
-
69
-
70
-
71
-
72
-
73
-
74
-
75
-
76
-
77
-
78
-
79
-
80
-
81
-
82
-
83
-
84
-
85
-
86
-
87
-
88
-
89
-
90
-
91
-
92
-
93
-
94
-
95
-
96
-
97
-
98
-
99
-
100
 |
 |