RCA DRC99392 DRC99392 Product Manual - Page 5
Power Supply, Connections - battery life
 |
View all RCA DRC99392 manuals
Add to My Manuals
Save this manual to your list of manuals |
Page 5 highlights
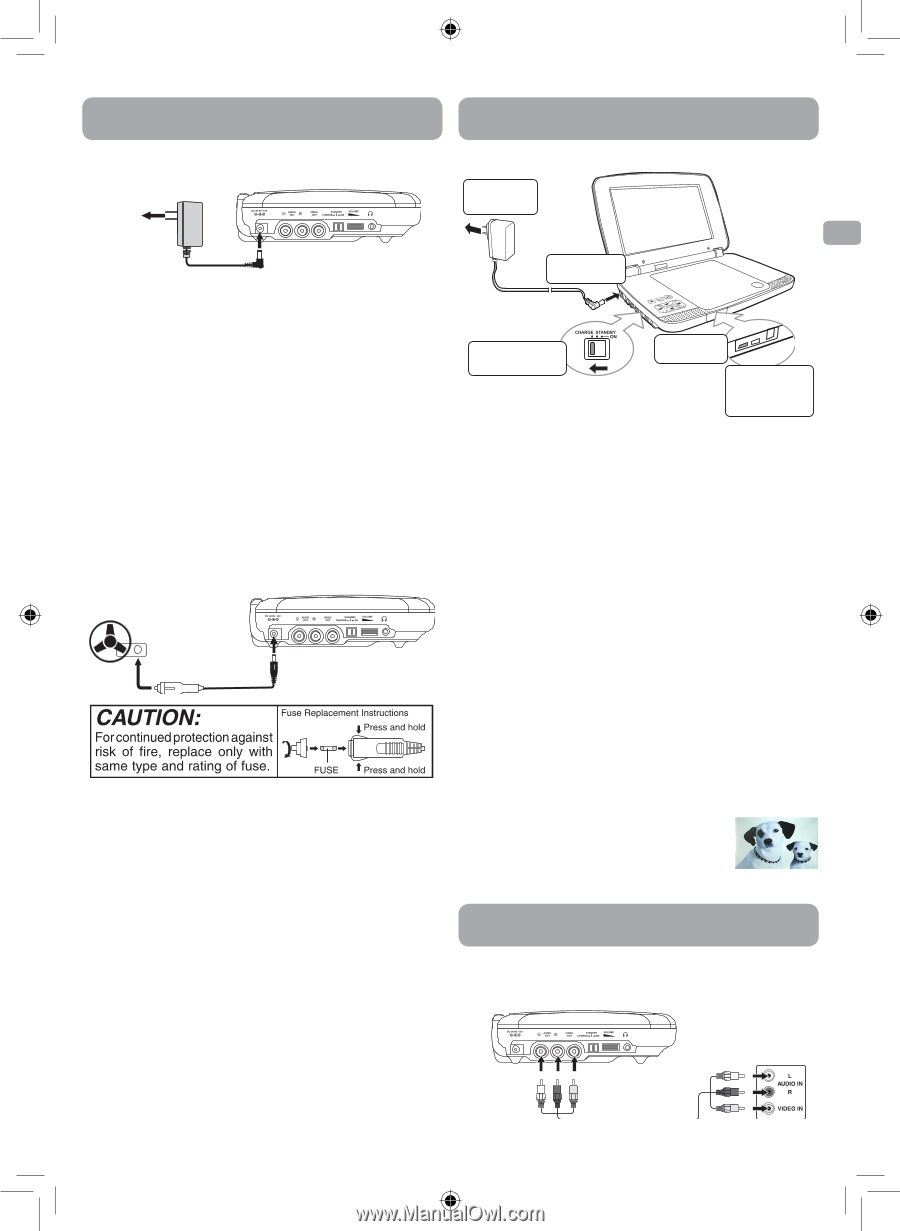
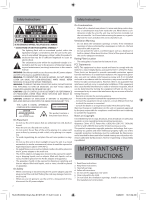
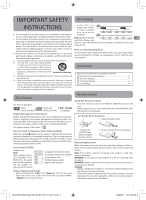
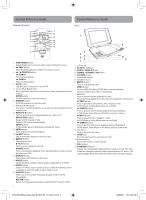
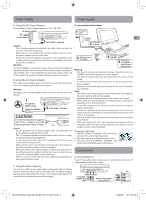
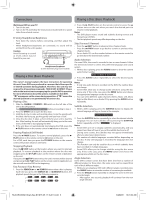
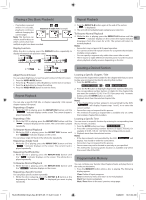
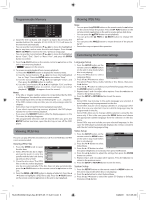
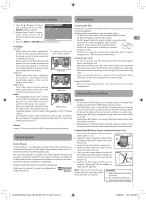
Power Supply Power Supply A. Using the AC Power Adapter The supplied AC power adapter operates on AC 100-120V. AC power adapter 1 To wall outlet 2 To DC IN 9V - 12V Jack Caution: • The AC power adapter included with this unit is for its use only. Do not use it with other equipment. • When the unit is not going to be used for long time, disconnect the AC power adapter from the wall outlet. • When the AC power adapter is plugged in, the apparatus is not completely disconnected from the main power supply, even when the power is turned off. Warning: The AC/DC adaptor is used as disconnect device. The AC/DC adaptor of apparatus should not be obstructed OR should be easily accessed during intended used. To be completely disconnect the power input, the AC/DC adaptor of apparatus shall be disconnected from the mains. B. Using the Car Power Adapter The 12V car power adapter allows the unit to be used with vehicles that have a 12V, negative ground electrical system. Warning: Disconnect the car power adapter when not in use. Not for use in 24V vehicles. 1 To cigarette lighter socket Car power adapter 2 To DC IN 9V - 12V Jack Caution: • Use the provided 12V car power adapter only. Use with other car power adapters could damage the unit. • The 12V car power adapter included with this unit is for its use only. Do not use it with other equipment. • In the interest of traffic safety, do not operate this unit or view videos while driving a vehicle. • Make sure the unit is securely fastened to prevent it from falling or flying through the air in the event of an accident. • When the inside of the cigarette lighter socket is dirty with ashes or dust, the plug section may become hot due to poor contact. Be sure to clean the cigarette lighter socket before use. • After use, disconnect the 12V car power adapter from both the unit and cigarette lighter socket. To recharge the built-in battery 1 To AC power outlet AC power EN adapter 2 To DC IN 9V - 12V Jack 3 Slide the switch to CHARGE 4 Charging light ON 5 Recharging is completed when charging light goes out Warning: • The built-in battery can only be recharged when the unit is in CHARGE mode while using the AC power adapter. • The built-in battery cannot be recharged when the unit is in ON mode. • Do NOT recharge the built-in battery in a vehicle using the car power adapter. • Batteries should not be exposed to excessive heat such as sunshine, fire or the like. Note: • When the built-in battery power is low, "Battery Low" will display on the screen and the unit will stop playing. • Recharge the built-in battery when you are ready to use it again. • While using the built-in battery, the environmental temperature should be 41°F (5°C) to 95°F (35°C). • To get the longest service life of the built-in battery, charge at indoor-temperature. • The built-in battery in this device may present a risk of fire or chemical burn if mistreated. Do not disassemble, heat above 212oF (100oC), or incinerate. • The unit should not be exposed to excessive heat such as sunshine, fire or the like. • When discarding the unit, environmental problems must be considered and local rules or laws governing the disposal of such products must be strictly followed. Turning on the Unit 1. Slide the CHARGE / STANDBY / ON switch on the left side of the unit to the ON position. 2. The start-up picture will appear on the screen. 3. After use, slide the CHARGE / STANDBY / ON switch to the STANDBY (power off ) position. Connections A. Connecting a TV If your TV has audio/video inputs, you can connect the unit to your TV using standard Audio/Video cables. C. Using the Built-in Battery The unit has a built-in, non-replaceable, rechargeable battery. Charge the built-in battery before using it for the first time. Complete charging TV typically takes approximately 4-5 hours. The charging light will go out when the built-in battery becomes fully charged. White Red Yellow To AUDIO / VIDEO OUT jacks Audio / Video cable (not included) White Red Yellow 5 RCA DRC99392_Eng & Spa IB_MTK A5_17-3-2011.indd 5 3/28/2011 10:31:03 AM
-
 1
1 -
 2
2 -
 3
3 -
 4
4 -
 5
5 -
 6
6 -
 7
7 -
 8
8 -
 9
9 -
 10
10 -
 11
11 -
12
-
13
-
14
-
15
-
16
-
17
-
18
-
19
-
20
 |
 |