RCA DRC99392 DRC99392 Product Manual - Page 9
Customizing the Function Settings, Sound System, Maintenance, Carrying Bag Installation
 |
View all RCA DRC99392 manuals
Add to My Manuals
Save this manual to your list of manuals |
Page 9 highlights
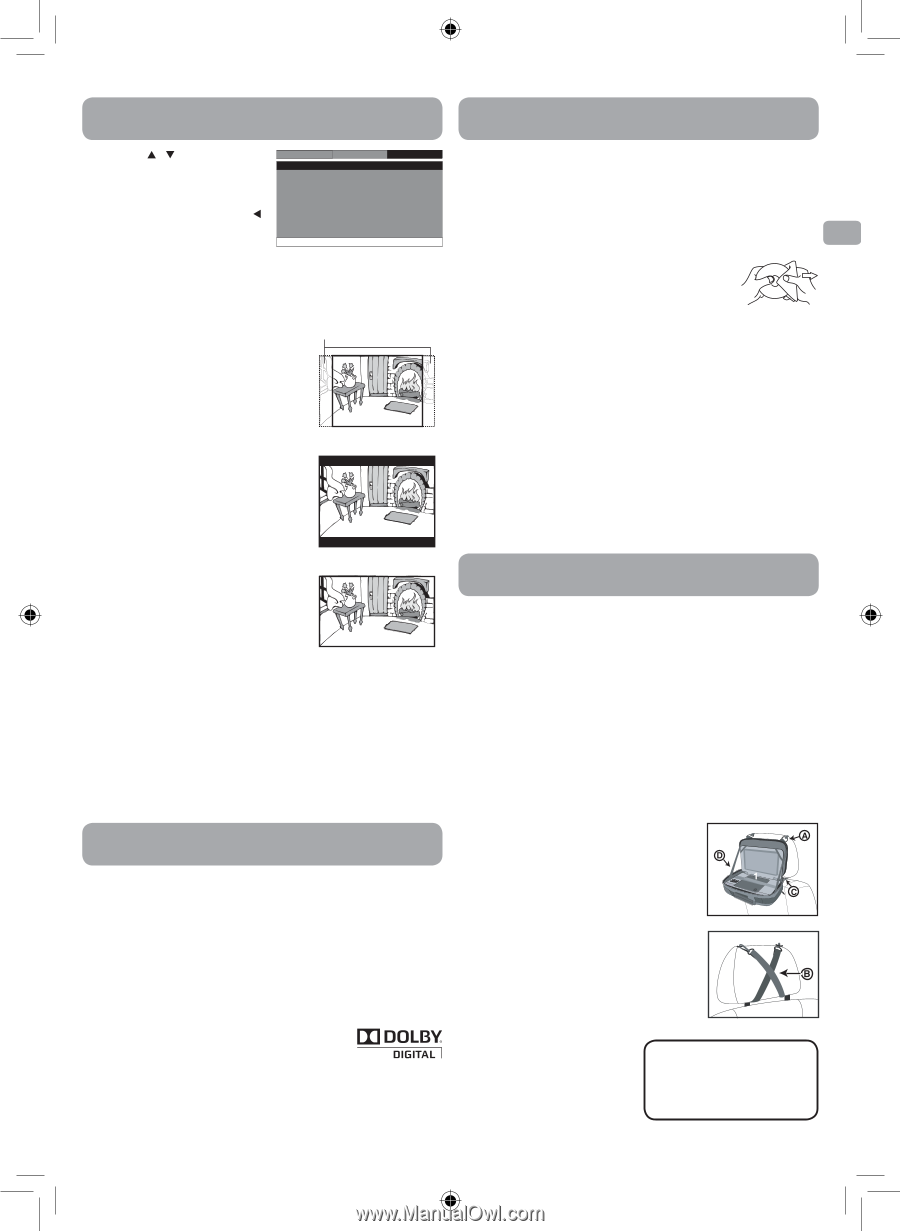
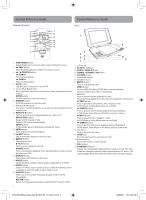
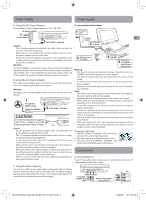
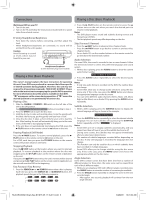
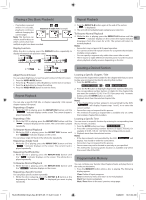
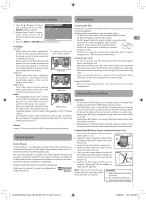
Customizing the Function Settings Maintenance 4. Press the / button to adjust Language Video the settings, then press the ENTER button to confirm. - - System Menu - - TV Display Default Wide No 5. Repeat steps 3 and 4 to adjust other options. Press the button to return to the previous menu. Go To System Menu 6. Press the SETUP or RETURN button to exit the menu. System TV Display Pan Scan • When wide-screen video is played, this Cut off when a wide-screen mode clips the right and left sides of video image is played. the image so that it can be viewed on a conventional screen. • Some wide-screen DVDs that do not permit Pan Scan mode playback are automatically played in letterbox mode (black bands that appear at the top and bottom of the screen). Pan Scan Letter Box • When wide-screen video is played in this mode on a conventional screen, black bands appear at the top and bottom of the screen. Wide Screen • This is the correct mode for playing wide-screen videos on the unit screen or other external wide-screens. Letter Box Notes: • The displayable picture size is preset on the DVD. Therefore the playback picture of some DVDs may not conform to the picture size selected. • When you play DVDs recorded in the 4:3 aspect ratio, the playback picture Wide Screen will always appear in the 4:3 aspect ratio regardless of the TV display setting. • Select Wide Screen to conform the LCD screen on the unit. Always be sure that your TV display conforms to the actual TV in use if you connect the unit to a TV. Default It takes 3-5 seconds to reset the DVD settings to the factory default. Sound System Dolby Digital Dolby Digital is a technology developed by Dolby Laboratories. Soundtracks encoded in Dolby Digital can reproduce from one to 5.1 discrete channels of excellent quality audio. The unit automatically recognizes the Dolby Digital bitstream and provides a downmix suitable for two-channel listening. An additional Dolby Digital decoder is required for reproduction of the discrete multichannel soundtracks available on many DVDs. Manufactured under license from Dolby Laboratories. Dolby and the double-D symbol are trademarks of Dolby Laboratories. Cleaning the Disc A defective or soiled disc inserted into the unit can cause sound to drop out during playback. Handle the disc by holding its inner and outer edges. • Do NOT touch the surface of the unlabeled side of the disc. • Do NOT stick paper or tape on the surface. EN • Do NOT expose the disc to direct sunlight or excessive heat. • Clean the disc before playback. Wipe the disc from the center outward with a cleaning cloth. • NEVER use solvents such as benzine or alcohol to clean the disc. • Do NOT use irregular shaped discs (example: heart shaped, octagonal, etc.). They may cause malfunctions. Cleaning the Unit • Be sure to turn the unit off and disconnect the AC power adapter before cleaning the unit. • Wipe the unit with a dry soft cloth. If the surfaces are extremely dirty, wipe clean with a cloth that has been dipped in a weak soapand-water solution and wrung out thoroughly, then wipe with a dry cloth. • Never use alcohol, benzine, thinner, cleaning fluid or other chemicals. Do NOT use compressed air to remove dust. Important Note • Before transporting the unit, remove the disc from the disc compartment. Carrying Bag Installation CAUTIONS: 1. Do not use this DVD player case as a swing, car seat, or for any other purpose except to hold a DVD player and accessories. 2. The DVD player case is intended for viewing only from the rear seats. Do not install or use this product in the front seat of a vehicle. 3. To reduce the chance of injury in case of a collision or sudden stop: • Always keep DVD player strapped securely inside case while vehicle is moving. • Always keep DVD player case securely attached inside vehicle while the vehicle is moving. 4. Always position the plastic hooks and strap adjustment slider so that they do not touch the back of the head of the person in the front seat. To Attach the DVD Player Case to a Headrest (Images 1 & 2) 1. Insert the DVD player into the case as shown right (1, 2, 3). 2. Unzip the main compartment that holds the player; locate the D rings at the top of the case (A). 3. Locate 2 straps with hooks on each end. 4. Hook one end of the each strap to the D rings at the top of the case. 5. Criss-cross the straps around the front of the headrest (B) and hook the straps to a second set of rings on the lower part of the case (C). 6. Tighten up the straps until the unit is secured. Connect the 12V car adapter as shown on the right (D). Image 1 2 3 1 Image 2 Note: Before closing the bag, release the left and right elastic bands from the screen panel. CAUTION: 1. High temperature damages CDs/DVDs. 2. Do not store in closed cars. 3. Protect from direct sunlight. 9 RCA DRC99392_Eng & Spa IB_MTK A5_17-3-2011.indd 9 3/28/2011 10:31:05 AM
-
 1
1 -
2
-
3
-
 4
4 -
 5
5 -
 6
6 -
 7
7 -
 8
8 -
 9
9 -
 10
10 -
 11
11 -
 12
12 -
 13
13 -
 14
14 -
15
-
16
-
17
-
18
-
19
-
20
 |
 |