RCA RDW3208 English Manual - Page 17
For personal safety
 |
View all RCA RDW3208 manuals
Add to My Manuals
Save this manual to your list of manuals |
Page 17 highlights
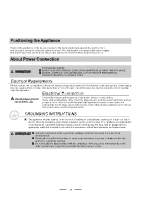
Position the applianc e in the desired location. The bac k should rest against the wall behind it, and the sides, along the a djacent cabinets or wall. The dishwasher is equipped with water supply and d rain hoses that can be positioned t o the righ t or the lef t to facilitate proper installation. For personal safety: DO NOT USE AN EXTENSION CORD OR AN ADAPTER PLUG WITH THIS APPLIANCE. DO NOT, UNDER ANY CIRCUMSTANCES, CUT OR REMOVE THE EARTHING CONNECTION FROM THE POWER CORD. Please look at the rating label to know the ratin g vol tage and c onne ct the dishwas her t o the appropriate power supply. Use the required fuse 10 amp, time delay fuse or circ uit breaker rec ommended and provide separate c ircui t serv ing only this appliance. Ensure the voltage and frequency of the power being corresponds to those on the rating plate. Only insert the plug into an electrical socket w hich is earthed properly. If the e lectrical socket to which the appliance must be connect ed is not appropriate for the plug , replace the socket, rather than using a adaptors or the like as they could cause overheating and burns. This appliance must be earthed. In the event of a malfunction or breakdown, earthing will reduce the risk of electric shock by providing a path of least resistance for the electric current. This appliance is equipped with a cord having an equipment-earthing conductor and an earthing plug. The plug must be plugged into an appropriate outlet that is installed and earthed in accordance with all local standards and requirements. IeCmlhepecrtcorkipcwesfDDriohtOOchorocaNpNnkenOOq. reuTTsc,aoUtUliionSfNineaEDdloAEsfeNRatlehfAEeceXNttreyTYicq:EiCuaNiInpRSmoICOrUeNsnMetCSreOvTaiARcretNDhCriOneEgpRSrce,AoCsNneUdAnTutDacOAttioRPvreTRcEiaEfRnMyoPrOueLVsUaEuGrletTWiHinnEITtdhHEoeAuTrRbHistTIkSwHoIhANfePGatPhnLeIrAtNhCe E. appliancCeOisNpNrEoCpeTIrOlyNeaFrRthOeMd.THE POWER CORD. Do not modify the plug provided with the appliance. If the plug does not fit properly to the outlet, please have a qualified electrician to install a proper outlet. 14
-
 1
1 -
2
-
3
-
4
-
5
-
6
-
7
-
8
-
9
-
10
-
11
-
 12
12 -
 13
13 -
 14
14 -
 15
15 -
 16
16 -
 17
17 -
 18
18 -
 19
19 -
 20
20 -
 21
21 -
 22
22
 |
 |