Radio Shack pro 95 User Guide - Page 83
Resetting, Initializing The, Scanner
 |
UPC - 040293166847
View all Radio Shack pro 95 manuals
Add to My Manuals
Save this manual to your list of manuals |
Page 83 highlights
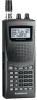
RESETTING/ INITIALIZING THE SCANNER If the scanner's display locks up or does not work properly after you connect a power source, you might need to reset or initialize it. ! RESETTING THE SCANNER 1. Turn off the scanner, then turn it on again. 2. Insert a pointed object, such as a straightened paper clip, into the reset opening on the side of the scanner. Then gently press and release the reset button inside the opening. Pressing the reset button does not clear the scanner's memory. INITIALIZING THE SCANNER 1. Turn off the scanner, then turn it on again. Welcome To Dual Trunking appears. ! 2. Press 0 then 1 while Welcome To Dual Trunking appears. Initializing Please Wait. appears for about 2 seconds. ! IMPORTANT ! Resetting/ Initializing the Scanner • If you have problems with the scanner, first try to reset it to retain all memory. If that does not work, you can initialize the scanner. • You can save the information in your scanner's memory into your computer or another scanner before trying to initialize it. See "Transferring Data to and from Another Scanner or a PC" on Page 15. Initializing the Scanner This procedure clears all information you stored in the scanner's memory. Initialize the scanner only when you are sure the scanner is not working properly. Do not turn off the scanner until the initialization is complete. When the initialization is complete M000 appears on the top line of the display. Bank 0 Ch 00 appears on the bottom line. Resetting/Initializing the Scanner 83
-
 1
1 -
2
-
3
-
4
-
5
-
6
-
7
-
8
-
9
-
10
-
11
-
12
-
13
-
14
-
15
-
16
-
17
-
18
-
19
-
20
-
21
-
22
-
23
-
24
-
25
-
26
-
27
-
28
-
29
-
30
-
31
-
32
-
33
-
34
-
35
-
36
-
37
-
38
-
39
-
40
-
41
-
42
-
43
-
44
-
45
-
46
-
47
-
48
-
49
-
50
-
51
-
52
-
53
-
54
-
55
-
56
-
57
-
58
-
59
-
60
-
61
-
62
-
63
-
64
-
65
-
66
-
67
-
68
-
69
-
70
-
71
-
72
-
73
-
74
-
75
-
76
-
77
-
 78
78 -
 79
79 -
 80
80 -
 81
81 -
 82
82 -
 83
83 -
 84
84 -
 85
85 -
 86
86 -
 87
87 -
 88
88 -
89
-
90
-
91
-
92
 |
 |