Rane SL3 SL3 Owners Manual for Scratch Live 2.5.0 - Page 13
Visual Aids, Tempo Matching Display, Track Overview Display, Main Waveform Display, Beat Matching - scratch live
 |
View all Rane SL3 manuals
Add to My Manuals
Save this manual to your list of manuals |
Page 13 highlights
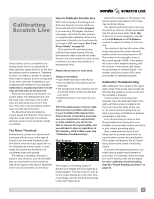
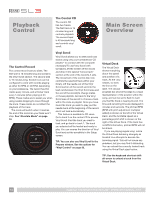
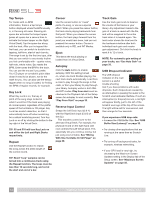
Visual Aids When the track is playing several waveforms are displayed. Each shows a different aspect of the track being played. Tempo Matching Display The Tempo Matching display area provides a helpful tool for beat matching. Scratch Live detects the beats within the track, and places a row of orange peaks (for the track on the left side) above a row of blue peaks (for the track on the right side) in the Tempo Matching display area. When the two tracks are matched to the same tempo, the peaks will line up. The tempo display is aligned with the beginning of the bar, so the peaks keep their relative position as the track plays. This display does not show the relative timing of the beats, only the tempos of the tracks. The peaks will still line up when the tracks are playing at the same tempo, but are out of sync. Track Overview Display This view provides a complete overview of the track waveform, and includes a marker to show the current position within the track. This view is useful for finding transitions within the track. The waveform is colored according to the sound spectrum - red representing low frequency bass sounds, green representing mid frequency sounds and blue representing high frequency treble sounds. You can jump to different positions within the track by clicking on the Track Overview display (disabled in ABS Mode). Grey lines behind the overview show the length of the track - a thin grey line every minute, and a thick grey line every 5 minutes. The overview will be filled when you load the track onto a Virtual Deck. On slower computers, you should disable Autofill overviews in the Library tab of the Setup screen. See "Preparing Your Files" on page 11 and "AutoFill Overviews" on page 34. Main Waveform Display This view provides a closeup of the track, including color coding to show the frequency of the sound; red representing low frequency bass, green representing mid-frequencies and blue representing high-frequency treble sounds. You can also switch to a three-band spectrum view by holding the ctrl key and clicking on the waveform. Click on the waveform to 'scrub' or make fine adjustments to your position within the track. This applies to INT Mode only, and may be useful if you wish to set cue points in your tracks without your turntables or CD players connected. The Main Waveform is zoomed around the current position in the track. See "Cue Points" on page 18 and "Scratch Live Modes" on page 16. TIP: Use the + and - keys to zoom in and out. TIP: Waveform can be either vertical or horizontal. See "Display Modes" on page 15. Kick Drum In this example, the red part of the wave represents a kick drum, while the purple part represents a snare drum. Snare Drum Beat Matching Display This view shows the position of beats within the track. When beat matching, this view helps align the downbeats of the two tracks. The markers are matched up when the two tracks are beat matched. Example: The following is a demonstration of using the visual aids to help beat match. In this example, the track that is playing is on the Left Deck, and the track to be mixed in is on the Right Deck. 1. Start the track playing on the Right Deck. After a few seconds, blue peaks appear in the Tempo Matching display. 2. Adjust the pitch of the right turntable until the blue peaks sit under the orange peaks in the Tempo Matching display. Once they are aligned, the two tracks have the same tempo. 3. Next align the markers in the Beat Matching display. Watch the color of the items passing by in the Main Waveform display. Remember that a kick or bass drum will be red in color, and a snare drum will be green or blue. This technique will by no means guarantee perfect mixes, but may help to speed up the process of beat matching. Master Gain The master output of Scratch Live can be controlled using the master gain control. This adjusts the output volume of all tracks played.Ctrlclick the knob to reset it to 12 o'clock. NOTE: For best results, set the master gain to 12 o'clock, and adjust the volume of individual tracks using the track gain adjustment. 33 / 45 Speeds Set this to match the speed of your turntable for normal playback. Tracking Indicator The tracking indicators on the main screen show the quality of the signal coming from the control record or CD. The length of the bar indicates the speed of the record or CD. The color indicates the amount of position information Scratch Live is receiving. When you are playing the record at normal speed, the tracking indicator should be grey. If it is mostly red there is a problem reading the control signal. Make sure your needles are clean, and check the calibration in the setup screen. NOTE: It is normal for the tracking indicator to be red when cueing or scratching. RANE SL3 FOR SERATO SCRATCH LIVE • OPERATOR'S MANUAL 2.5.0 13
-
 1
1 -
2
-
3
-
4
-
5
-
6
-
7
-
 8
8 -
 9
9 -
 10
10 -
 11
11 -
 12
12 -
 13
13 -
 14
14 -
 15
15 -
 16
16 -
 17
17 -
 18
18 -
19
-
20
-
21
-
22
-
23
-
24
-
25
-
26
-
27
-
28
-
29
-
30
-
31
-
32
-
33
-
34
-
35
-
36
-
37
-
38
-
39
-
40
-
41
-
42
-
43
-
44
 |
 |
