Ricoh Aficio MP C2051 Quick Reference Guide - Page 11
Scan to E-Mail - scanner
 |
View all Ricoh Aficio MP C2051 manuals
Add to My Manuals
Save this manual to your list of manuals |
Page 11 highlights
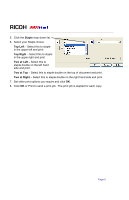
RICOH 3. Using the number pad, enter the number of copies desired. 4. Press the START key Scan to E-Mail In this function, the scanned data can be sent to the specified e-mail address as an attached file. If your scanned document needs to be sent to other parties, they cannot reply to the scanned document using "reply to" on e-mail. Therefore, it is recommended, if the scanned document needs to be shared with others, you scan to email to your individual e-mail box and then forward that e-mail and attachment as appropriate or add a group profile and include those email addresses into the group profile. The file will be sent as a PDF document. 1. Press the Scanner button on the Operations Panel 2. The main Scan to E-mail screen opens Page 11
-
 1
1 -
2
-
3
-
4
-
5
-
 6
6 -
 7
7 -
 8
8 -
 9
9 -
 10
10 -
 11
11 -
 12
12 -
 13
13 -
 14
14 -
 15
15 -
 16
16
 |
 |
RICOH
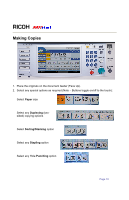
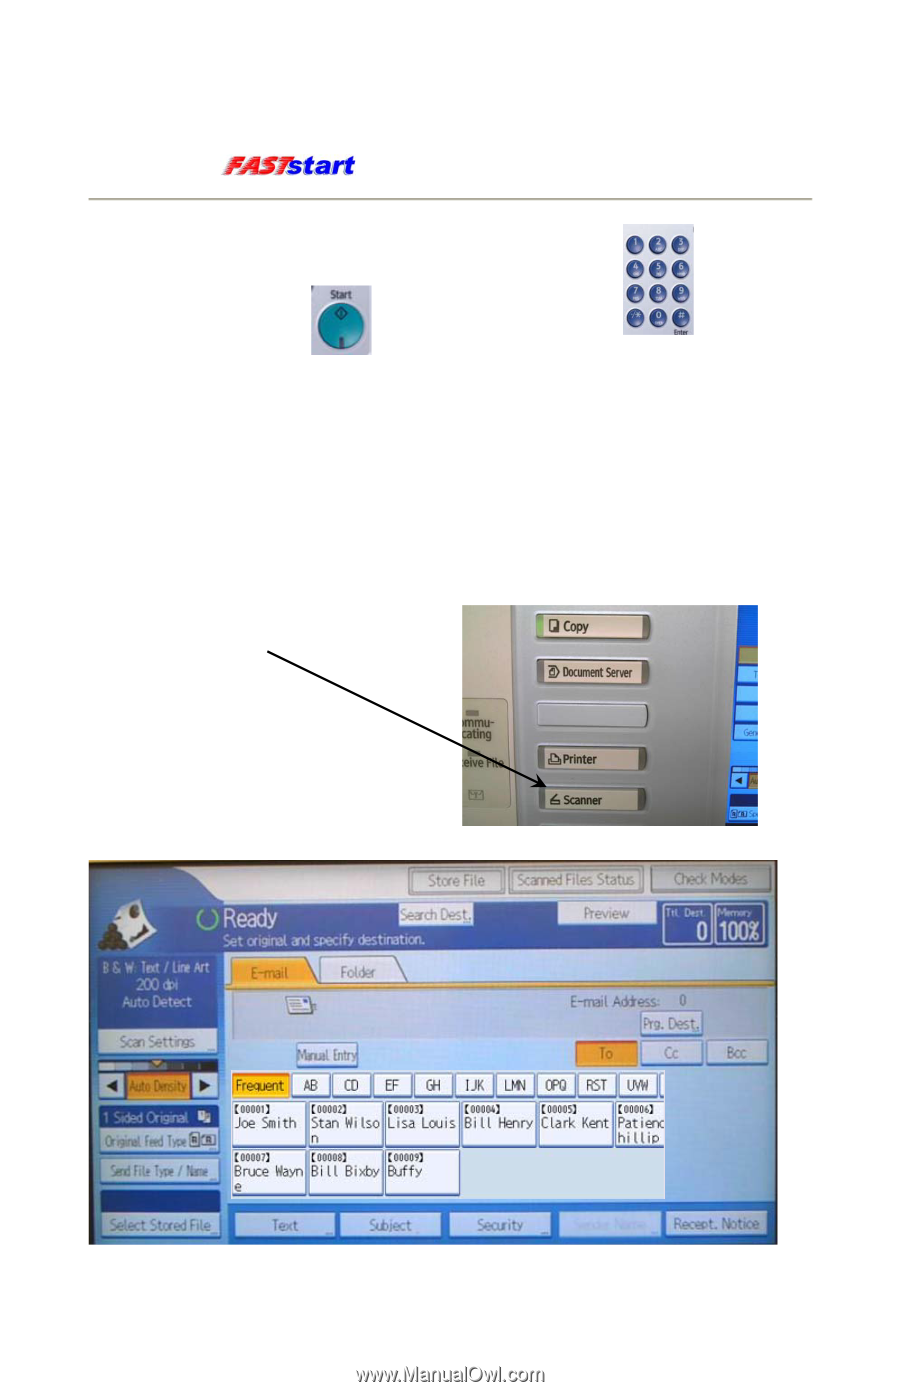
3. Using the number pad, enter the number of copies desired.
4. Press the START key
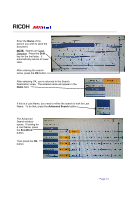
Scan to E-Mail
In this function, the scanned data can be sent to the specified e-mail address as an
attached file.
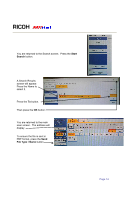
If your scanned document needs to be sent to other parties, they cannot
reply to the scanned document using “reply to” on e-mail.
Therefore, it is
recommended, if the scanned document needs to be shared with others, you scan to e-
mail to your individual e-mail box and then forward that e-mail and attachment as
appropriate or add a group profile and include those email addresses into the group
profile.
The file will be sent as a PDF document.
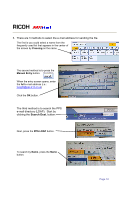
1. Press the
Scanner
button on the
Operations Panel
2. The main
Scan to E-mail
screen opens
Page 11