Ricoh Aficio SP 5200DN Operating Instructions - Page 33
Setting Up the Printer, Printer Setup Procedure - drivers
 |
View all Ricoh Aficio SP 5200DN manuals
Add to My Manuals
Save this manual to your list of manuals |
Page 33 highlights
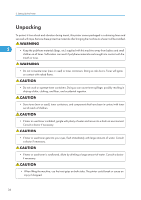
2. Setting Up the Printer This chapter explains how to set up and configure the printer for operation. Printer Setup Procedure Use the following procedure to set up the printer. 2 1. Select a suitable location for your printer. For details, see p.32 "Place to Install". 2. Take the printer out of its box, and then remove the protective materials and adhesive tape. For details, see p.36 "Unpacking". 3. Load paper in the standard paper feed tray. For details, see p.117 "Loading Paper in Trays". 4. Turn the printer power on. For details, see p.39 "Turning the Printer's Power On and Off". 5. Select the language used on the display. For details, see p.43 "Selecting the Display Language". 6. Print a test page. For details, see p.44 "Test Printing". 7. Connect the printer to your network. For details, see p.69 "Connecting the Printer". 8. Configure the printer's network settings. For details, see p.75 "Configuration". 9. Install the printer driver. For details, see Driver Installation Guide. 31
-
 1
1 -
2
-
3
-
4
-
5
-
6
-
7
-
8
-
9
-
10
-
11
-
12
-
13
-
14
-
15
-
16
-
17
-
18
-
19
-
20
-
21
-
22
-
23
-
24
-
25
-
26
-
27
-
 28
28 -
 29
29 -
 30
30 -
 31
31 -
 32
32 -
 33
33 -
 34
34 -
 35
35 -
 36
36 -
 37
37 -
 38
38 -
39
-
40
-
41
-
42
-
43
-
44
-
45
-
46
-
47
-
48
-
49
-
50
-
51
-
52
-
53
-
54
-
55
-
56
-
57
-
58
-
59
-
60
-
61
-
62
-
63
-
64
-
65
-
66
-
67
-
68
-
69
-
70
-
71
-
72
-
73
-
74
-
75
-
76
-
77
-
78
-
79
-
80
-
81
-
82
-
83
-
84
-
85
-
86
-
87
-
88
-
89
-
90
-
91
-
92
-
93
-
94
-
95
-
96
-
97
-
98
-
99
-
100
-
101
-
102
-
103
-
104
-
105
-
106
-
107
-
108
-
109
-
110
-
111
-
112
-
113
-
114
-
115
-
116
-
117
-
118
-
119
-
120
-
121
-
122
-
123
-
124
-
125
-
126
-
127
-
128
-
129
-
130
-
131
-
132
-
133
-
134
-
135
-
136
-
137
-
138
-
139
-
140
-
141
-
142
-
143
-
144
-
145
-
146
-
147
-
148
-
149
-
150
-
151
-
152
-
153
-
154
-
155
-
156
-
157
-
158
-
159
-
160
-
161
-
162
-
163
-
164
-
165
-
166
-
167
-
168
-
169
-
170
-
171
-
172
-
173
-
174
-
175
-
176
-
177
-
178
-
179
-
180
-
181
-
182
-
183
-
184
-
185
-
186
-
187
-
188
-
189
-
190
-
191
-
192
-
193
-
194
-
195
-
196
-
197
-
198
-
199
-
200
-
201
-
202
-
203
-
204
-
205
-
206
-
207
-
208
-
209
-
210
-
211
-
212
-
213
-
214
-
215
-
216
-
217
-
218
-
219
-
220
-
221
-
222
-
223
-
224
-
225
-
226
-
227
-
228
 |
 |
