Ricoh GR User Guide - Page 66
item, and then press
 |
View all Ricoh GR manuals
Add to My Manuals
Save this manual to your list of manuals |
Page 66 highlights
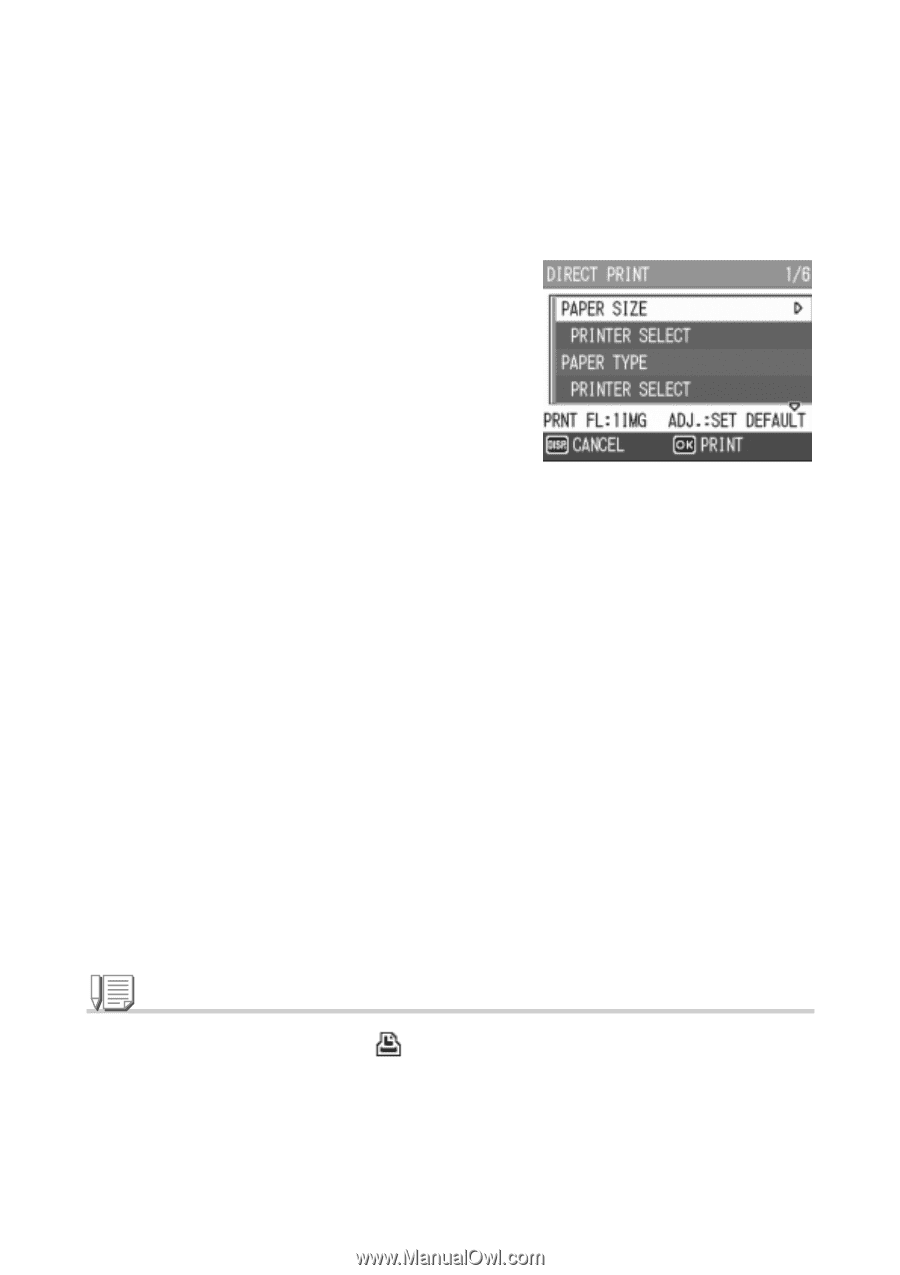
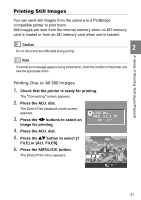
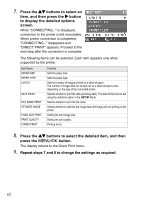
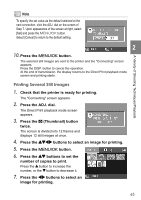
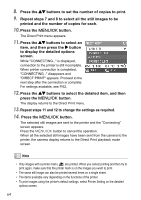
8. Press the !" buttons to set the number of copies to print. 9. Repeat steps 7 and 8 to select all the still images to be printed and the number of copies for each. 10.Press the M/O button. The Direct Print menu appears. 11. Press the !" buttons to select an item, and then press the $ button to display the detailed options screen. While "CONNECTING..." is displayed, connection to the printer is still incomplete. When printer connection is completed, "CONNECTING..." disappears and "DIRECT PRINT" appears. Proceed to the next step after the connection is complete. For settings available, see P.62. 12. Press the !" buttons to select the detailed item, and then press the M/O button. The display returns to the Direct Print menu. 13. Repeat steps 11 and 12 to change the settings as required. 14. Press the M/O button. The selected still images are sent to the printer and the "Connecting" screen appears. Press the M/O button to cancel the operation. When all the selected still images have been sent from the camera to the printer, the camera display returns to the Direct Print playback mode screen. Note • Only images with a printer mark ( ) are printed. When you cancel printing and then try to print again, make sure that the printer mark is on the images you want to print. • The same still image can also be printed several times on a single sheet. • The items available vary depending on the functions of the printer. • To print images using the printer's default settings, select Printer Setting on the detailed options screen. 64
-
 1
1 -
2
-
3
-
4
-
5
-
6
-
7
-
8
-
9
-
10
-
11
-
12
-
13
-
14
-
15
-
16
-
17
-
18
-
19
-
20
-
21
-
22
-
23
-
24
-
25
-
26
-
27
-
28
-
29
-
30
-
31
-
32
-
33
-
34
-
35
-
36
-
37
-
38
-
39
-
40
-
41
-
42
-
43
-
44
-
45
-
46
-
47
-
48
-
49
-
50
-
51
-
52
-
53
-
54
-
55
-
56
-
57
-
58
-
59
-
60
-
 61
61 -
 62
62 -
 63
63 -
 64
64 -
 65
65 -
 66
66 -
 67
67 -
 68
68 -
 69
69 -
 70
70 -
 71
71 -
72
-
73
-
74
-
75
-
76
-
77
-
78
-
79
-
80
-
81
-
82
-
83
-
84
-
85
-
86
-
87
-
88
-
89
-
90
-
91
-
92
-
93
-
94
-
95
-
96
-
97
-
98
-
99
-
100
-
101
-
102
-
103
-
104
-
105
-
106
-
107
-
108
-
109
-
110
-
111
-
112
-
113
-
114
-
115
-
116
-
117
-
118
-
119
-
120
-
121
-
122
-
123
-
124
-
125
-
126
-
127
-
128
-
129
-
130
-
131
-
132
-
133
-
134
-
135
-
136
-
137
-
138
-
139
-
140
-
141
-
142
-
143
-
144
-
145
-
146
-
147
-
148
-
149
-
150
-
151
-
152
-
153
-
154
-
155
-
156
-
157
-
158
-
159
-
160
-
161
-
162
-
163
-
164
-
165
-
166
-
167
-
168
-
169
-
170
-
171
-
172
-
173
-
174
-
175
-
176
-
177
-
178
-
179
-
180
-
181
-
182
-
183
-
184
-
185
-
186
-
187
-
188
-
189
-
190
-
191
-
192
-
193
-
194
-
195
-
196
-
197
-
198
-
199
-
200
-
201
-
202
-
203
-
204
 |
 |