Ricoh P C301W Setup Guide - Page 12
Installing the Printer Driver, For Windows, For macOS or OS X
 |
View all Ricoh P C301W manuals
Add to My Manuals
Save this manual to your list of manuals |
Page 12 highlights
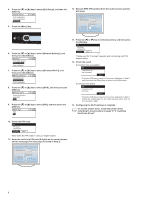
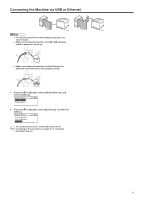
3. Installing the Printer Driver ●● The following items are necessary to set up a wired connection. ●● USB interface cable or Ethernet interface cable ●● CD-ROM supplied with the machine 6. Follow the instructions in the setup wizard. If you already completed the Wi-Fi setting, click [The machine's IP address has been already configured.]. For Windows 1. Turn on your computer. 2. Insert the provided CD-ROM into the CD-ROM drive of the computer. If your computer does not have a CD-ROM drive, download a setup file from our website. or ECC048 7. Click [Finish] in the [Setup Complete] dialog box. If the installer prompt you to restart Windows, reboot your computer. 3. Click [Install Drivers and Software]. ECC043 4. The software license agreement appears in the [Software License Agreement] dialog box. After reading the agreement, click [Yes]. ECC044 5. Select [USB Connection] or [Network Connection] according to communication environment or your device. If you already completed the Wi-Fi setting, select [Network Connection]. ECC045 Setup is completed. For macOS or OS X The following procedure is explained using macOS 10.13 as an example. 1. Turn on your computer. 2. Insert the provided CD-ROM into the CD-ROM drive of the computer. If your computer does not have a CD-ROM drive, download a setup file from our website. 3. Double-click the CD-ROM drive icon. 4. Double-click the [macOS] folder. 5. Double-click the folder of driver you want to install. 6. Follow the instructions in the setup wizard. 7. Click [Close] in the [Summary] dialog box. 8. Start System Preferences. 9. Click [Printers & Scanners]. Check that the machine automatically recognized by plug-andplay appears in the printers list. 10. Click the [+] button. 11. Click [Default]. 12. When using the USB, select the printer that has "USB" indicated in the [Kind] column. When using the Ethernet cable, select the printer that has "Bonjour" indicated in the [Kind] column. If the printer name is not displayed, select the icon that corresponds to your network environment (TCP/IP, etc.). 13. Select the printer you are using from the [Use:] pop-up menu. 14. Click [Add]. 15. Select [Installed] or [Not Installed] for [Tray 2], and then click [OK]. 16. Quit System Preferences. Setup is completed. 10
-
 1
1 -
2
-
3
-
4
-
5
-
6
-
 7
7 -
 8
8 -
 9
9 -
 10
10 -
 11
11 -
 12
12 -
 13
13 -
 14
14 -
 15
15 -
 16
16
 |
 |