Ryobi A18MS01G Operation Manual - Page 7
Miter, Saw Mounting, Bracket, Carriage, Flat Washer, Miter Saw, Carriage Bolt, Mounting, Surface,
 |
View all Ryobi A18MS01G manuals
Add to My Manuals
Save this manual to your list of manuals |
Page 7 highlights
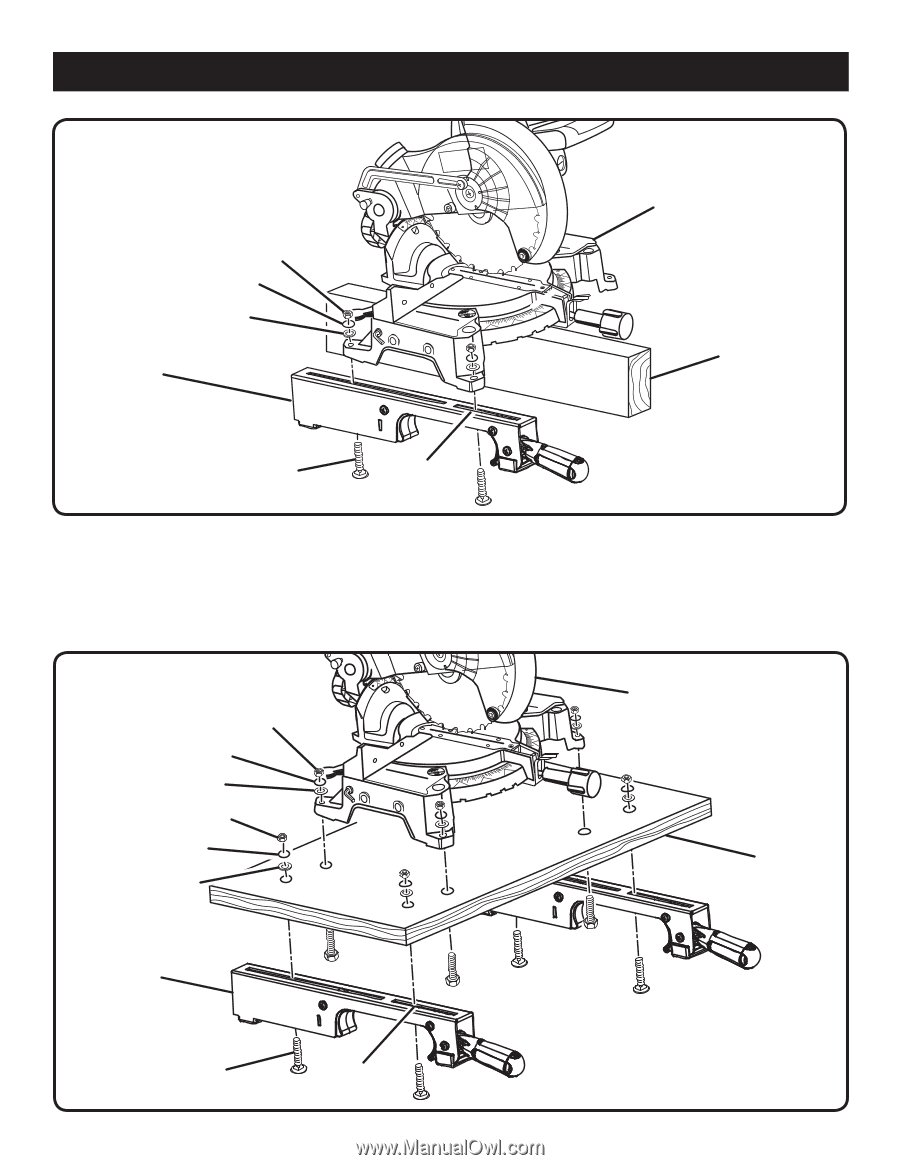
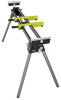
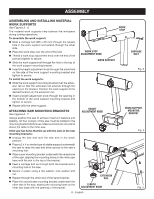
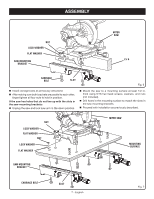
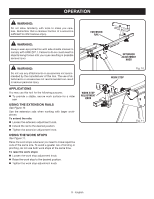
ASSEMBLY NUT LOCK WASHER FLAT WASHER SAW MOUNTING BRACKET MITER SAW 2 x 4 CARRIAGE BOLT SLOT Fig. 6 n Install carriage bolts as previously described. n After making sure both brackets are parallel to each other, finger tighten all four nuts to hold in position. If the saw has holes that do not line up with the slots in the saw mounting brackets: n Unplug the saw and lock saw arm in the down p osition. n Mount the saw to a mounting surface at least 1/2 in. thick using 5/16 hex head screws, washers, and nuts (not included). n Drill holes in the mounting surface to match the slots in the saw mounting brackets. n Proceed with installation as previously described. NUT LOCK WASHER FLAT WASHER NUT LOCK WASHER FLAT WASHER MITER SAW MOUNTING SURFACE SAW MOUNTING BRACKET CARRIAGE BOLT SLOT 7 - English Fig. 7
-
 1
1 -
 2
2 -
 3
3 -
 4
4 -
 5
5 -
 6
6 -
 7
7 -
 8
8 -
 9
9 -
 10
10 -
 11
11 -
 12
12 -
13
-
14
-
15
-
16
-
17
-
18
-
19
-
20
-
21
-
22
-
23
-
24
-
25
-
26
-
27
-
28
-
29
-
30
-
31
-
32
 |
 |