Ryobi RTS11 Operation Manual - Page 16
Installing The Handle, Removing/reinstalling The Throat, Plate
 |
View all Ryobi RTS11 manuals
Add to My Manuals
Save this manual to your list of manuals |
Page 16 highlights
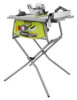
ASSEMBLY INSTALLING THE HANDLE See Figure 10. Remove the hex nut from the bolt in the handle but do not remove the bolt. Slide a washer onto the bolt. Place the nylon hex nut into the recessed hole on the back of the height/bevel adjusting handwheel and hold NUT in place. Insert the handle and screw into the hole on the height/ bevel adjusting handwheel. Using a flathead screwdriver, turn the screw clockwise and tighten in place. Cover the end of the handle with the cap. REMOVING/REINSTALLING THE THROAT PLATE See Figure 11. Lower the blade by turning the height/bevel adjusting handwheel counterclockwise. To remove the throat plate, locate the latch that holds the plate in place. Place your thumb and index finger into the holes and pull together until the latch releases. Lift and pull the throat plate out toward the front of the saw. To reinstall the throat plate, first slip the tab into the slot at the back of the saw. Place your fingers into the holes and pull together. Push down to secure in place. WASHER HANDLE BOLT HANDLE END CAP HEIGHT/BEVEL ADJUSTING HANDWHEEL Fig. 10 THROAT PLATE RIVING KNIFE Fig. 11 16 - English
-
 1
1 -
2
-
3
-
4
-
5
-
6
-
7
-
8
-
9
-
10
-
 11
11 -
 12
12 -
 13
13 -
 14
14 -
 15
15 -
 16
16 -
 17
17 -
 18
18 -
 19
19 -
 20
20 -
 21
21 -
22
-
23
-
24
-
25
-
26
-
27
-
28
-
29
-
30
-
31
-
32
-
33
-
34
-
35
-
36
-
37
-
38
-
39
-
40
-
41
-
42
-
43
-
44
-
45
-
46
-
47
-
48
-
49
-
50
-
51
-
52
-
53
-
54
-
55
-
56
-
57
-
58
-
59
-
60
-
61
-
62
-
63
-
64
-
65
-
66
-
67
-
68
-
69
-
70
-
71
-
72
-
73
-
74
-
75
-
76
-
77
-
78
-
79
-
80
-
81
-
82
-
83
-
84
-
85
-
86
-
87
-
88
-
89
-
90
-
91
-
92
-
93
-
94
-
95
-
96
-
97
-
98
-
99
-
100
-
101
-
102
-
103
-
104
-
105
-
106
-
107
-
108
-
109
-
110
-
111
-
112
-
113
-
114
-
115
-
116
-
117
-
118
-
119
-
120
-
121
-
122
-
123
-
124
-
125
-
126
-
127
-
128
 |
 |
