Ryobi RTS11 Operation Manual - Page 29
Making Cuts
 |
View all Ryobi RTS11 manuals
Add to My Manuals
Save this manual to your list of manuals |
Page 29 highlights
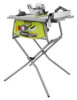
OPERATION If the distances are different: Remove the blade guard and riving knife. Raise the blade by turning the height/bevel adjusting handwheel. Loosen the locking bolts by turning towards the left. NOTE: The bolts are located above the height/bevel adjusting handwheel and under the saw table in the front of the saw. Turn adjusting bolt left or right until the blade is square. Tighten the locking bolts. Check again for squareness and continue to adjust if needed. RULER MITER GAUGE GROOVE WARNING: To reduce the risk of injury from kickback, align the rip fence to the blade following any blade adjustments. Always make sure the rip fence is parallel to the blade before beginning any operation. MAKING CUTS Fig. 32 WARNING: Before making any cuts, make sure that the table saw stand is on a firm level surface where there is plenty of room to handle and properly support the table saw and the workpiece. If a suitable location can not be found, then the saw should not be used. Operating the saw in a location that does not provide adequate space and stable footing for the table saw stand could create a tipping hazard which could result in serious personal injury. ADJUSTING BOLT This table saw can perform a variety of cuts that are not all mentioned in this manual. DO NOT attempt to make any cuts not covered here unless you are thoroughly familiar with the proper procedures and necessary accessories. Your local library has many books on table saw usage and specialized woodworking procedures for your reference. The blade provided with the saw is a high-quality combination blade suitable for ripping and cross cut operations. Carefully check all setups and rotate the blade one full revolution to assure proper clearance before connecting saw to power source. Stand slightly to the side of the blade path to reduce the chance of injury should kickback occur. WARNING: Do not use blades rated less than the speed of this tool. Failure to heed this warning could result in personal injury. LOCKING BOLTS (2) Fig. 33 Use the miter gauge when making cross, miter, bevel, and compound miter cuts. To secure the angle, lock the miter gauge in place by twisting the lock knob clockwise. Always tighten the lock knob securely in place before use. NOTE: It is recommended that you place the piece to be saved on the left side of the blade and that you make a test cut on scrap wood first. 29 - English
-
 1
1 -
2
-
3
-
4
-
5
-
6
-
7
-
8
-
9
-
10
-
11
-
12
-
13
-
14
-
15
-
16
-
17
-
18
-
19
-
20
-
21
-
22
-
23
-
 24
24 -
 25
25 -
 26
26 -
 27
27 -
 28
28 -
 29
29 -
 30
30 -
 31
31 -
 32
32 -
 33
33 -
 34
34 -
35
-
36
-
37
-
38
-
39
-
40
-
41
-
42
-
43
-
44
-
45
-
46
-
47
-
48
-
49
-
50
-
51
-
52
-
53
-
54
-
55
-
56
-
57
-
58
-
59
-
60
-
61
-
62
-
63
-
64
-
65
-
66
-
67
-
68
-
69
-
70
-
71
-
72
-
73
-
74
-
75
-
76
-
77
-
78
-
79
-
80
-
81
-
82
-
83
-
84
-
85
-
86
-
87
-
88
-
89
-
90
-
91
-
92
-
93
-
94
-
95
-
96
-
97
-
98
-
99
-
100
-
101
-
102
-
103
-
104
-
105
-
106
-
107
-
108
-
109
-
110
-
111
-
112
-
113
-
114
-
115
-
116
-
117
-
118
-
119
-
120
-
121
-
122
-
123
-
124
-
125
-
126
-
127
-
128
 |
 |
