Ryobi RYi1000 User Manual - Page 14
Starting The Engine, Stopping The Engine, Warning, Using The Battery Charging Cable
 |
View all Ryobi RYi1000 manuals
Add to My Manuals
Save this manual to your list of manuals |
Page 14 highlights
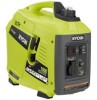
OPERATION STARTING THE ENGINE See Figures 5 - 7. NOTICE: On a level surface with the engine off, check the lubricant level before each use of the generator. NOTE: If location of generator is not level, the unit may not start or may shut down during operation. To start generator the first time: Your new inverter generator is equipped with a mechanical fuel pump. The initial start up will require additional pulls of the recoil starter to prime the fuel system. n Turn the ENGINE/CHOKE LEVER to the CHOKE position. n Fill the fuel tank per the Operator's Manual instructions. n Slowly pull the engine recoil five (5) times to prime the fuel system. n Press the AUTO IDLE SWITCH to the OFF position. n Add engine lubricant per the Operator's Manual instruc- tions. n Pull the recoil starter until the engine starts. n Move the CHOKE LEVER to the RUN position. n For quieter more efficient operation, place the AUTO IDLE switch in the ON position. To start subsequent times: NOTE: Subsequent starting should only require 6 pulls maximum. n Unplug all loads from the generator. n Place the auto idle switch in the off position. n Slide the engine/choke lever to the start (center) position. NOTE: When the engine/choke lever is in the start (center) position, the fuel will flow from the fuel tank to the engine. If engine is warm, move the engine/choke lever right to the run (restart) position. n Pull the starter grip and rope until the engine runs. NOTE: Do not allow the grip to snap back after starting; return it gently to its original place. Initial starting of the unit may require additional pulls to prime the fuel pump. n Allow the engine to run for 15-30 seconds, then move the engine/choke lever right to the run position. STOPPING THE ENGINE See Figures 5 - 6. n Remove any load from the generator. n Place the engine/choke lever in the off position. To stop the engine in an emergency situation: n Put the engine/choke lever in the off position. WARNING: While operating and storing, keep at least 3 feet of clearance on all sides of this product, including overhead. Allow a minimum of 30 minutes of "cool down" time before storage. Heat created by muffler and exhaust gases could be hot enough to cause serious burns and/ or ignite combustible objects. USING THE BATTERY CHARGING CABLE See Figure 8. WARNING: The 12 V DC receptacle is designed to charge vented wet lead acid batteries only. Other types of batteries could burst, causing personal injury and damage. NOTICE: The 12 V DC receptacle provides continuous charge. Do not overcharge battery or leave battery unattended. Doing so may cause damage to the battery. NOTICE: Do not use the generator to jump start vehicles. Doing so could result in damage to the vehicle or its electrical components. n Place the auto idle switch in the OFF position. n Using the battery clamps, connect the battery charging cable assembly to the battery terminal. Connect the red wire to the positive (+) terminal first, then connect the black wire to the negative (-) terminal. Make sure all connections are secure. NOTE: Be careful not to short across the terminals when installing. Shorting the terminals together can cause sparks, damage to the battery or generator, or even burns or explosions. NOTE: To prevent short circuit, keep away from a metal surface during clamp connection. n Connect the battery charging cable assembly to the 12 V DC receptacle. n Start the generator. NOTE: The AC receptacles can be used while the DC receptacle is in use. n The battery will become slightly warm to the touch while charging. This is normal and does not indicate a problem. NOTE: Only use battery charging cable assembly to charge vented wet lead acid batteries. n When batteries become fully charged, disconnect the battery charging cable assembly from the battery. Disconnect the negative (black) wire first, then the positive (red) wire, being careful not to short across the terminals. 14 - English
-
 1
1 -
2
-
3
-
4
-
5
-
6
-
7
-
8
-
 9
9 -
 10
10 -
 11
11 -
 12
12 -
 13
13 -
 14
14 -
 15
15 -
 16
16 -
 17
17 -
 18
18 -
 19
19 -
20
-
21
-
22
-
23
-
24
-
25
-
26
-
27
-
28
-
29
-
30
-
31
-
32
-
33
-
34
-
35
-
36
-
37
-
38
-
39
-
40
-
41
-
42
-
43
-
44
-
45
-
46
-
47
-
48
-
49
-
50
-
51
-
52
-
53
-
54
-
55
-
56
-
57
-
58
-
59
-
60
-
61
-
62
-
63
-
64
 |
 |
