Ryobi WS750L Operation Manual - Page 15
To Make A Bevel Cut, To Make A Plunge Cut, To Fold The Saw For Storage And, Transportation - wet saw
 |
View all Ryobi WS750L manuals
Add to My Manuals
Save this manual to your list of manuals |
Page 15 highlights
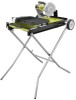
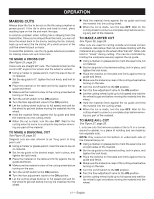
OPERATION Hold the material firmly against the rip guide and feed the material into the cutting wheel. Make the cut far enough into the material without overcutting. Turn the on/off switch to the OFF position. Turn the material over and make the cut along one of the marks. This time overcut the other line and the cut piece should separate from the rest of the material. Turn the on/off switch to the on position. Turn the flow adjustment valve to the on position. Let the cutting wheel build up to full speed and wait for the wheel to get wet before moving the material into the wheel. When the cut is made, turn the saw OFF. Wait for the cutting wheel to come to a complete stop before removing any part of the material. To make a bevel cut See Figure 28, page 25. Beveled 45° cuts can be made by adjusting the position of the motor head. Using a marker or grease pencil, mark the area to be cut on material. Loosen the lock knob on the back of the motor head. Pivot the motor head to the full 45° angle. Tighten the lock knob securely. Set the rip guide to the desired setting, lock in place, and tighten the lock knob. Place the material on the table and firmly against the rip guide and fence. Make sure the material is clear of the cutting wheel before turning on the saw. Turn the on/off switch to the on position. Turn the flow adjustment valve to the on position. Let the cutting wheel build up to full speed and wait for the wheel to get wet before moving the material into the wheel. Hold the material firmly against the rip guide and feed the material into the cutting wheel. When the cut is made, turn the saw OFF. Wait for the cutting wheel to come to a complete stop before removing any part of the material. TO MAKE A PLUNGE CUT See Figure 29, page 25. Plunge cuts are made by positioning the material directly underneath the cutting wheel and lowering the wheel onto the workpiece. This allows pieces to be cut from the center of the material. Using a marker or grease pencil, mark the area to be cut on material. Loosen the lock knob on the top of the motor head and pull the motor head upward to its maximum height. Tighten the lock knob. Secure the material on the table underneath the cutting wheel. Turn the on/off switch to the on position. Turn the flow adjustment valve to the on position. Let the cutting wheel build up to full speed and wait for the wheel to get wet before moving the material into the wheel. Hold the motor head firmly by the handle and loosen the lock knob. Slowly lower the motor head into the material to make the cut. Raise the motor head and tighten the lock knob. Turn the on/off switch to the OFF position. Turn the flow adjustment valve to the OFF position. Slide the table away from the motor head and position the work material for the next cut. TO FOLD THE SAW FOR STORAGE AND TRANSPORTATION See Figures 30 - 31, page 26. The leg stand can be collapsed for storing or transporting the saw. Drain water from the water tray. Disconnect the hoses and wipe the tray out with a clean, dry cloth. Unplug the saw and secure the power cord inside the tray. Make sure the knobs on the motor head are tightened. Set and lock the rip guide at an angle as shown in Figure 31. This will help keep the table from sliding too far out of place when the saw is set on end. Set the saw upright on its wheel end. Pull the lock knob to collapse the leg stand. Slide and push leg sections 2 and 3 toward the wheel end. Push the legs together until the lock knob locks into place on the leg stand. NOTE: The ridged area on the end of the frame may be used as a handle for moving and transporting the saw. 15 - English
-
 1
1 -
2
-
3
-
4
-
5
-
6
-
7
-
8
-
9
-
 10
10 -
 11
11 -
 12
12 -
 13
13 -
 14
14 -
 15
15 -
 16
16 -
 17
17 -
 18
18 -
 19
19 -
 20
20 -
21
-
22
-
23
-
24
-
25
-
26
-
27
-
28
-
29
-
30
-
31
-
32
-
33
-
34
-
35
-
36
-
37
-
38
-
39
-
40
-
41
-
42
-
43
-
44
-
45
-
46
-
47
-
48
-
49
-
50
-
51
-
52
-
53
-
54
-
55
-
56
-
57
-
58
-
59
-
60
 |
 |