Samsung CLX-2160 User Manual - Page 55
Understanding display messages, Data Read Fail - cartridge
 |
View all Samsung CLX-2160 manuals
Add to My Manuals
Save this manual to your list of manuals |
Page 55 highlights
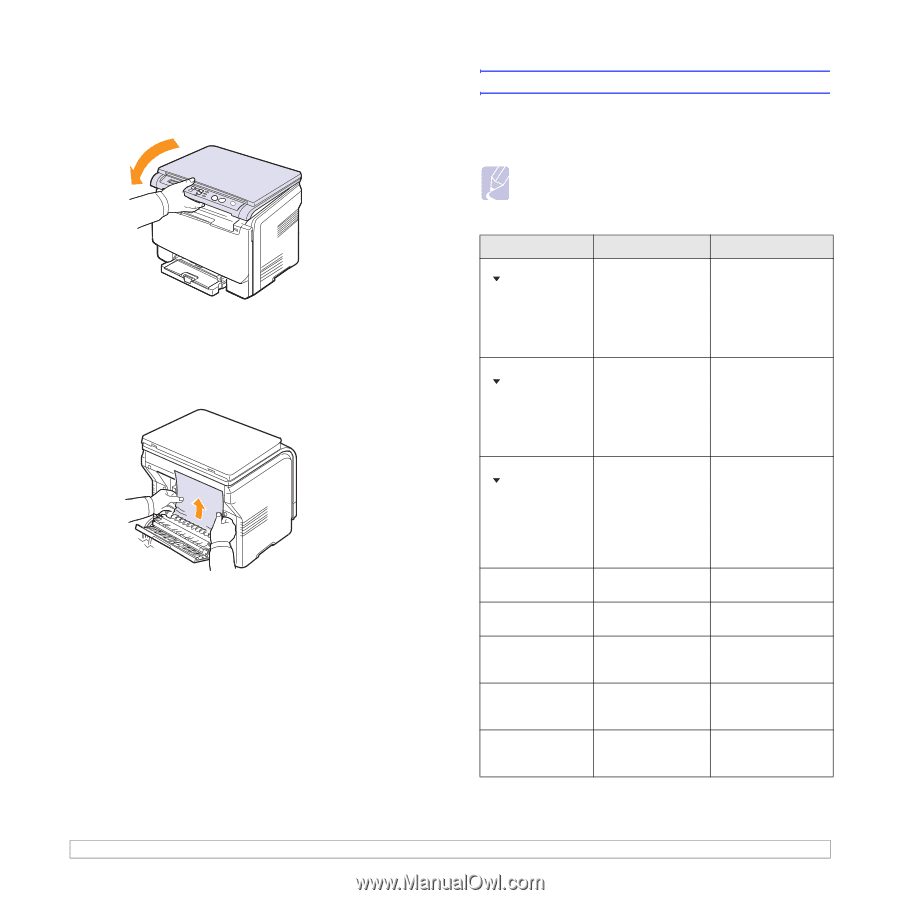
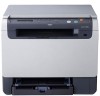
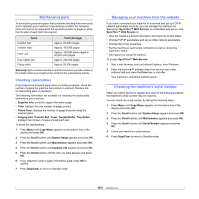
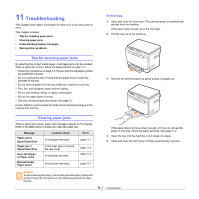
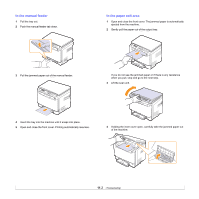
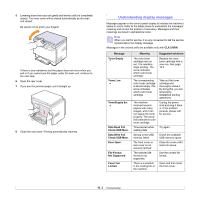
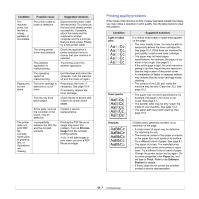
5 Lowering down the scan unit gently and slowly until it is completely closed. The inner cover will be closed automatically by the scan unit closed. Be careful not to pinch your fingers! If there is any resistance and the paper does not move when you pull or if you cannot see the paper under the scan unit, continue to the next step. 6 Open the rear cover. 7 If you see the jammed paper, pull it straight up. 8 Close the rear cover. Printing automatically resumes. Understanding display messages Messages appear on the control panel display to indicate the machine's status or errors. Refer to the tables below to understand the messages' meaning and correct the problem if necessary. Messages and their meanings are listed in alphabetical order. Note When you call for service, it is very convenient to tell the service representative the display message. Messages in the colored cells are available only with CLX-2160N. Message Toner Empty Toner Low TonerSupply Err. Data Read Fail Check USB Mem. Data Write Fail Check USB Mem. Door Open File Format Not Supported Fuser Fan Locked Meaning The color toner cartridge has run out. The machine stops printing. The arrow indicates which color toner cartridge. The corresponding color toner cartridge is almost empty. The arrow indicates which color toner cartridge. The machine received several papers with many images, and it can not supply the toner properly. The arrow indicates which color toner cartridge. Time expired while reading data. Storing to the USB memory failed. The front cover or rear cover is not securely latched. The selected file format is not supported. There is a problem in the cooling fan of the machine. Suggested solutions Replace the color toner cartridge with a new one. See page 10.5 Take out the toner cartridge and thoroughly shake it. By doing this, you can temporarily reestablish printing operations. Unplug the power cord and plug it back in. If the problem persists, please call for service. Try again. Check the available USB memory space. Close the cover until it locks into place. Use the correct file format. Open and then close the front cover. 11.3
-
 1
1 -
2
-
3
-
4
-
5
-
6
-
7
-
8
-
9
-
10
-
11
-
12
-
13
-
14
-
15
-
16
-
17
-
18
-
19
-
20
-
21
-
22
-
23
-
24
-
25
-
26
-
27
-
28
-
29
-
30
-
31
-
32
-
33
-
34
-
35
-
36
-
37
-
38
-
39
-
40
-
41
-
42
-
43
-
44
-
45
-
46
-
47
-
48
-
49
-
 50
50 -
 51
51 -
 52
52 -
 53
53 -
 54
54 -
 55
55 -
 56
56 -
 57
57 -
 58
58 -
 59
59 -
 60
60 -
61
-
62
-
63
-
64
-
65
-
66
-
67
-
68
-
69
-
70
-
71
-
72
-
73
-
74
-
75
-
76
-
77
-
78
-
79
-
80
-
81
-
82
-
83
-
84
-
85
-
86
-
87
-
88
-
89
-
90
-
91
-
92
-
93
-
94
-
95
-
96
-
97
-
98
-
99
-
100
-
101
-
102
-
103
-
104
-
105
-
106
-
107
-
108
-
109
-
110
-
111
-
112
-
113
-
114
-
115
-
116
-
117
 |
 |