Samsung DVD-R120 User Manual (user Manual) (ver.1.0) (English) - Page 38
Flexible Recording (for Timer recording only), Editing the Scheduled Record List
 |
View all Samsung DVD-R120 manuals
Add to My Manuals
Save this manual to your list of manuals |
Page 38 highlights
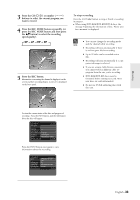
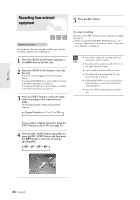
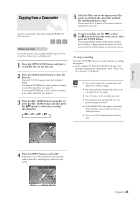
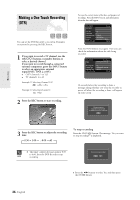
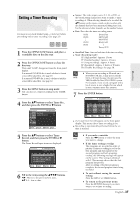
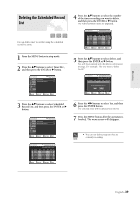
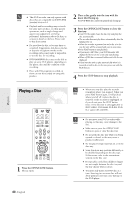
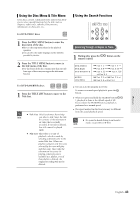
Recording I The timer recording time may differ from the set time depending on the disc and the 3 Press the ...† buttons to select Scheduled Record List, and then press the ENTER or √ NOTE overall timer recording status (for button. example, recording times overlapping, or when the previous recording ends within 3 minutes of the start of the next recording.) I will start blinking if 'Timer Recording' is not ready to start. DVD-RAM(VR) Scheduled Record List Recordable Time 02:12 SP No. Source 01 CH 09 02 CH 05 03 -- -- Date 01/01 01/01 - -/- - Start End Mode Edit 12:00 AM 02:00 AM SP √ 12:30 AM 09:00 PM LP Flexible Recording (for Timer recording only) In FR mode, the timer recording's video quality is adjusted automatically so that all images for the scheduled time can be recorded onto the free disc space. The FR mode recording setup is the same as Timer Recording. When setting the mode in step 6, set FR Mode. MOVE SELECT RETURN EXIT 4 Press the ...† buttons to select the number of the Scheduled Record List you want to edit, and then press the ENTER or √ button. The Edit and Delete items are displayed. DVD-RAM(VR) Scheduled Record List Recordable Time 02:12 SP No. Source 01 CH 09 02 CH 05 03 -- -- Date 01/01 01/01 - -/- - Start End Mode Edit 12:00 AM 02:00 AM SP 12:30 AM 09:00 PM LP E√dit D√elete √ MOVE SELECT RETURN EXIT Editing the Scheduled Record List You can change timer record settings using the scheduled record list menu. 5 Press the ...† buttons to select Edit, and then press the ENTER or √ button. The Timer Record Input item is displayed. DVD-RAM(VR) Scheduled Record List Recordable Time 02:12 SP No. Source 01 -- -- Date Start End Mode Edit --/-- No-.-0:1 Source Date Start End Mode CH 09 01/01 12 : 00 AM 02 : 00 AM SP Recordable Time 02:12 SP MOVE SELECT RETURN EXIT 1 Press the MENU button in stop mode. 2 Press the ...† buttons to select Timer Rec., and then press the ENTER or √ button. DVD-RAM(VR) Timer Record Title List Timer Record √ Playlist Scheduled Record List √ Disc manager Timer Rec. Setup MOVE SELECT RETURN EXIT Edit the items you want to modify. See the Timer Record section for more information on Timer Record Input items. (See page 37.) 6 Move through the items with the œ √ or number buttons and change the settings with ...† buttons and press the ENTER button. 7 Press the MENU button after the operation is finished. The menu screen will disappear. 38- English
-
 1
1 -
2
-
3
-
4
-
5
-
6
-
7
-
8
-
9
-
10
-
11
-
12
-
13
-
14
-
15
-
16
-
17
-
18
-
19
-
20
-
21
-
22
-
23
-
24
-
25
-
26
-
27
-
28
-
29
-
30
-
31
-
32
-
 33
33 -
 34
34 -
 35
35 -
 36
36 -
 37
37 -
 38
38 -
 39
39 -
 40
40 -
 41
41 -
 42
42 -
 43
43 -
44
-
45
-
46
-
47
-
48
-
49
-
50
-
51
-
52
-
53
-
54
-
55
-
56
-
57
-
58
-
59
-
60
-
61
-
62
-
63
-
64
-
65
-
66
-
67
-
68
-
69
-
70
-
71
-
72
-
73
-
74
-
75
-
76
-
77
-
78
-
79
-
80
-
81
-
82
-
83
-
84
-
85
-
86
-
87
-
88
-
89
 |
 |
