Samsung DVD-R157 Quick Guide (easy Manual) (ver.1.0) (English) - Page 18
Step 3 : Connecting the Video Cable, Connecting to a Video input jack
 |
View all Samsung DVD-R157 manuals
Add to My Manuals
Save this manual to your list of manuals |
Page 18 highlights
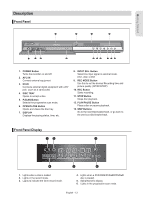
Connecting & Setting Up Step 3 : Connecting the Video Cable There are several ways to connect your DVD Recorder. Select one of the video connections on the following pages. You must use one of the following audio/video connections on this unit. ▌Connecting to a Video input jack Connect a video(yellow) cable between the VIDEO(yellow) OUT jack on DVD Recorder and VIDEO(yellow) IN jack on the TV (or AV amplifier). • You will enjoy normal quality images. • Connect the audio cables(white and red) between the AUDIO OUT jacks on the DVD Recorder and AUDIO IN jacks on your TV(or AV amplifier). (See pages 21~23) English - 18
-
 1
1 -
2
-
3
-
4
-
5
-
6
-
7
-
8
-
9
-
10
-
11
-
12
-
 13
13 -
 14
14 -
 15
15 -
 16
16 -
 17
17 -
 18
18 -
 19
19 -
 20
20 -
 21
21 -
 22
22 -
 23
23 -
24
-
25
-
26
-
27
-
28
-
29
-
30
-
31
-
32
-
33
-
34
-
35
-
36
-
37
-
38
-
39
-
40
-
41
-
42
-
43
-
44
-
45
-
46
-
47
-
48
-
49
-
50
-
51
-
52
-
53
-
54
-
55
-
56
-
57
-
58
-
59
-
60
-
61
-
62
-
63
-
64
-
65
-
66
-
67
-
68
-
69
-
70
-
71
-
72
-
73
-
74
-
75
-
76
-
77
-
78
-
79
-
80
-
81
-
82
-
83
 |
 |

C
onnecting & Setting Up
English - 18
Step 3 : Connecting the Video Cable
There are several ways to connect your DVD Recorder. Select one of the video connections on the following
pages.
You must use one of the following audio/video connections on this unit.
Connecting to a Video input jack
Connect a video(yellow) cable between the VIDEO(yellow) OUT jack on DVD Recorder and VIDEO(yellow) IN jack
on the TV (or AV ampli
fi
er).
▌
• You will enjoy normal quality images.
•
Connect the audio cables(white and red) between the
AUDIO OUT jacks on the DVD Recorder and AUDIO IN
jacks on your TV(or AV ampli
fi
er). (See pages 21~23)