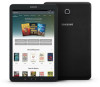
Samsung Galaxy Tab E NOOK User Manual - Page 13
Set Up Your NOOK
 |
View all Samsung Galaxy Tab E NOOK manuals
Add to My Manuals
Save this manual to your list of manuals |
Page 13 highlights
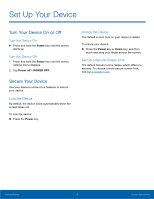
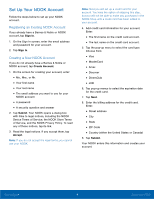
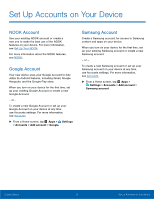
Set Up Your NOOK The set-up process for your Samsung Galaxy Tab E NOOK® guides you through setting up three types of accounts: • A Google/Gmail account for accessing Google Play and the Google App Store. • A Samsung account for buying and using Samsung apps. • A NOOK account for accessing the NOOK Store® and NOOK content such as NOOK Books®, the NOOK Newsstand®, and NOOK apps. Note: You have to connect to a Wi-Fi network to set up your NOOK. When you first turn on your NOOK, it displays a Samsung Galaxy welcome screen. 1. Select your preferred language and tap the yellow arrow to continue. Note: Accessibility options can be found by tapping the ACCESSIBILITY button. Your NOOK displays a list of the Wi-Fi networks it detects in your area. 2. Tap the name of the Wi-Fi network to which you want to connect. If the network displays a lock symbol, you are prompted to enter a password to connect to the network. If you do not know the password, ask the network administrator. Once you have entered the password in the password dialog box, tap CONNECT. 3. Once your NOOK connects to the network, tap NEXT. 4. Tap Learn more to read the End User License Agreement (EULA) for Software. If you agree to the EULA, tap AGREE. (If you do not agree to the EULA, you cannot use your NOOK.) 5. The EULA screen also offers you a chance to share diagnostic data with Samsung. Tap the checkbox to indicate your decision. 6. Tap NEXT. Your NOOK prompts you to sign in to your Google account or to create a Google account if you do not have one. You need a Google account to access Google Play and other Google apps on your device. 7. If you want to make use of Google apps, either create a Google account or sign in to your existing Google account. 8. Set up billing information for payments to the Google Store or tap Remind me later. 9. Tap NEXT. 10. Set the date, time, and time zone for your NOOK. Tap any of these items to call up a dialog box for making changes. 11. Tap NEXT. 12. Tap SET SCREEN LOCK NOW if you want to further secure your device or tap SKIP. 13.Select which Google services you want to participate in by tapping on each checkbox to select or deselect. 14.Tap NEXT. 15. Your NOOK prompts you to set up a Samsung account for accessing Samsung Galaxy apps. You can sign in, create a new account, or sign in with your Google ID. Tap the button with your choice. To skip setting up or signing in with a Samsung account, tap SKIP. 16.Next your device displays a full-screen welcome page for NOOK. (Until you have set up a NOOK account, your NOOK displays this same welcome page whenever you launch any NOOK app such as the NOOK Library.) Getting Started 7 Set Up Your NOOK
-
 1
1 -
2
-
3
-
4
-
5
-
6
-
7
-
 8
8 -
 9
9 -
 10
10 -
 11
11 -
 12
12 -
 13
13 -
 14
14 -
 15
15 -
 16
16 -
 17
17 -
 18
18 -
19
-
20
-
21
-
22
-
23
-
24
-
25
-
26
-
27
-
28
-
29
-
30
-
31
-
32
-
33
-
34
-
35
-
36
-
37
-
38
-
39
-
40
-
41
-
42
-
43
-
44
-
45
-
46
-
47
-
48
-
49
-
50
-
51
-
52
-
53
-
54
-
55
-
56
-
57
-
58
-
59
-
60
-
61
-
62
-
63
-
64
-
65
-
66
-
67
-
68
-
69
-
70
-
71
-
72
-
73
-
74
-
75
-
76
-
77
-
78
-
79
-
80
-
81
-
82
-
83
-
84
-
85
-
86
-
87
-
88
-
89
-
90
-
91
-
92
-
93
-
94
-
95
-
96
-
97
-
98
-
99
-
100
-
101
-
102
-
103
-
104
-
105
-
106
-
107
-
108
-
109
-
110
-
111
-
112
-
113
-
114
-
115
-
116
-
117
-
118
-
119
-
120
-
121
-
122
-
123
 |
 |