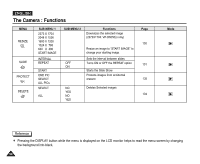
Samsung SCD5000 User Manual (ENGLISH) - Page 99
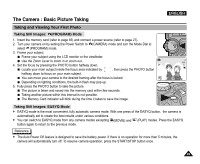
The Camera : Basic Picture Taking, Taking and Viewing Your First Photo
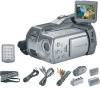 |
UPC - 036725301085
View all Samsung SCD5000 manuals
Add to My Manuals
Save this manual to your list of manuals |
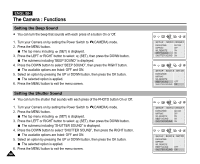
Page 99 highlights
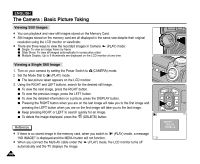
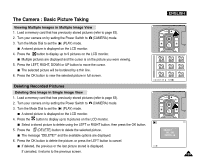
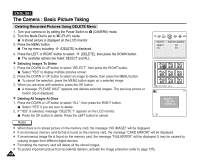
The Camera : Basic Picture Taking ENGLISH Taking and Viewing Your First Photo Taking Still Images: (PROGRAM) Mode 1. Insert the memory card (refer to page 83) and connect a power source (refer to page 27). 2. Turn your camera on by setting the Power Switch to (CAMERA) mode and turn the Mode Dial to select (PROGRAM) mode. 3. Frame your subject. Frame your subject using the LCD monitor or the viewfinder. Use the Zoom Lever to zoom in or zoom out. 4. Set the focus by pressing the PHOTO button halfway down. Locate your main subject inside the focus area indicated by , then press the PHOTO button halfway down to focus on your main subject. You can move your camera to the desired framing after the focus is locked. Depending on lighting conditions, the built-in flash may pop up. 5. Fully press the PHOTO button to take the picture. The picture is taken and saved into the memory card within few seconds. Taking another picture within this interval is not possible. The Memory Card indicator will blink during the time it takes to save the image. Taking Still Images: EASYQ Mode ✤ EASYQ mode is the most convenient, fully automatic camera mode. With one press of the EASYQ button, the camera is automatically set to create the best results under various conditions. ✤ You can switch to EASYQ mode from any camera modes excepting (MOVIE) and (PLAY) modes. Press the EASYQ button again to return to the previous mode. Reference ✤ The Auto Power Off feature is designed to save the battery power. If there is no operation for more than 5 minutes, the camera will automatically turn off. To resume camera operation, press the START/STOP button once. 99
-
 1
1 -
2
-
3
-
4
-
5
-
6
-
7
-
8
-
9
-
10
-
11
-
12
-
13
-
14
-
15
-
16
-
17
-
18
-
19
-
20
-
21
-
22
-
23
-
24
-
25
-
26
-
27
-
28
-
29
-
30
-
31
-
32
-
33
-
34
-
35
-
36
-
37
-
38
-
39
-
40
-
41
-
42
-
43
-
44
-
45
-
46
-
47
-
48
-
49
-
50
-
51
-
52
-
53
-
54
-
55
-
56
-
57
-
58
-
59
-
60
-
61
-
62
-
63
-
64
-
65
-
66
-
67
-
68
-
69
-
70
-
71
-
72
-
73
-
74
-
75
-
76
-
77
-
78
-
79
-
80
-
81
-
82
-
83
-
84
-
85
-
86
-
87
-
88
-
89
-
90
-
91
-
92
-
93
-
 94
94 -
 95
95 -
 96
96 -
 97
97 -
 98
98 -
 99
99 -
 100
100 -
 101
101 -
 102
102 -
 103
103 -
 104
104 -
105
-
106
-
107
-
108
-
109
-
110
-
111
-
112
-
113
-
114
-
115
-
116
-
117
-
118
-
119
-
120
-
121
-
122
-
123
-
124
-
125
-
126
-
127
-
128
-
129
-
130
-
131
-
132
-
133
-
134
-
135
-
136
-
137
-
138
-
139
-
140
-
141
-
142
-
143
-
144
-
145
-
146
-
147
-
148
-
149
-
150
-
151
-
152
-
153
-
154
-
155
-
156
-
157
-
158
-
159
-
160
-
161
-
162
-
163
-
164
-
165
-
166
 |
 |
