Samsung SCH-R600 User Manual (user Manual) (ver.f3) (English) - Page 129
Erase All Contacts, Phone Settings
 |
View all Samsung SCH-R600 manuals
Add to My Manuals
Save this manual to your list of manuals |
Page 129 highlights
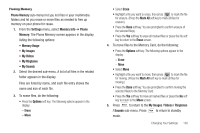
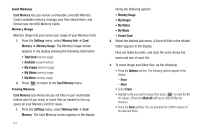
1. From the Settings menu, select Phone Settings ➔ Security. You're prompted to enter the lock code. Note: The default lock code is the last four digits of your telephone number. 2. Enter the lock code, then select Erase All Contacts. You are prompted to confirm erasure of all Contacts entries. Note: This procedure does not delete your Photo Gallery. The Photo Gallery needs to be deleted separately. 3. To erase all entries, press the Yes soft key. To keep the current entries and return to the Security sub-menu, press the No soft key. Restrictions Restrictions lets you restrict the use of your phone for outgoing calls, incoming calls, and calls placed from your Contacts. 1. From the Settings menu, select Phone Settings ➔ Security. You're prompted to enter the lock code. Note: The default lock code is the last four digits of your telephone number. 2. Enter the lock code, then select Restrictions. 3. Select Outgoing Calls or Incoming Calls. The following options appear in the display: • Allow All - No restriction on selected calls. • Allow None - Restrict (block) all selected calls. • Allow Contacts - Restrict selected calls from/to numbers not in your Contacts list. 4. Select the desired call Restrictions setting. NAM Selection The Network menu allows you to select NAM (Number Assignment Module) settings for your phone. You can store two NAM settings, which are essentially telephone numbers, for your phone. 1. From the Settings menu, select Phone Settings ➔ NAM Selection. The following options appear in the display: • NAM1 - Your service contract has one phone line. • NAM2 - Your service contract has two phone lines. 2. Select the desired NAM setting. The phone powers itself off and back on. System Select The System Select menu allows you to select the roaming setting for your phone. Changing Your Settings 126
-
 1
1 -
2
-
3
-
4
-
5
-
6
-
7
-
8
-
9
-
10
-
11
-
12
-
13
-
14
-
15
-
16
-
17
-
18
-
19
-
20
-
21
-
22
-
23
-
24
-
25
-
26
-
27
-
28
-
29
-
30
-
31
-
32
-
33
-
34
-
35
-
36
-
37
-
38
-
39
-
40
-
41
-
42
-
43
-
44
-
45
-
46
-
47
-
48
-
49
-
50
-
51
-
52
-
53
-
54
-
55
-
56
-
57
-
58
-
59
-
60
-
61
-
62
-
63
-
64
-
65
-
66
-
67
-
68
-
69
-
70
-
71
-
72
-
73
-
74
-
75
-
76
-
77
-
78
-
79
-
80
-
81
-
82
-
83
-
84
-
85
-
86
-
87
-
88
-
89
-
90
-
91
-
92
-
93
-
94
-
95
-
96
-
97
-
98
-
99
-
100
-
101
-
102
-
103
-
104
-
105
-
106
-
107
-
108
-
109
-
110
-
111
-
112
-
113
-
114
-
115
-
116
-
117
-
118
-
119
-
120
-
121
-
122
-
123
-
 124
124 -
 125
125 -
 126
126 -
 127
127 -
 128
128 -
 129
129 -
 130
130 -
 131
131 -
 132
132 -
 133
133 -
 134
134 -
135
-
136
-
137
-
138
-
139
-
140
-
141
-
142
-
143
-
144
-
145
-
146
-
147
-
148
-
149
-
150
-
151
-
152
-
153
-
154
-
155
-
156
-
157
-
158
-
159
-
160
-
161
-
162
-
163
-
164
-
165
-
166
-
167
 |
 |