Samsung SCH-R600 User Manual (user Manual) (ver.f3) (English) - Page 38
Mobile, E-mail, Group, Ringtone, My Circle, Email 2, My Images, Create New, Update Existing
 |
View all Samsung SCH-R600 manuals
Add to My Manuals
Save this manual to your list of manuals |
Page 38 highlights
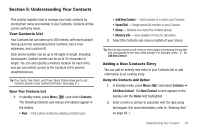
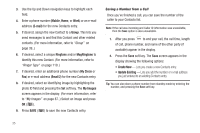
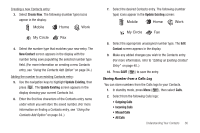
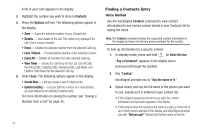
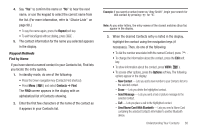
3. Use the Up and Down navigation keys to highlight each field. 4. Enter a phone number (Mobile, Home, or Work) or an e-mail address (E-mail) for the new Contacts entry. 5. If desired, assign the new Contact to a Group. This lets you send messages to and find this Contact and other related contacts. (For more information, refer to "Group" on page 39..) 6. If desired, select a unique Ringtone and/or MsgRingtone to identify this new Contact. (For more information, refer to "Ringer Type" on page 119..) 7. If desired, enter an additional phone number (My Circle or Fax) or e-mail address (Email 2) for the new Contacts entry. 8. If desired, select an identifying image by highlighting the photo ID field and pressing the Set soft key. The My Images screen appears in the display. (For more information, refer to "My Images" on page 87..) Select an image and press OK ( ). 9. Press SAVE ( ) to save the new Contacts entry. Saving a Number from a Call Once you've finished a call, you can save the number of the caller to your Contacts list. Note: If the call was incoming and Caller ID information was unavailable, then the Save option is also unavailable. 1. After you press to end your call, the call time, length of call, phone number, and name of the other party (if available) appear in the display. 2. Press the Save soft key. The Save screen appears in the display showing the following options: • Create New - Lets you create a new Contacts entry. • Update Existing - Lets you add the number or e-mail address you just entered to an existing Contacts entry. Tip: You can also store a phone number from standby mode by entering the number, and pressing the Save soft key. 35
-
 1
1 -
2
-
3
-
4
-
5
-
6
-
7
-
8
-
9
-
10
-
11
-
12
-
13
-
14
-
15
-
16
-
17
-
18
-
19
-
20
-
21
-
22
-
23
-
24
-
25
-
26
-
27
-
28
-
29
-
30
-
31
-
32
-
 33
33 -
 34
34 -
 35
35 -
 36
36 -
 37
37 -
 38
38 -
 39
39 -
 40
40 -
 41
41 -
 42
42 -
 43
43 -
44
-
45
-
46
-
47
-
48
-
49
-
50
-
51
-
52
-
53
-
54
-
55
-
56
-
57
-
58
-
59
-
60
-
61
-
62
-
63
-
64
-
65
-
66
-
67
-
68
-
69
-
70
-
71
-
72
-
73
-
74
-
75
-
76
-
77
-
78
-
79
-
80
-
81
-
82
-
83
-
84
-
85
-
86
-
87
-
88
-
89
-
90
-
91
-
92
-
93
-
94
-
95
-
96
-
97
-
98
-
99
-
100
-
101
-
102
-
103
-
104
-
105
-
106
-
107
-
108
-
109
-
110
-
111
-
112
-
113
-
114
-
115
-
116
-
117
-
118
-
119
-
120
-
121
-
122
-
123
-
124
-
125
-
126
-
127
-
128
-
129
-
130
-
131
-
132
-
133
-
134
-
135
-
136
-
137
-
138
-
139
-
140
-
141
-
142
-
143
-
144
-
145
-
146
-
147
-
148
-
149
-
150
-
151
-
152
-
153
-
154
-
155
-
156
-
157
-
158
-
159
-
160
-
161
-
162
-
163
-
164
-
165
-
166
-
167
 |
 |
