Samsung SCL901 User Manual (ENGLISH) - Page 18
Connecting the Power Source, Connexion d'une alimentation - power cord
 |
View all Samsung SCL901 manuals
Add to My Manuals
Save this manual to your list of manuals |
Page 18 highlights
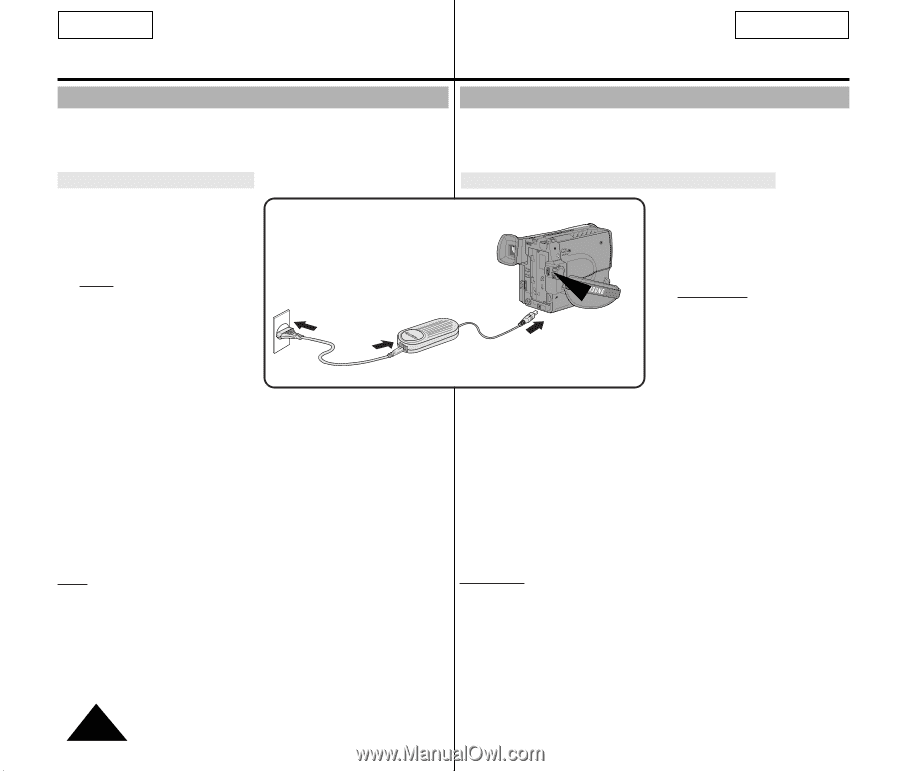
ENGLISH Preparing FRANÇAIS Réglage du caméscope Connecting the Power Source ✤ There are two ways to connect power source. - Using the AC Power Adapter : used for indoor recording. - Using the Battery Pack: used for outdoor recording. Connexion d'une alimentation ✤ Deux possibilités d'alimentation s'offrent à vous: - l'adaptateur secteur et le câble DC: utilisation intérieure, - le bloc batterie: utilisation extérieure. To use the AC Power Adapter 1. Connect the AC Power Adapter to the AC cord. Utilisation de l'adaptateur secteur et du câble DC 1. Branchez le câble DC sur l'adaptateur secteur. 2. Connect the AC cord to a wall socket. Note: The plug and wall socket type may be different depending on 2 regional conditions. 1 3. Connect the other end of the DC cable to DC jack of the camcorder. 2. Connectez l'adaptateur à une prise murale. CAMERA 3 Remarque: le type de fiche et de prise murale peut différer selon le pays. 3. Connectez l'autre extrémité du câble DC au caméscope. 4. To set the camcorder to the CAMERA mode. a. Hold down the tab of the power switch and push the switch to CAMERA mode. b. Make sure that the Lens Cap is open. c. Open the LCD Screen and make sure that the image appears in the LCD Screen. - The LCD Screen is turned on automatically when it's opened more than 30 degrees. 4. Placez l'appareil en mode caméscope en suivant les instructions ci-après. a. Tout en maintenant appuyé le petit bouton au milieu du commutateur, placez ce dernier sur la position CAMERA. b. Retirez le capuchon de la lentille. c. Ouvrez l'écran LCD et assurez-vous que l'image apparaît. - L'écran LCD s'allume automatiquement lorsqu'il est ouvert de plus de 30°. Note: If the adapter is used next to a TV or the camcorder, it may cause the TV or camcorder to emit noise. Move the adapter away from the TV, camcorder or the antenna cable. Remarque: Si vous utilisez l'adaptateur secteur à proximité d'un téléviseur ou du caméscope, des parasites peuvent apparaître sur l'écran. Eloignez l'adaptateur du téléviseur, du caméscope ou du câble de l'antenne. 18
-
 1
1 -
2
-
3
-
4
-
5
-
6
-
7
-
8
-
9
-
10
-
11
-
12
-
 13
13 -
 14
14 -
 15
15 -
 16
16 -
 17
17 -
 18
18 -
 19
19 -
 20
20 -
 21
21 -
 22
22 -
 23
23 -
24
-
25
-
26
-
27
-
28
-
29
-
30
-
31
-
32
-
33
-
34
-
35
-
36
-
37
-
38
-
39
-
40
-
41
-
42
-
43
-
44
-
45
-
46
-
47
-
48
-
49
-
50
-
51
-
52
-
53
-
54
-
55
-
56
-
57
-
58
-
59
-
60
-
61
-
62
-
63
-
64
-
65
-
66
-
67
-
68
-
69
-
70
-
71
-
72
 |
 |