Samsung SGH-T719 User Manual (user Manual) (ver.1.0) (English) - Page 135
Creating an Appointment
 |
View all Samsung SGH-T719 manuals
Add to My Manuals
Save this manual to your list of manuals |
Page 135 highlights
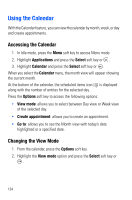
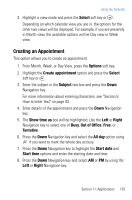
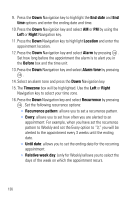
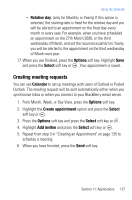
Using the Calendar 3. Highlight a view mode and press the Select soft key or . Depending on which calendar view you are in, the options for the other two views will be displayed. For example, if you are presently in Month view, the available options will be Day view or Week view. Creating an Appointment This option allows you to create an appointment. 1. From Month, Week, or Day View, press the Options soft key. 2. Highlight the Create appointment option and press the Select soft key or . 3. Enter the subject in the Subject text box and press the Down Navigation key. For more information about entering characters, see "Section 5: How to Enter Text" on page 43. 4. Enter details of the appointment and press the Down Navigation key. 5. The Show time as box will be highlighted. Use the Left or Right Navigation key to select one of Busy, Out of Office, Free, or Tentative. 6. Press the Down Navigation key and select the All day option using if you want to mark the whole day as busy. 7. Press the Down Navigation key to highlight the Start date and Start time options and enter the starting date and time. 8. Press the Down Navigation key and select AM or PM by using the Left or Right Navigation key. Section 11: Applications 135
-
 1
1 -
2
-
3
-
4
-
5
-
6
-
7
-
8
-
9
-
10
-
11
-
12
-
13
-
14
-
15
-
16
-
17
-
18
-
19
-
20
-
21
-
22
-
23
-
24
-
25
-
26
-
27
-
28
-
29
-
30
-
31
-
32
-
33
-
34
-
35
-
36
-
37
-
38
-
39
-
40
-
41
-
42
-
43
-
44
-
45
-
46
-
47
-
48
-
49
-
50
-
51
-
52
-
53
-
54
-
55
-
56
-
57
-
58
-
59
-
60
-
61
-
62
-
63
-
64
-
65
-
66
-
67
-
68
-
69
-
70
-
71
-
72
-
73
-
74
-
75
-
76
-
77
-
78
-
79
-
80
-
81
-
82
-
83
-
84
-
85
-
86
-
87
-
88
-
89
-
90
-
91
-
92
-
93
-
94
-
95
-
96
-
97
-
98
-
99
-
100
-
101
-
102
-
103
-
104
-
105
-
106
-
107
-
108
-
109
-
110
-
111
-
112
-
113
-
114
-
115
-
116
-
117
-
118
-
119
-
120
-
121
-
122
-
123
-
124
-
125
-
126
-
127
-
128
-
129
-
 130
130 -
 131
131 -
 132
132 -
 133
133 -
 134
134 -
 135
135 -
 136
136 -
 137
137 -
 138
138 -
 139
139 -
 140
140 -
141
-
142
-
143
-
144
-
145
-
146
-
147
-
148
-
149
-
150
-
151
-
152
-
153
-
154
-
155
-
156
-
157
-
158
-
159
-
160
-
161
-
162
-
163
-
164
-
165
-
166
-
167
-
168
-
169
-
170
-
171
-
172
-
173
-
174
-
175
-
176
-
177
-
178
-
179
-
180
-
181
-
182
-
183
-
184
-
185
-
186
-
187
-
188
-
189
-
190
-
191
-
192
-
193
-
194
-
195
-
196
-
197
-
198
-
199
-
200
-
201
-
202
-
203
-
204
-
205
-
206
-
207
-
208
-
209
-
210
-
211
-
212
-
213
-
214
-
215
-
216
 |
 |