Sanyo DMP-692 Owners Manual - Page 13
Operating Instructions, Connecting External Devices
 |
UPC - 086483076466
View all Sanyo DMP-692 manuals
Add to My Manuals
Save this manual to your list of manuals |
Page 13 highlights
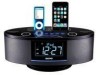
OPERATING INSTRUCTIONS • Make sure that you have fully extended the FM antenna wire. • Be sure to connect the external AM Loop Antenna to the AM Antenna Jack on the back panel if you are planning to listen to AM radio stations (refer to page 17 for connection information) . • Make sure you have removed the mylar insulation tab from the remote control. • Make sure that the system is connected to an AC outlet that is always "live". • Do not connect the system to an AC outlet controlled by a wall switch. General Controls Most of the main functions of this system can be operated by the controls on the top panel of the main unit, or by the buttons on the remote control. If a specific function can only be operated by the remote control, or by the top panel controls, this will be clearly indicated in the instructions. When operating this system with the remote control, make sure that the IR (Infrared) transmitter on the front of the remote control is pointed at the remote sensor on the front panel of the main unit. The effective operating range of the remote control is approximately 20 feet. Please note that bright sunlight or room lighting may interfere with the remote control operation. If the remote control is not operating properly, try reducing the brightness of the room or moving closer to the main unit. If this does not solve the problem, it may be time to change the remote control battery. CONNECTING EXTERNAL DEVICES Auxiliary Input Jack This system includes an AUX IN Jack to allow you to connect external audio equipment and listen to the sound from the external equipment through the speakers of this system. To listen to the external audio source: • Connect the external audio equipment to AUX IN jack on the rear panel of the system as shown below. The connection cable is not included: Select the AUX mode by repeatedly touching the MODE button on the top panel or by repeatedly pressing the MODE button on the remote control until the "AUX" indicator appears above the time display. External audio source plug Signal cord (not included) 12
-
 1
1 -
2
-
3
-
4
-
5
-
6
-
7
-
 8
8 -
 9
9 -
 10
10 -
 11
11 -
 12
12 -
 13
13 -
 14
14 -
 15
15 -
 16
16 -
 17
17 -
 18
18 -
19
-
20
-
21
-
22
-
23
-
24
-
25
-
26
-
27
-
28
-
29
-
30
-
31
-
32
-
33
-
34
-
35
 |
 |
