Sanyo DMP-692 Owners Manual - Page 22
Alarm Setting
 |
UPC - 086483076466
View all Sanyo DMP-692 manuals
Add to My Manuals
Save this manual to your list of manuals |
Page 22 highlights
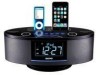
ALARM SETTING NOTES: • Use the Remote Control, you can set the Alarms in STANDBY mode or operation mode. (The ALM1/ALM2 on the top panel can only be set when the system is in the standby mode.) • When setting the alarm be sure to observe the AM/PM indicators to confirm that you have set the wake-up hour correctly. • The procedure for setting Alarm 1 and Alarm 2 is the same. The example below is for Alarm 1. 1). Press and hold the ALM 1 button on remote control or touch and hold the ALM 1 control on top panel, while the system is in the standby mode, the default alarm time (AM6:00) and the default alarm mode (iPod) begin flashing in the display. Continue holding the ALM 1 button until only the HOUR digits are flashing. 2). Press the or buttons on the remote control or touch the TUNE/SKIP or control on the top panel repeatedly to set the display to the desired wake-up Hour, AM or PM. 3). Press the ALM 1 button again. The Hour digits stop flashing and the Minute digits begin flashing. 4). Press the or buttons on the remote control or touch the TUNE/SKIP or control on the top panel repeatedly to set the display to the desired wake up minutes. 5). Press the ALM 1 button once more to select the wake-up Alarm Mode (iPod, Radio or Buzzer). One of the 3 Alarm Mode indicators will be flashing in the display. Press the or buttons on the remote control or touch the TUNE/SKIP or control on the top panel repeatedly to select the desired wake up mode, iPod, Radio, or Buzzer (BUZZ) 6). Press the ALM 1 button once more. If you selected either the iPod or Radio Alarm Mode, the Volume Level indicator begins flashing. Press the or buttons on the remote control or touch the TUNE/SKIP or control on the top panel - not the Volume ḤḤḤ/ buttons - repeatedly to set the desired wake up volume level. Note: if you selected the wake up to Buzzer alarm mode the volume level is fixed and cannot be adjusted. 7). When all settings are completed press the ALM 1 button once more to exit the setting mode and activate Alarm 1. The display will continue to show all of your alarm settings for a few seconds and then return to the current time. However the Alarm 1 indicator ( ) will remain in the display to confirm that the alarm is active. 21
-
 1
1 -
2
-
3
-
4
-
5
-
6
-
7
-
8
-
9
-
10
-
11
-
12
-
13
-
14
-
15
-
16
-
 17
17 -
 18
18 -
 19
19 -
 20
20 -
 21
21 -
 22
22 -
 23
23 -
 24
24 -
 25
25 -
 26
26 -
 27
27 -
28
-
29
-
30
-
31
-
32
-
33
-
34
-
35
 |
 |
