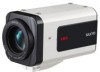
Sanyo VCC-HD4600 VCC-HD4600 Manual - Page 36
Configuration Related to Access and Security - day night network camera
 |
UPC - 086483075704
View all Sanyo VCC-HD4600 manuals
Add to My Manuals
Save this manual to your list of manuals |
Page 36 highlights
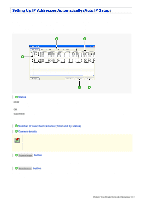
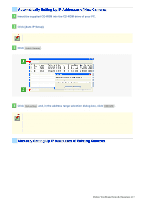
Click MENU on the control panel to display the administrator configuration menu that includes a series of menu selection buttons. If you are a surveillance system administrator, use these buttons to configure necessary settings according to the installation environment and application of your camera. Configuration Related to Network Connection Operation Changing the camera's IP address. Using SANYO's DDNS service. Using SSL communication. Streaming H.264 video in multicast Configuration Screen (Menu) NETWORK SETTINGS Clock and Camera Title Configuration Operation Adjusting clock to specific time based on external input signal Configuring the camera title Configuration Screen (Menu) CLOCK SETTINGS Configuration Related to Access and Security Operation Registering new users Changing the password, user name, and operation privilege of users Allowing all users to access the camera without any authentication check Restricting PCs that have access to the camera Configuration Screen (Menu) USER REGISTRATION SECURITY SETTINGS Configuration Related to Live Video Operation Configuration Screen (Menu) Accessing the camera from video viewer or similar software to view NETWORK SETTINGS live video Hiding specific portions of video CAMERA SETTINGS (PRIVACY MASK) Alarm-Related Configuration Operation Sending an alarm image via e-mail Using the alarm input terminals to switch the camera between the color and black-and-white video modes Configuration Screen (Menu) E-MAIL SETTINGS CAMERA SETTINGS (DAY/NIGHT) Recording-Related Configuration Operation Recording video with the camera for backup in the event of a network failure Recording images from the camera to an FTP server Configuration Screen (Menu) RECORDING FTP SETTINGS Quick Operation Guide 13/14
-
 1
1 -
2
-
3
-
4
-
5
-
6
-
7
-
8
-
9
-
10
-
11
-
12
-
13
-
14
-
15
-
16
-
17
-
18
-
19
-
20
-
21
-
22
-
23
-
24
-
25
-
26
-
27
-
28
-
29
-
30
-
 31
31 -
 32
32 -
 33
33 -
 34
34 -
 35
35 -
 36
36 -
 37
37 -
 38
38 -
 39
39 -
 40
40 -
 41
41 -
42
-
43
-
44
-
45
-
46
-
47
-
48
-
49
-
50
-
51
-
52
-
53
-
54
-
55
-
56
-
57
-
58
-
59
-
60
-
61
-
62
-
63
-
64
-
65
-
66
-
67
-
68
-
69
-
70
-
71
-
72
-
73
-
74
-
75
-
76
-
77
-
78
-
79
-
80
-
81
-
82
-
83
-
84
-
85
-
86
-
87
-
88
-
89
-
90
-
91
-
92
-
93
-
94
-
95
-
96
-
97
-
98
-
99
-
100
-
101
-
102
-
103
-
104
-
105
-
106
-
107
-
108
-
109
-
110
-
111
-
112
-
113
-
114
-
115
-
116
-
117
-
118
-
119
-
120
-
121
-
122
-
123
-
124
-
125
-
126
-
127
-
128
-
129
-
130
-
131
-
132
-
133
-
134
-
135
-
136
-
137
-
138
-
139
-
140
-
141
-
142
-
143
-
144
-
145
-
146
-
147
-
148
-
149
-
150
-
151
-
152
-
153
-
154
-
155
-
156
-
157
-
158
-
159
 |
 |
