Seagate ST1100FS0000 Seagate X8 Accelerator User Guide for Linux - Page 9
Hardware Installation
 |
View all Seagate ST1100FS0000 manuals
Add to My Manuals
Save this manual to your list of manuals |
Page 9 highlights
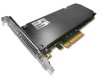
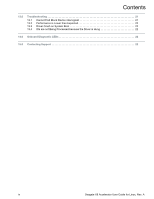
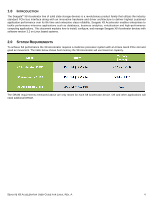
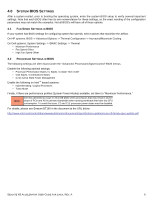
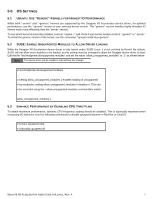
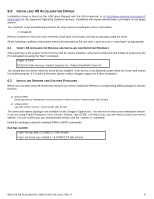
3.0 HARDWARE INSTALLATION Please observe Electrostatic Discharge (ESD) precautions while installing or handling an NOTE X8 Accelerator device. ESD can damage server and/or device components. Make sure to power down the system before installing an X8 Accelerator device. NOTE Disconnect the server from the AC power to ensure no dangerous voltages are present. 3.1 BRACKET INSTALLATION If necessary, install the appropriate bracket on the Seagate X8 Accelerator device. NOTE Please use only brackets supplied with the device. Also, do not remove the heat sinks during the bracket replacement process as doing so could incur damage to the device and void the warranty. Single Board: If your single board device has nuts like the one in the picture below then, follow the single board instructions. If your single board device does not have any nuts, please follow the double board instructions. To replace brackets for a single board device, please remove only the two screws closest to the bracket (see picture below). Please slide the bracket in horizontally to line up with the screw holes. You will need an 'm 2.5' screw driver and an 'm 2.5' nut driver. The screws need to be tightened to 4lb-in (0.45Nm). Double Board: To replace brackets for a double board device, or a single board device without retaining nuts, please remove only the two screws nearest the bracket (see picture below). Please slide the bracket in horizontally to line up with the screw holes. You will need an 'm 2.5' screw driver. The screws need to be tightened to 4lb-in (0.45Nm). 3.2 PCI SLOT SELECTION Seagate X8 Accelerator devices need to be installed in x8 or x16 PCIe Gen 2 slots. If no PCIe x8/x16 slots are available, x4 slots can be used. However, using an x4 slot may result in up to 50% reduction in performance. NOTE Some systems have PCIe slots with x8 physical connectors but only provide x4 electrical connectivity. From a performance point of view these slots behave like an x4 slot. Check your system documentation for PCIe slot specifications. SEAGATE X8 ACCELERATOR USER GUIDE FOR LINUX, REV. A 5
-
 1
1 -
2
-
3
-
 4
4 -
 5
5 -
 6
6 -
 7
7 -
 8
8 -
 9
9 -
 10
10 -
 11
11 -
 12
12 -
 13
13 -
 14
14 -
15
-
16
-
17
-
18
-
19
-
20
-
21
-
22
-
23
-
24
-
25
-
26
-
27
-
28
 |
 |