Seagate STM320004SDA20G-RK User Guide - Page 27
Using EasyManage, Create and Use Shared Folders, Creating Shared Folders
 |
UPC - 763649005705
View all Seagate STM320004SDA20G-RK manuals
Add to My Manuals
Save this manual to your list of manuals |
Page 27 highlights
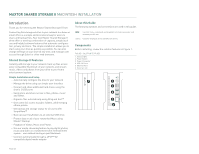
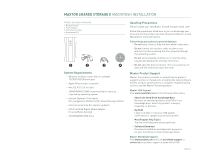
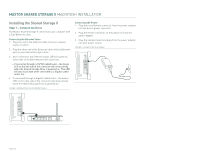
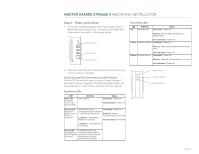
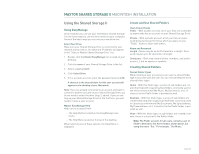
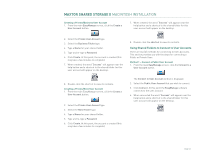
MAXTOR SHARED STORAGE II MACINTOSH INSTALLATION Using the Shared Storage II Using EasyManage Once installed, you can use your new Maxtor Shared Storage II in the same way you use the other drives on your computer. Some of the basic ways you can use your new drive are: Select Your Drive Make sure your Shared Storage Drive is connected to your network and turned on. Its name and IP address will appear in the "Select a Maxtor Shared Storage Drive" list. 1. Double-click the Maxtor EasyManage icon located on your Desktop. 2. Click the name of your Shared Storage Drive in the list. 3. Select a user account. 4. Click Select Drive. 5. If it is a private account, enter the password and click OK. A shortcut to the shared folder for this user account will appear on the desktop of your Macintosh. Note: If you are already connected to an account and want to connect to another account on your Shared Storage Drive, you do not need to select the drive (step 3, above). If you are setting up your Shared Storage Drive for the first time, you will need to create a user account. Maxtor EasyManage Help Help can be accessed from: - The Help Button located on the EasyManage main menu. - The Help Menu located at the top of the desktop. When selecting one of these options, the Help Menu is displayed. Create and Use Shared Folders User Account Types Public - With a public account, all of your files are accessible to anyone who has an account on your Shared Storage Drive. Private - With a private account, all of your files are password-protected except for those which you place in your "Public" folder to share with others. Name and Password Length - Name may be up to 20 characters in length. Password may be up to 32 characters in length. Characters - Both may contain letters, numbers, and underscores (_), but no spaces or symbols. Creating Shared Folders Shared Folder Types While creating a user account you can select a shared folder type to associate with the user. You can choose between three shared folder types: Home - With this folder type, a series of sub-folders are created that help with organizing files/folders commonly used in the Home environment (My Music, My Documents, etc.). A shortcut to the Public folder is provided as well. Business - With this folder type, a series of sub-folders are created that help with organizing files/folder commonly used in a business environment (My Documents, My Spreadsheets, My Presentations, etc.). A shortcut to the Public folder is provided as well. None - With this folder type, no sub-folders are created; however, there is a shortcut to the Public folder. Note: The Public account, for all users, contains a set of folders identical to the Home folders shown above, but using the name "Our." For example: "Our Music." PAGE 25
-
 1
1 -
2
-
3
-
4
-
5
-
6
-
7
-
8
-
9
-
10
-
11
-
12
-
13
-
14
-
15
-
16
-
17
-
18
-
19
-
20
-
21
-
 22
22 -
 23
23 -
 24
24 -
 25
25 -
 26
26 -
 27
27 -
 28
28 -
 29
29 -
 30
30 -
 31
31 -
 32
32 -
33
-
34
-
35
-
36
-
37
-
38
-
39
-
40
-
41
-
42
-
43
-
44
-
45
-
46
-
47
-
48
-
49
-
50
-
51
-
52
-
53
 |
 |
