Sharp DT 100 DT-100 Operation Manual - Page 12
Part Names and Functions, Projector - maine
 |
UPC - 074000364684
View all Sharp DT 100 manuals
Add to My Manuals
Save this manual to your list of manuals |
Page 12 highlights
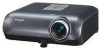
Introduction Part Names and Functions Numbers in Z refer to the main pages in this operation manual where the topic is explained. Projector Top View Power indicator 28, 48 STANDBY/ON 28 button For turning the power on and putting the projector into standby mode. ENTER button 39 For setting items selected or adjusted on the menu. KEYSTONE 33 button For entering the Keystone Correction mode. Front View Focus ring 30 For adjusting the focus. HEIGHT 31 ADJUST lever 28, 48 Lamp indicator 48 Temperature warning indicator 32 Volume buttons (-O/Q+) For adjusting the speaker sound level. 30 INPUT buttons (P/R) For switching input mode 1, 2, 3 or 4. 39, 46 MENU/HELP button For displaying adjustment and setting screens, and help screen. 39 Adjustment buttons (P/R/O/Q) For selecting menu items. 47 Intake vent 30 Zoom ring For enlarging/ reducing the picture. 15 Remote control sensor Push both sides of the lens cap to attach or remove. 11
-
 1
1 -
2
-
3
-
4
-
5
-
6
-
 7
7 -
 8
8 -
 9
9 -
 10
10 -
 11
11 -
 12
12 -
 13
13 -
 14
14 -
 15
15 -
 16
16 -
 17
17 -
18
-
19
-
20
-
21
-
22
-
23
-
24
-
25
-
26
-
27
-
28
-
29
-
30
-
31
-
32
-
33
-
34
-
35
-
36
-
37
-
38
-
39
-
40
-
41
-
42
-
43
-
44
-
45
-
46
-
47
-
48
-
49
-
50
-
51
-
52
-
53
-
54
-
55
-
56
-
57
-
58
-
59
-
60
-
61
-
62
 |
 |
