Sharp FPP60CX FP-P60CX Operation Manual - Page 13
Install the filters - hepa filter replacement
 |
View all Sharp FPP60CX manuals
Add to My Manuals
Save this manual to your list of manuals |
Page 13 highlights
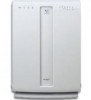
ENGLISH ESPAÑOL FRANÇAIS 2 Install the filters 1 Place the True HEPA Filter within the Filter Frame with the tabs facing up. Do not install the filter backwards or the unit will not operate properly. 2 Place the Active Carbon Filter on top of the True HEPA Filter with the bands (2 places) facing up. HEPA Filter Filter Frame Band Active Carbon Filter True HEPA Filter Filter Frame 3 Place the Pre-filter through the bands (2 places) located at the corners of the Active Carbon Filter. Insert the tabs of the pre-filter into the associated holes of the Filter Frame. 4 Mount the Filter Frame to the main unit. 5 Fix the Front Panel to the main unit. 6 Fill in the usage start date on the Date Label. Use the date as a guide for the Filter Replacement schedule. Date Label Band Holes Main unit Filter Frame Band Tabs (4 places) E-11
-
 1
1 -
2
-
3
-
4
-
5
-
6
-
7
-
 8
8 -
 9
9 -
 10
10 -
 11
11 -
 12
12 -
 13
13 -
 14
14 -
 15
15 -
 16
16 -
 17
17 -
 18
18 -
19
-
20
-
21
 |
 |
