Sharp LC-42SV49U LC-42SV49U Operation Manual - Page 34
AV Mode, Color Temperature, Advanced Video, Ambient Light Sensor - user manual
 |
View all Sharp LC-42SV49U manuals
Add to My Manuals
Save this manual to your list of manuals |
Page 34 highlights
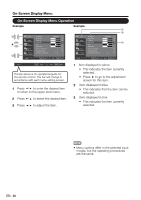
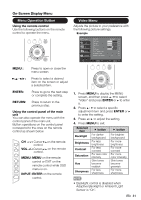
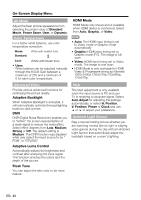
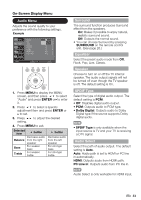
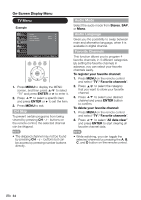
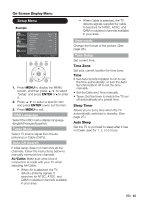
On-Screen Display Menu AV Mode Adjust the best picture appearance from selecting the preset value of Standard, Movie, Power Saver, User, or Dynamic. Color Temperature For a better white balance, use color temperature correction. Warm: White with reddish tone Standard: Cool: White with bluish tone • User: White balance can be adjusted manually through the R/G/B Gain between a maximum of 255 and a minimum of 0 for each color temperature. HDMI Mode HDMI Mode only shows and is available when HDMI device is connected. Select from Auto, Graphic, or Video. • Auto: The HDMI input timing is set to Video mode or Graphic mode automatically • Graphic: HDMI input timing set to Graphic mode (PC). The image is full scan • Video: HDMI input timing set to Video mode. The image is over scan. • HDMI Mode is only workable for HDMI Video & Progressive timing as followed: 1920x1080p,1280x720p,720x480p, 720x576p. Advanced Video Provide various advanced functions for optimizing the picture quality. Adaptive Backlight When Adaptive Backlight is activated, it will automatically optimize the backlighting levels for dark scenes. DNR DNR (Digital Noise Reduction) enables you to "soften" the screen representation of a weak signal to reduce the noise effect. Select effect degrees from Low, Medium, Strong or Off. The default setting is Medium. The DNR function was disabled while user select the input source to be " PCIN" or "DTV(HD)". Adaptive Luma Control Automatically adjusts the brightness and contrast after analyzing the input signal. This function enriches the colors and the depth of the picture. Flesh Tone You can adjust the skin color to be more natural. VGA The VGA adjustment is only available when the input source is PC and your TV is receiving a computer signal. Select Auto Adjust for adjusting the settings automatically, or select H. Position, V. Position, Phase or Clock and use ◄ or ► to adjust your preference. VAGmAbient Light Sensor Deg a natural looking picture whether you are watching movies late at night or playing video games during the day with am Ambient Light Sensor that automtically adjust the backlight based on a room's lighting. 32
-
 1
1 -
2
-
3
-
4
-
5
-
6
-
7
-
8
-
9
-
10
-
11
-
12
-
13
-
14
-
15
-
16
-
17
-
18
-
19
-
20
-
21
-
22
-
23
-
24
-
25
-
26
-
27
-
28
-
 29
29 -
 30
30 -
 31
31 -
 32
32 -
 33
33 -
 34
34 -
 35
35 -
 36
36 -
 37
37 -
 38
38 -
 39
39 -
40
-
41
-
42
-
43
-
44
-
45
-
46
-
47
-
48
-
49
-
50
-
51
-
52
-
53
-
54
-
55
-
56
-
57
-
58
-
59
-
60
-
61
-
62
-
63
-
64
-
65
-
66
-
67
-
68
-
69
-
70
-
71
-
72
-
73
-
74
-
75
-
76
-
77
-
78
-
79
-
80
-
81
-
82
-
83
-
84
-
85
-
86
-
87
-
88
-
89
-
90
-
91
-
92
-
93
-
94
-
95
-
96
-
97
-
98
-
99
-
100
-
101
-
102
-
103
-
104
-
105
-
106
-
107
-
108
-
109
-
110
-
111
-
112
-
113
-
114
-
115
-
116
-
117
-
118
-
119
-
120
-
121
-
122
-
123
-
124
-
125
-
126
-
127
-
128
-
129
-
130
-
131
-
132
-
133
-
134
-
135
-
136
-
137
-
138
-
139
-
140
-
141
-
142
-
143
-
144
-
145
-
146
-
147
-
148
-
149
-
150
-
151
-
152
-
153
-
154
-
155
-
156
 |
 |