Sharp LC-46LE540U LC-42LE540U LC-46LE540U Operation Manual - Page 27
Initial Setup - english manual
 |
View all Sharp LC-46LE540U manuals
Add to My Manuals
Save this manual to your list of manuals |
Page 27 highlights
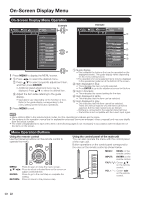
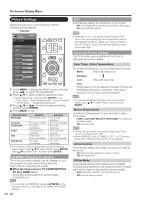
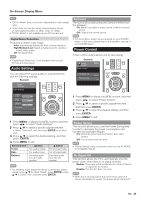
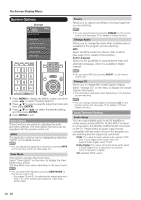
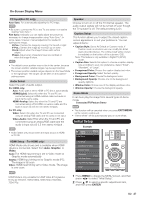
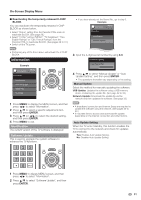
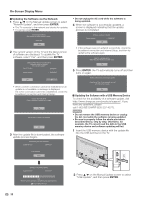
On-Screen Display Menu PC Input(For PC only) Auto Sync: For automatically adjusting the PC image. • Be sure to connect the PC to the TV and switch it on before starting "Auto Sync.". Fine Sync: Ordinarily you can easily adjust the picture as necessary to change image position using "Auto Sync.". In some cases, however, manual adjustment is needed to optimize the image. H-Pos.: Centers the image by moving it to the left or right. V-Pos.: Centers the image by moving it up or down. Clock: Adjust when the image fl ickers with vertical stripes. Phase: Adjust when characters have low contrast or when the image fl ickers. • The default cursor position may not be in the center, because the screen position variable ranges may be asymmetrical. • The screen position variable ranges depend on the View Mode or the signal type. The ranges can be seen on the positionsetting screen. Audio Select Select the path of audio output. For HDMI only: Auto: Audio path is set to HDMI or PC line in automatically HDMI(Digital): Select this when the TV and PC are connected using an HDMI-certified cable and audio is input via the same cable. HDMI+Analog: Select this when the TV and PC are connected using a DVI-HDMI conversion cable and the audio is input via a Ø 3.5 mm stereo minijack. For PC only: Video: Select this when the TV and PC are connected using an analog RGB cable and the audio is not input. Video+Audio: Select this when the TV and PC are connected suing an analog RGB cable and the audio is input via a Ø 3.5 mm stereo minijack . Speaker Choose to turn on or off the TV internal speaker. The audio output signals will not be turned off even though the TV speaker is off. The default setting is On. Caption Setup This function allows you to adjust the closed caption screen appearance to suit your preference. You can adjust 8 items: • Caption Style: Set to As Default or Custom mode. If Custom mode is selected, user can modify the detail styles described below. The setting result will be shown immediately on the bottom of the submenu OSD. Note: This feature is only available in Digital TV (ATSC) mode. • Caption Size: Selects this option to choose a caption display size according to your own preference. Select "Small", "Standard", or "Large". • Foreground Color: Choose the caption display text color. • Foreground Opacity: Select the text opacity. • Background Color: Choose the backgrond color. • Background Opacity: Choose one of the background opacity options. • Window Color: Choose one of the display windows color. • Window Opacity: Choose the backgrond opacity. Demo Mode It can Auto play the image from several types of demo mode. Connected TV/Feature Demo • This function will be canceled when you press EXIT/MENU on the remote control unit. • "Demo Mode" will be automatically play on store Mode. Initial Setup Example • Audio Select only shows when the input source is HDMI or PC IN. Initial Setup Initial Setup Menu HDMI Setup(For HDMI only) HDMI Mode only shows and is available when HDMI device is connected. Select from Auto, Graphic, or Video. Auto: The HDMI input timing is set to Video mode or Graphic mode automatically Gaphic: HDMI input timing set to Graphic mode (PC). The image is full scan Video: HDMI input timing set to Video mode. The image is over scan. EZ Setup Broadcasting Setup Internet Setup Language Individual Setup [English] FAV APP Key Assign Reset HDMI Mode is only workable for HDMI Video & Progressive timing as followed: 1920x1080p,1280x720p,720x480p, 720x576p. 1 Press MENU to display the MENU screen, and then press c/d to select "Initial Setup". 2 Press a/b to select a specific adjustment item, and then press ENTER. 27
-
 1
1 -
2
-
3
-
4
-
5
-
6
-
7
-
8
-
9
-
10
-
11
-
12
-
13
-
14
-
15
-
16
-
17
-
18
-
19
-
20
-
21
-
 22
22 -
 23
23 -
 24
24 -
 25
25 -
 26
26 -
 27
27 -
 28
28 -
 29
29 -
 30
30 -
 31
31 -
 32
32 -
33
-
34
-
35
-
36
-
37
-
38
-
39
-
40
-
41
-
42
-
43
-
44
-
45
-
46
-
47
-
48
-
49
-
50
-
51
-
52
-
53
-
54
-
55
-
56
-
57
-
58
-
59
-
60
-
61
-
62
-
63
 |
 |
