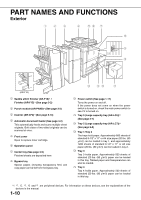
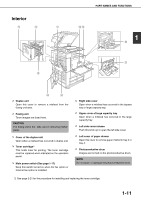
Sharp MX-M620N Operation Manual - Page 26
Touch panel
 |
View all Sharp MX-M620N manuals
Add to My Manuals
Save this manual to your list of manuals |
Page 26 highlights
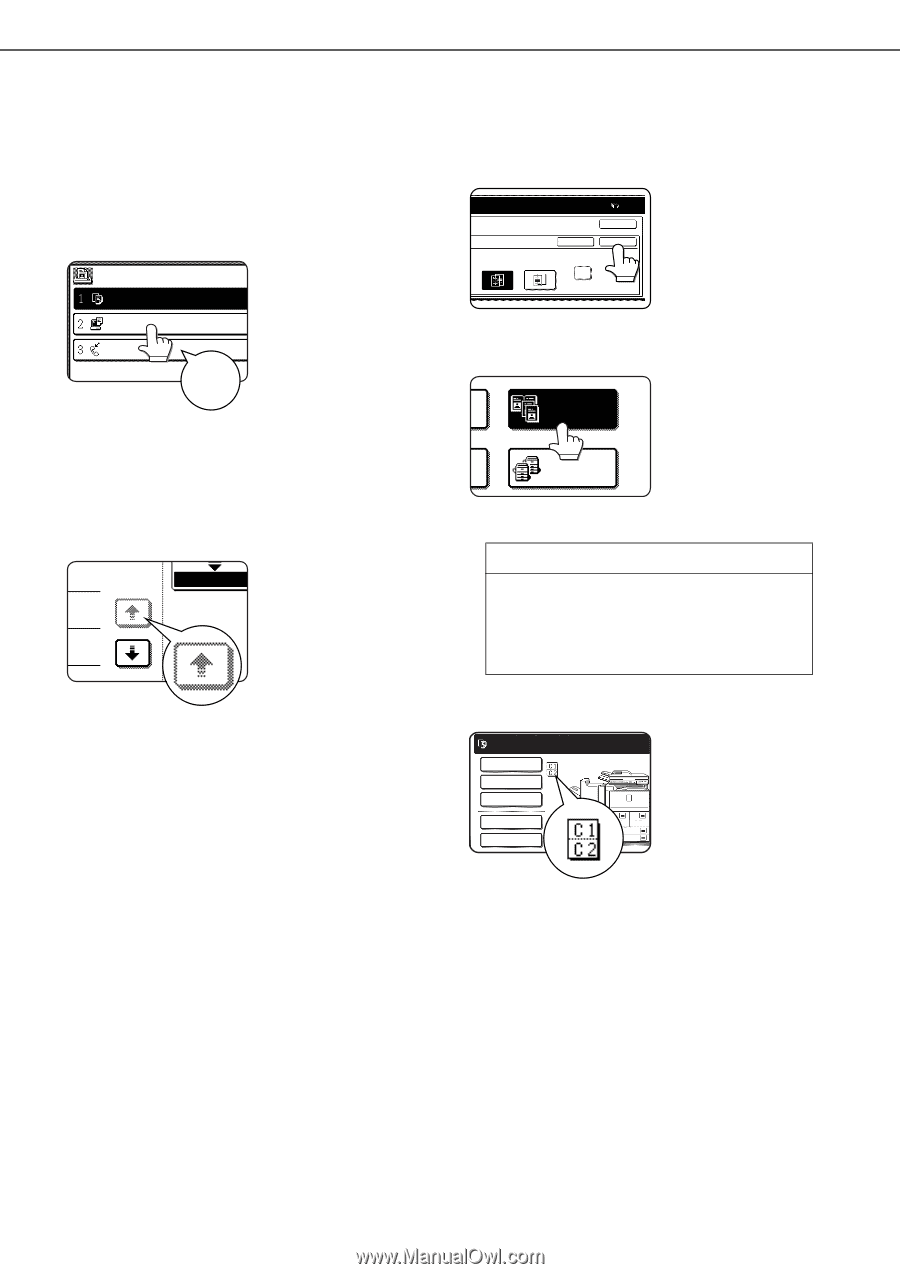
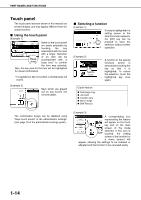
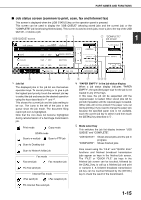
PART NAMES AND FUNCTIONS Touch panel The touch panel screens shown in this manual are printed images, and may appear different from the actual screens. ■ Using the touch panel [Example 1] JOB QUEUE COPY Items on the touch panel SETS / PROG are easily selectable by 003 / 000 touching the key 001 003 / 000 associated with the item 0666211221 010 / 000 Beep tone with a finger. Selection of an item will be accompanied with a beep tone* to confirm the item was selected. Also, the key area for the item will be highlighted for visual confirmation. * If a grayed out key is touched, a double beep will sound. [Example 2] 1/13 COMPLETE Keys which are grayed out on any screen are not selectable. ■ Selecting a function [Example 1] OCK ONTO 0 OK PRINT ON INSERT SHEETS YES NO CANCEL OK PAPER IS FED FROM INSERTER If a key is highlighted in a setting screen at the time the screen appears, the [OK] key can be pressed to store the selection without further operation. [Example 2] DUAL PAGE COPY TANDEM COPY Copier feature ● Dual page copy ● Job build ● Tandem copy ● Mirror image ● B/W Reverse A function in the special functions screen is selected by touching the key so that it is highlighted. To cancel the selection, touch the highlighted key once again. The confirmation beeps can be disabled using "Keys touch sound" in the administrator settings. (See page 10 of the administrator settings guide.) [Example 3] READY TO SCAN FOR COPY. A corresponding icon SPECIAL MODES 2-SIDED COPY OUTPUT representing the feature ORIGI will appear on the touch key and on the main FILE QUICK FILE 1. 2. 81/2x11 81/2x11 3. 81/2x14 4. 11x17 screen of the mode selected. If this icon is touched, the setting screen of the function (or a menu screen) will appear, allowing the settings to be checked or adjusted and the function to be canceled easily. 1-14
-
 1
1 -
2
-
3
-
4
-
5
-
6
-
7
-
8
-
9
-
10
-
11
-
12
-
13
-
14
-
15
-
16
-
17
-
18
-
19
-
20
-
 21
21 -
 22
22 -
 23
23 -
 24
24 -
 25
25 -
 26
26 -
 27
27 -
 28
28 -
 29
29 -
 30
30 -
 31
31 -
32
-
33
-
34
-
35
-
36
-
37
-
38
-
39
-
40
-
41
-
42
-
43
-
44
-
45
-
46
-
47
-
48
-
49
-
50
-
51
-
52
-
53
-
54
-
55
-
56
-
57
-
58
-
59
-
60
-
61
-
62
-
63
-
64
-
65
-
66
-
67
-
68
-
69
-
70
-
71
-
72
-
73
-
74
-
75
-
76
-
77
-
78
-
79
-
80
-
81
-
82
-
83
-
84
-
85
-
86
-
87
-
88
-
89
-
90
-
91
-
92
-
93
-
94
-
95
-
96
-
97
-
98
-
99
-
100
-
101
-
102
-
103
-
104
-
105
-
106
-
107
-
108
-
109
-
110
-
111
-
112
-
113
-
114
-
115
-
116
-
117
-
118
-
119
-
120
-
121
-
122
-
123
-
124
-
125
-
126
-
127
-
128
-
129
-
130
-
131
-
132
-
133
-
134
-
135
-
136
-
137
-
138
-
139
-
140
-
141
-
142
-
143
-
144
-
145
-
146
-
147
-
148
-
149
-
150
-
151
-
152
-
153
-
154
-
155
-
156
-
157
-
158
-
159
-
160
-
161
-
162
-
163
-
164
-
165
-
166
-
167
-
168
-
169
-
170
-
171
-
172
-
173
-
174
-
175
-
176
-
177
-
178
-
179
-
180
-
181
-
182
-
183
-
184
-
185
-
186
-
187
-
188
-
189
-
190
-
191
-
192
-
193
-
194
-
195
-
196
-
197
-
198
-
199
-
200
 |
 |