Sharp T19D1-H Operation Manual - Page 26
Installing set-up information and the ICC profile For Windows - ll b driver
 |
UPC - 074000047792
View all Sharp T19D1-H manuals
Add to My Manuals
Save this manual to your list of manuals |
Page 26 highlights
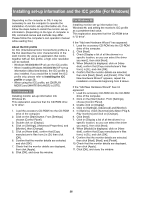
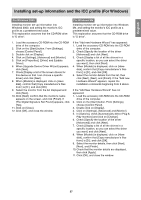
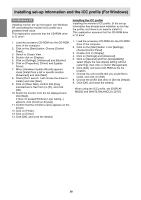
Installing set-up information and the ICC profile (For Windows) Depending on the computer or OS, it may be necessary to use the computer to operate the installation of monitor set-up information etc. If so, follow the steps below to install the monitor set-up information. (Depending on the type of computer or OS, command names and methods may differ. Please follow the computer's own operation manual while reading this.) About the ICC profile An ICC (International Color Consortium) profile is a file that describes the color characteristics of the LCD monitor. By using an application that works together with an ICC profile, a high color resolution can be realized. - Windows 98/2000/Me/XP all use the ICC profile. - When installing Windows 98/2000/Me/XP set-up information (described below), the ICC profile is also installed. If you would like to install the ICC profile only, please refer to Installing the ICC profile on page 28. - When using the ICC profile, set [DISPLAY MODE] and [WHITE BALANCE] to [STD]. For Windows 95 Installing monitor set-up information into Windows 95. This explanation assumes that the CD-ROM drive is "D drive". 1. Load the accessory CD-ROM into the CD-ROM drive of the computer. 2. Click on the [Start] button. From [Settings], choose [Control Panel]. 3. Double click on [Display]. 4. Click on [Settings], [Advanced Properties], and [Monitor], then [Change]. 5. Click on [Have disk], confirm that [Copy manufacturer's files from:] is [D:] then click [OK]. 6. Confirm that the monitor details are selected, and click [OK]. 7. Check that the monitor details are displayed, then click [Apply]. 8. Click [OK], and close the window. For Windows 98 Installing monitor set-up information into Windows 98, and setting the monitor's ICC profile as a predetermined value. This explanation assumes that the CD-ROM drive is "D drive". If the "Add new Hardware Wizard" has appeared: 1. Load the accessory CD-ROM into the CD-ROM drive of the computer. 2. Click [Next]. 3. Check [Display a list of all the drivers in a specific location, so you can select the driver you want.], then click [Next]. 4. When [Models] is displayed, click on [Have disk], confirm that [Copy manufacturer's files from:] is [D:], and click [OK]. 5. Confirm that the monitor details are selected, then click [Next], [Next], and [Finish]. If the "Add New Hardware Wizard" appears, repeat the installation commands beginning from 2 above. If the "Add New Hardware Wizard" has not appeared: 1. Load the accessory CD-ROM into the CD-ROM drive of the computer. 2. Click on the [Start] button. From [Settings], choose [Control Panel]. 3. Double click on [Display]. 4. Click on [Settings], [Advanced] and [Monitor]. 5. In [Options], check [Automatically detect Plug & Play monitors] and click on [Change]. 6. Click [Next]. 7. Click on [Display a list of all the drivers in a specific location, so you can select the driver you want.], then click [Next]. 8. When [Models] is displayed, click on [Have disk], confirm that [Copy manufacturer's files from:] is [D:], and click [OK]. 9. Confirm that the monitor details are selected, then click [Next], [Next], and [Finish]. 10. Check that the monitor details are displayed, then click [Apply]. 11. Click [OK], and close the window. 26
-
 1
1 -
2
-
3
-
4
-
5
-
6
-
7
-
8
-
9
-
10
-
11
-
12
-
13
-
14
-
15
-
16
-
17
-
18
-
19
-
20
-
 21
21 -
 22
22 -
 23
23 -
 24
24 -
 25
25 -
 26
26 -
 27
27 -
 28
28 -
 29
29 -
 30
30 -
 31
31 -
32
-
33
-
34
-
35
-
36
-
37
-
38
-
39
-
40
-
41
-
42
-
43
-
44
-
45
-
46
-
47
-
48
-
49
-
50
-
51
-
52
-
53
-
54
-
55
-
56
-
57
-
58
-
59
-
60
-
61
-
62
-
63
-
64
-
65
-
66
-
67
-
68
-
69
-
70
-
71
-
72
-
73
-
74
-
75
-
76
-
77
-
78
-
79
-
80
-
81
-
82
-
83
-
84
-
85
-
86
-
87
-
88
-
89
-
90
-
91
-
92
-
93
-
94
-
95
-
96
-
97
-
98
-
99
-
100
-
101
-
102
-
103
-
104
-
105
-
106
-
107
-
108
-
109
-
110
-
111
-
112
-
113
-
114
-
115
-
116
-
117
-
118
-
119
-
120
-
121
-
122
-
123
-
124
-
125
-
126
-
127
-
128
-
129
-
130
-
131
-
132
 |
 |
