Sharp VN-EZ1U VNEZ1U Operation Manual
Sharp VN-EZ1U Manual
 |
View all Sharp VN-EZ1U manuals
Add to My Manuals
Save this manual to your list of manuals |
Sharp VN-EZ1U manual content summary:
- Sharp VN-EZ1U | VNEZ1U Operation Manual - Page 1
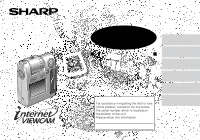
INTERNET VIEWCAM MPEG-4 Digital Recorder MODEL VN-EZ1U Important Information OPERATION MANUAL Preparations Basic Operations Please read this operation manual carefully before using the Digital Recorder. Important For assistance in reporting the theft or loss of this product, record on the line - Sharp VN-EZ1U | VNEZ1U Operation Manual - Page 2
Thank you for purchasing this Digital Recorder from SHARP. Before using the MPEG-4 Digital Recorder, please read this operation manual carefully and then save it for future reference. Important Information for Consumers in the U.S. WARNING: TO REDUCE THE RISK OF FIRE OR ELECTRIC SHOCK, DO - Sharp VN-EZ1U | VNEZ1U Operation Manual - Page 3
and, if not installed and used in accordance with the instructions, may cause harmful interference to radio communications. However, there FCC regulations for Class B computing equipment. NOTE The LCD panel of this Digital Recorder is a very high technology product with more than 61,000 thin-film - Sharp VN-EZ1U | VNEZ1U Operation Manual - Page 4
respective holders. About The Supplied Software "PixLab Integrated Digital Media Software" • PixLab Integrated Digital Media Software is the property of Sharp Corporation and all related copyright and other rights belong to Sharp Corporation. • Sharp Corporation shall in no event be liable for - Sharp VN-EZ1U | VNEZ1U Operation Manual - Page 5
it be placed in a built-in installation such as a bookcase or rack unless proper ventilation is provided, or the manufacturer's instructions have been heeded. 11. Power Sources-This Digital Recorder should be operated only from the type of power source indicated on the marking label. If you are not - Sharp VN-EZ1U | VNEZ1U Operation Manual - Page 6
voltage or other hazards. Refer all servicing to qualified service personnel. See the back of this operation manual. 18. Damage Requiring Service-Unplug this Digital Recorder from the wall outlet and refer servicing to qualified service personnel under the following conditions: a. When - Sharp VN-EZ1U | VNEZ1U Operation Manual - Page 7
parts. Unauthorized substitutions may result in fire, electric shock, or other hazards. 20. Safety Check-Upon completion of any service or repairs to this Digital Recorder, ask the service technician to perform safety checks to determine that the Digital Recorder is in proper operating condition. vi - Sharp VN-EZ1U | VNEZ1U Operation Manual - Page 8
Soft case GCASN0022TAZZ PixLab Integrated Digital Media Software CD-ROM CDSKA0039TA01 CDSKA0032TA01 AC adapter UADP-0243TAZZ Floppy disk adapter for SmartMedia™ VR-1FPN RUNTK0350TAZZ SHARP 3.3 V type SmartMedia™ (4MB) SmartMedia holder SHARP Index label (× 2) Write-protect seal - Sharp VN-EZ1U | VNEZ1U Operation Manual - Page 9
6 Part Names & Index 7 Indicators on the LCD Monitor 9 Warning Indicators 13 Preparations Inserting and Removing the Batteries 14 Powering the Digital Recorder from an AC Outlet ....... 16 Inserting and Removing a SmartMedia Card 17 Setting the Date and Time 18 Attaching the Hand Strap 21 - Sharp VN-EZ1U | VNEZ1U Operation Manual - Page 10
a Floppy Disk Adapter 67 Using a PC Card Adapter 68 Transferring Image Data to Your Computer 69 References Before Requesting Service 70 Specifications 73 SERVICE INFORMATION (For the U.S 74 Guía de operación rápida en español 75 Contents Important Information Preparations Basic Operations - Sharp VN-EZ1U | VNEZ1U Operation Manual - Page 11
on the use of electronic equipment on commercial flights or in other sensitive areas. • Be aware of the temperature and humidity. You can use your Digital Recorder at 0°C to +40°C (32°F to 104°F) and at 30% to 80% relative humidity. Do not store the unit in an unventilated car in the summer - Sharp VN-EZ1U | VNEZ1U Operation Manual - Page 12
• Some small, portable tripods may be difficult to attach and may not be sturdy enough to support your Digital Recorder. Be sure to use only a strong, stable tripod. • When using your Digital Recorder in a cold environment, the color LCD monitor may appear less bright immediately after the power is - Sharp VN-EZ1U | VNEZ1U Operation Manual - Page 13
a SmartMedia card has a service life. Replace the card with a new one before it cannot store images anymore because of deterioration. • Do not eject the SmartMedia card while recording or erasing images. Also do not turn off the connected device while using the Digital Recorder. It may cause total - Sharp VN-EZ1U | VNEZ1U Operation Manual - Page 14
from an air conditioned room. • when placing the Digital Recorder in the direct path of air blowing from an air conditioner. • when placing the Digital Recorder in a humid room. • How to prevent trouble due to dew formation. When using the Digital Recorder in a place where dew formation is likely to - Sharp VN-EZ1U | VNEZ1U Operation Manual - Page 15
Important Information Important Information Part Names & Index For details on the use of each control, refer to the page number indicated in the brackets. Front view Lens body (CAMERA/PLAY select switch) [pp. 23, 29] Mode select switch (MOVIE/STILL select switch) [p. 22] POWER switch [p. 22] - Sharp VN-EZ1U | VNEZ1U Operation Manual - Page 16
Left view Iris select switch [p. 53] Shutter button [pp. 23, 26] Focus (Macro/Normal) select switch [p. 48] Lens Bottom view Battery compartment cover [pp. 14, 17] Important Information Microphone Speaker [p. 30] DC IN 6V terminal [p. 16] Tripod socket Battery compartment [p. 14] SmartMedia slot - Sharp VN-EZ1U | VNEZ1U Operation Manual - Page 17
LAP 7 REM ‰:‰1:‰2 8 3 9 0 4 OCT.27.2‰‰‰ 1‰:31 AM INDOOR 5 q 1 MOVIE mode indicator (p. 23) Indicates the Digital Recorder is in the Movie mode. 2 Recording/Pause indicator (p. 23) : Recording : Pausing 3 Zoom indicator (p. 25) Appears when zooming in or out. 4 Date and time indicators - Sharp VN-EZ1U | VNEZ1U Operation Manual - Page 18
Movie Index Playback Mode 1 3 2 OK[SHUTTER] ‰‰3 4 5 1 MOVIE mode indicator (p. 29) Indicates the Digital Recorder is in the Movie mode. 2 Battery power indicator (p. 28) Indicates remaining power of the batteries. 3 Selecting frame (p. 29) Indicates the currently selected image. 4 The number - Sharp VN-EZ1U | VNEZ1U Operation Manual - Page 19
1 Still image resolution mode indicator (p. 46) Indicates the Still image resolution mode setting; NORMAL FINE 2 STILL mode indicator (p. 26) Indicates the Digital Recorder is in the Still mode. 3 Date and time indicators (p. 20) Indicates the current date and time. 4 White balance indicator (p. 51 - Sharp VN-EZ1U | VNEZ1U Operation Manual - Page 20
Still Index Playback Mode 1 3 2 OK[SHUTTER] 1 12 4 5 1 STILL mode indicator (p. 39) Indicates the Digital Recorder is in the Still mode. 2 Battery power indicator (p. 28) Indicates remaining power of the batteries. 3 Selecting frame (p. 39) Indicates the currently selected image. 4 The number - Sharp VN-EZ1U | VNEZ1U Operation Manual - Page 21
OFF The power will be turned off about five seconds later. To turn it on again, slide the POWER switch. BUSY Now processing instructions. Wait until this indicator disappears. TEMP ERROR The Digital Recorder becomes warm to touch. Turn off the power and do not use for a while. CAN'T REC Cannot - Sharp VN-EZ1U | VNEZ1U Operation Manual - Page 22
). See precautions on page 15. Precaution: • Do not use different type batteries together. Inserting batteries 1 Make sure the power of the Digital Recorder is turned off. 2 Slide the battery compartment cover (1) to open it in the direction of the arrow (2). 4 Close the battery compartment - Sharp VN-EZ1U | VNEZ1U Operation Manual - Page 23
or burst and seriously damage the Digital Recorder. Be sure to note the following important precautions to avoid problems with batteries. Cautions: • NEVER batteries, refer to the instructions that come with them. • Never mix old batteries with new ones. It may shorten the service lives of the new - Sharp VN-EZ1U | VNEZ1U Operation Manual - Page 24
back for a long time, or formatting a SmartMedia card. 1 Make sure the power of the Digital Recorder is turned off. 2 Insert the DC cable plug of the AC adapter into the DC IN 6V terminal on the Digital Recorder. 3 Insert the power plug of the AC adapter into a power outlet. Cautions: Make sure to - Sharp VN-EZ1U | VNEZ1U Operation Manual - Page 25
images even if the batteries are depleted or the power source is interrupted. Inserting a SmartMedia Card 1 Make sure the power of the Digital Recorder is turned off. 2 Slide the battery compartment cover (1) to open it in the direction of the arrow (2). 4 Close the battery compartment cover - Sharp VN-EZ1U | VNEZ1U Operation Manual - Page 26
(10:30 AM). 1 Slide the POWER switch (1) and then rotate the lens body toward CAMERA (2). 2 PLAY POWER CAMERA 1 Note: • If you turn on the Digital Recorder before setting the built-in clock, the CLOCK SET mode screen appears. In this case, proceed to step 4. Preparations 2 Press the MENU button to - Sharp VN-EZ1U | VNEZ1U Operation Manual - Page 27
Preparations Preparations 4 Press ' or " to select the 12-hour or 24-hour time mode (1) and then press | (2). • The second CLOCK SET mode screen appears. 1 CLOCK 12H 24H EXIT [MENU] 2 CLOCK JAN. 1.1999 12:‰‰ AM EXIT [MENU] 5 Press ' or " to select "OCT" (month) (1) and press | (2). 1 OCT - Sharp VN-EZ1U | VNEZ1U Operation Manual - Page 28
set as the current time. In this case, proceed to step 4. • The batteries power the built-in clock. In case of no power source, the Digital Recorder backs up the clock for 30 minutes. Replace batteries or change the power source meanwhile. • Note that if power source is interrupted for more than - Sharp VN-EZ1U | VNEZ1U Operation Manual - Page 29
1 After attaching the hand strap (see the left column), make sure the lens section is set to PLAY position (see page 29). Then put the Digital Recorder in the soft case with the monitor screen facing down. 2 Close the cover and seal the Velcro® closures. 2 Let the other end through as shown - Sharp VN-EZ1U | VNEZ1U Operation Manual - Page 30
Basic Operations Basic Operations Quick Reference Precautions: • Take care not to touch the lens with your fingers when handling the Digital Recorder. • Operate the switches slowly. To Turn On the Power Slide the POWER switch and hold for more than one second. (It springs back when released.) - Sharp VN-EZ1U | VNEZ1U Operation Manual - Page 31
body toward CAMERA (3). 3 POWER 1 PLAY MOVIE STILL CAMERA 2 Note: • If the warning indicator "NOT INITIALIZED" appears, format the SmartMedia card by the Digital Recorder (see page 64). 23 2 Adjust the angle of the lens body to compose the image on the LCD monitor. MOVIE mode indicator NORMAL - Sharp VN-EZ1U | VNEZ1U Operation Manual - Page 32
time indicator "LAP" returns 0:00:00. NORMAL LAP REM ‰:‰1:‰2 The Auto Power Off The Digital Recorder is automatically turned off to save the battery power whenever you do not perform any operation for about three minutes. Slide the POWER switch again - Sharp VN-EZ1U | VNEZ1U Operation Manual - Page 33
Basic Operations Zooming The digital zooming allows you to move visually closer or farther from the subject without changing your position, while the movie recording. Zoom range is 1-4×. Zooming in (when you want to center attention on the subject) Wide angle Zooming out (when you want to show - Sharp VN-EZ1U | VNEZ1U Operation Manual - Page 34
REM 17 OCT.27.2‰‰‰ 1‰:31 AM Notes: • If the warning indicator "NOT INITIALIZED" appears, format the SmartMedia card by the Digital Recorder (see page 64). • The Digital Recorder automatically chooses the correct shutter speed for the lighting conditions. Note that the slow shutter speed set for the - Sharp VN-EZ1U | VNEZ1U Operation Manual - Page 35
as the lens, and you can always see the Timer indicator. Precaution: • When using the Self-Timer, fix the Digital Recorder on a tripod, etc. to place it horizontally. 1 Set the Still Recording mode (see page 26), then press the MENU button to display . MENU REC.MODE NORMAL - Sharp VN-EZ1U | VNEZ1U Operation Manual - Page 36
the start time is reached. • The Shutter will be released automatically 10 seconds after the Shutter button is pressed. • To cancel the Self-Timer recording, press the MENU button. Timer indicator Notes: • Do not turn off the power or change the mode once the Timer indicator appears. • Whenever the - Sharp VN-EZ1U | VNEZ1U Operation Manual - Page 37
monitor makes it possible to play back what you have just recorded. You can also enjoy the sound through the built-in speaker mode indicator OK[SHUTTER] ‰‰5 The number of the movie Note: • If you have recorded more than nine movies, there are other pages before and after the current page. To - Sharp VN-EZ1U | VNEZ1U Operation Manual - Page 38
of built-in speaker. Volume indicator Increase NORMAL Increase ‰‰1 2 Decrease Decrease OCT.27.2‰‰‰ 1‰:31 AM Note: • The volume setting will be retained even after the Digital Recorder is turned off. Speaker Basic Operations 30 - Sharp VN-EZ1U | VNEZ1U Operation Manual - Page 39
Basic Operations Basic Operations Slow This function halves the normal speed of playback. You can play the movie in slow motion. 1 Set the Movie Playback mode (see page 29), then press the MENU button. • appears on the LCD monitor. MENU C-PLAY OFF SLOW PLAY OFF DISPLAY - Sharp VN-EZ1U | VNEZ1U Operation Manual - Page 40
Basic Operations Skipping During a movie playback, press and release immediately \ or | on the Operation button. It allows you to jump to the first scene of the current or the next movie and automatically start playing it again. Fast Forward/Fast Reverse During a movie playback, press \ or | on - Sharp VN-EZ1U | VNEZ1U Operation Manual - Page 41
. To delete a protected movie, unprotect it before the deletion (see pages 37 and 38). • Do not open the battery compartment cover while the Digital Recorder delete a movie. 1 Slide the POWER switch (1), set the Mode select switch to MOVIE (2) and then rotate the lens body to PLAY (3). 3 POWER - Sharp VN-EZ1U | VNEZ1U Operation Manual - Page 42
DELETE? YES [SHUTTER] NO [ MENU ] OK[SHUTTER] ‰‰2 5 Press \ or | to move the frame to the unwanted movie. DELETE OK[SHUTTER] ‰‰1 Note: • If you have recorded more than nine movies, there are other pages before and after the current page. To go to the previous page, press '. To go to the
-
 1
1 -
 2
2 -
 3
3 -
 4
4 -
 5
5 -
 6
6 -
 7
7 -
8
-
9
-
10
-
11
-
12
-
13
-
14
-
15
-
16
-
17
-
18
-
19
-
20
-
21
-
22
-
23
-
24
-
25
-
26
-
27
-
28
-
29
-
30
-
31
-
32
-
33
-
34
-
35
-
36
-
37
-
38
-
39
-
40
-
41
-
42
 |
 |

Important Information
Advanced Features
Importing Images
into a Computer
References
Basic Operations
Preparations
INTERNET VIEWCAM
MPEG-4 Digital Recorder
OPERATION MANUAL
MODEL
VN-EZ1U
Important
Model No.:
Serial No.:
Please read this operation manual
carefully before using the Digital Recorder.
For assistance in reporting the theft or
loss
of this product, record on the line
below
the serial number which is located on
the bottom of the unit.
Please retain this information.
VN-EZ1U