Sharp XL-HP707 XL-HP707 Operation Manual - Page 13
Battery installation, Test of the remote control
 |
View all Sharp XL-HP707 manuals
Add to My Manuals
Save this manual to your list of manuals |
Page 13 highlights
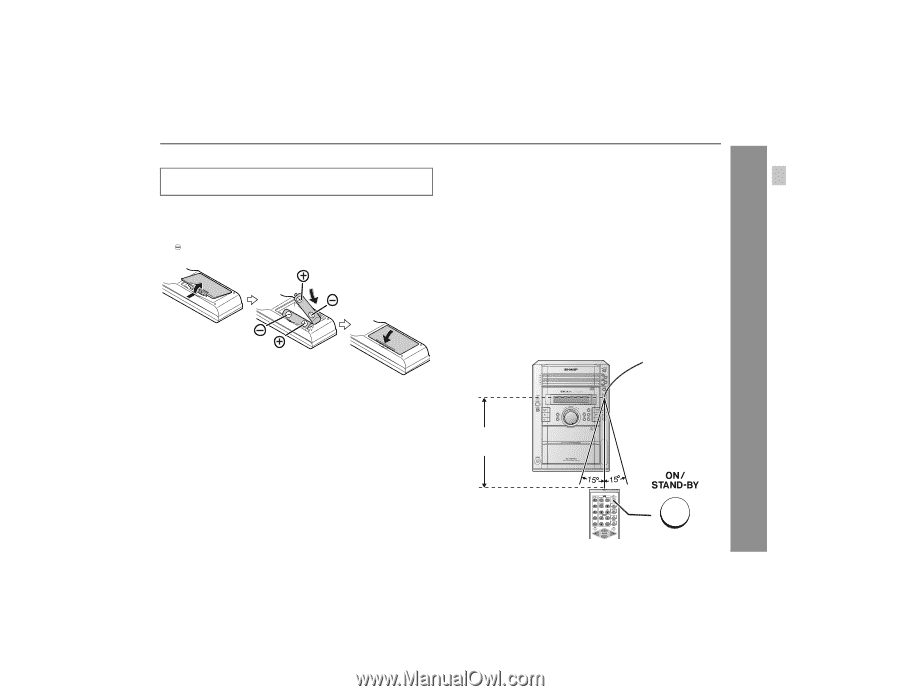
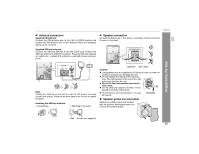
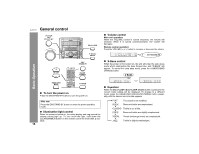
Remote control ! Battery installation Use 2 "AA" size batteries (UM/SUM-3, R6, HP-7 or similar). Batteries are not included. 1 Remove the battery cover. 2 Insert the batteries according to the direction indicated in the battery compartment. When inserting or removing the batteries, push them toward the battery terminals. 3 Replace the cover. Notes concerning use: " Replace the batteries if the operating distance is reduced or if the operation becomes erratic. " Periodically clean the transmitter on the remote control and the sensor on the unit with a soft cloth. " Exposing the sensor on the unit to strong light may interfere with operation. Change the lighting or the direction of the unit. " Keep the remote control away from moisture, heat, shock, and vibrations. ! Test of the remote control Check the remote control after checking all the connections (see pages 10 - 12). Point the remote control directly at the remote sensor on the unit. The remote control can be used within the range shown below: Press the ON/STAND-BY button. Does the power turn on? Now, you can enjoy music. XL-HP707 Remote sensor Preparation for Use Precautions for battery use: " Replace all old batteries with new ones at the same time. " Do not mix old and new batteries. " Remove the batteries if the unit will not be used for long periods of time. This will prevent potential damage due to battery leakage. Caution: " Do not use rechargeable batteries (nickel-cadmium battery, etc.). " Installing the batteries incorrectly may cause the unit to malfunc- tion. 8" - 20' (0.2 m - 6 m) 13
-
 1
1 -
2
-
3
-
4
-
5
-
6
-
7
-
 8
8 -
 9
9 -
 10
10 -
 11
11 -
 12
12 -
 13
13 -
 14
14 -
 15
15 -
 16
16 -
 17
17 -
 18
18 -
19
-
20
-
21
-
22
-
23
-
24
-
25
-
26
-
27
-
28
-
29
-
30
-
31
-
32
-
33
-
34
-
35
-
36
 |
 |