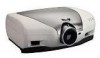
Sharp XV-Z9000U XVZ9000U Operation Manual - Page 13
Power Supply, Connecting to Video Equipment - projector picture
 |
UPC - 074000358126
View all Sharp XV-Z9000U manuals
Add to My Manuals
Save this manual to your list of manuals |
Page 13 highlights
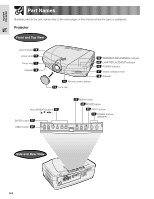
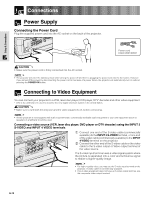
Setup & Connections Connections Power Supply Connecting the Power Cord Plug the supplied power cord into the AC socket on the back of the projector. Power cord CACCU5013DE01 CAUTION • Make sure the power cord is firmly connected into the AC socket. • The projector will enter the stand-by mode after turning the power off and then re-plugging the power cord into the AC socket. However, if you turned off the power by disconnecting the power cord or because of a power failure, the projector will automatically turn on without pressing the POWER ON button. Connecting to Video Equipment You can connect your projector to a VCR, laser disc player, DVD player, DTV* decoder and other video equipment. * DTV is the umbrella term used to describe the new digital television system in the United States. CAUTION • Make sure to turn both the projector and the video equipment off, before connecting. • As this projector is not equipped with audio input terminals, commercially available audio equipment or your own equipment (such as speakers or amplifiers) should be used. Connecting a video source (VCR, laser disc player, DVD player or DTV decoder) using the INPUT 3 S-VIDEO and INPUT 4 VIDEO terminals 1 Connect one end of the S-video cable (commercially available) to the INPUT 3 S-VIDEO terminal, or one end of the video cable (commercially available) to the INPUT 4 VIDEO terminal on the projector. 2 Connect the other end of the S-video cable or the video cable to the S-video output or Video output terminal of the video source. The S-video input terminal uses a video signal system where the picture is separated into a color and luminance signal to realize a higher-quality image. • For higher quality video, you may use the S-video input terminal on the projector. S-video cable is commercially available. • If your video equipment does not have an S-video output terminal, use the composite video output terminal. E-13
-
 1
1 -
2
-
3
-
4
-
5
-
6
-
7
-
 8
8 -
 9
9 -
 10
10 -
 11
11 -
 12
12 -
 13
13 -
 14
14 -
 15
15 -
 16
16 -
 17
17 -
 18
18 -
19
-
20
-
21
-
22
-
23
-
24
-
25
-
26
-
27
-
28
-
29
-
30
-
31
-
32
-
33
-
34
-
35
-
36
-
37
-
38
-
39
-
40
-
41
-
42
-
43
-
44
-
45
-
46
-
47
-
48
-
49
-
50
-
51
-
52
-
53
-
54
-
55
-
56
-
57
-
58
-
59
-
60
-
61
 |
 |
