Singer Fashion Mate 5560 User Manual - Page 19
Stitch Selection
 |
View all Singer Fashion Mate 5560 manuals
Add to My Manuals
Save this manual to your list of manuals |
Page 19 highlights
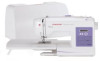
START SEWING Stitch Selection A B B C C Choosing Utility and Decorative stitch patterns: The machine is automatically set to stitch 00 (Straight Stitch) when turned on. Press the stitch selection buttons (A) to set desired stitch number. Left button sets the left digit on the LCD display, right button sets the right digit. Adjusting the width/needle position of the stitch: To adjust stitch width for selected stitch/needle position for Straight Stitch, press the stitch width/ needle position adjustment buttons (B). Left button decreases the width/moves the needle position to the left. Right button increases the width/moves the needle position to the right. Adjusting the length of the stitch: To adjust the stitch length for selected stitch, press the stitch length adjustment buttons (C). Up button increases the length. Down button decreases the length. ✓ The stitch width can be adjusted from 1.0 to 6.5. Some stitches have a limited stitch width. ✓ The stitch length can be adjusted from 0.3 to 4.5. Some stitches have a limited stitch length. ✓ There are 13 needle positions. 0.5 is far left, 3.5 is center, 6.5 is far right. ✓ Default settings are underlined on the LCD display. 19
-
 1
1 -
2
-
3
-
4
-
5
-
6
-
7
-
8
-
9
-
10
-
11
-
12
-
13
-
 14
14 -
 15
15 -
 16
16 -
 17
17 -
 18
18 -
 19
19 -
 20
20 -
 21
21 -
 22
22 -
 23
23 -
 24
24 -
25
-
26
-
27
-
28
-
29
-
30
-
31
-
32
-
33
-
34
-
35
-
36
-
37
-
38
-
39
-
40
-
41
-
42
-
43
-
44
-
45
-
46
-
47
-
48
-
49
-
50
-
51
-
52
-
53
-
54
-
55
-
56
-
57
-
58
-
59
-
60
-
61
-
62
-
63
-
64
-
65
-
66
-
67
-
68
-
69
-
70
-
71
-
72
-
73
-
74
-
75
-
76
-
77
-
78
-
79
-
80
-
81
-
82
-
83
-
84
-
85
-
86
-
87
-
88
-
89
-
90
-
91
-
92
-
93
-
94
-
95
-
96
-
97
-
98
-
99
-
100
-
101
-
102
-
103
-
104
 |
 |
