Singer Fashion Mate 5560 User Manual - Page 33
Maintenance
 |
View all Singer Fashion Mate 5560 manuals
Add to My Manuals
Save this manual to your list of manuals |
Page 33 highlights
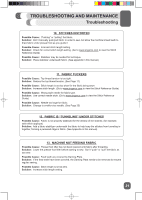
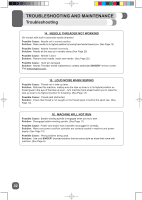
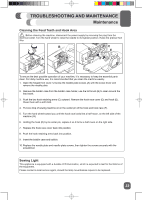
TROUBLESHOOTING AND MAINTENANCE Maintenance Cleaning the Feed Teeth and Hook Area ⚠ Before cleaning the machine, disconnect the power supply by removing the plug from the electrical outlet. Turn the hand wheel to raise the needle to its highest position. Raise the presser foot lifter. B C G E A C F D To ensure the best possible operation of your machine, it is necessary to keep the essential parts clean. For daily machine use, it is recommended that you clean the machine weekly. 1. Open the hinged front cover. Unscrew the needle plate screws (A) with the screw driver and remove the needle plate. 2. Remove the bobbin case from the bobbin case holder, use the lint brush (B) to clean around the feed teeth. 3. Push the two hook retaining arms (C) outward. Remove the hook race cover (D) and hook (E). Clean them with a soft cloth. 4. Put one drop of sewing machine oil on the center pin of the hook and hook race (F). 5. Turn the hand wheel toward you until the hook race looks like a half-moon, on the left side of the machine (G). 6. Holding the hook (E) by its center pin, replace it so it forms a half-moon on the right side. 7. Replace the hook race cover back into position. 8. Push the hook retaining arms back into position. 9. Insert the bobbin case and bobbin. 10. Replace the needle plate and needle plate screws, then tighten the screws securely with the screwdriver. Sewing Light This appliance is equipped with a durable LED illumination, which is expected to last for the lifetime of the equipment. Please contact a local service agent, should the lamp nevertheless require to be replaced. 33
-
 1
1 -
2
-
3
-
4
-
5
-
6
-
7
-
8
-
9
-
10
-
11
-
12
-
13
-
14
-
15
-
16
-
17
-
18
-
19
-
20
-
21
-
22
-
23
-
24
-
25
-
26
-
27
-
 28
28 -
 29
29 -
 30
30 -
 31
31 -
 32
32 -
 33
33 -
 34
34 -
 35
35 -
 36
36 -
 37
37 -
 38
38 -
39
-
40
-
41
-
42
-
43
-
44
-
45
-
46
-
47
-
48
-
49
-
50
-
51
-
52
-
53
-
54
-
55
-
56
-
57
-
58
-
59
-
60
-
61
-
62
-
63
-
64
-
65
-
66
-
67
-
68
-
69
-
70
-
71
-
72
-
73
-
74
-
75
-
76
-
77
-
78
-
79
-
80
-
81
-
82
-
83
-
84
-
85
-
86
-
87
-
88
-
89
-
90
-
91
-
92
-
93
-
94
-
95
-
96
-
97
-
98
-
99
-
100
-
101
-
102
-
103
-
104
 |
 |
