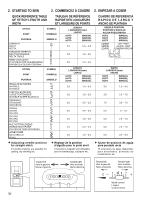
Singer XL-420 FUTURA Instruction Manual - Page 28
Stitch length and width/needle position controls, Twin needle mode button
 |
View all Singer XL-420 FUTURA manuals
Add to My Manuals
Save this manual to your list of manuals |
Page 28 highlights
Stitch length and width/needle position controls *Auto/Default settings
-
 1
1 -
2
-
3
-
4
-
5
-
6
-
7
-
8
-
9
-
10
-
11
-
12
-
13
-
14
-
15
-
16
-
17
-
18
-
19
-
20
-
21
-
22
-
 23
23 -
 24
24 -
 25
25 -
 26
26 -
 27
27 -
 28
28 -
 29
29 -
 30
30 -
 31
31 -
 32
32 -
 33
33 -
34
-
35
-
36
-
37
-
38
-
39
-
40
-
41
-
42
-
43
-
44
-
45
-
46
-
47
-
48
-
49
-
50
-
51
-
52
-
53
-
54
-
55
-
56
-
57
-
58
-
59
-
60
-
61
-
62
-
63
-
64
-
65
-
66
-
67
-
68
-
69
-
70
-
71
-
72
-
73
-
74
-
75
-
76
-
77
-
78
-
79
-
80
-
81
-
82
-
83
-
84
-
85
-
86
-
87
-
88
-
89
-
90
-
91
-
92
-
93
-
94
-
95
-
96
-
97
-
98
-
99
-
100
-
101
-
102
-
103
-
104
-
105
-
106
-
107
-
108
-
109
-
110
-
111
-
112
-
113
-
114
-
115
-
116
-
117
-
118
-
119
-
120
-
121
-
122
-
123
-
124
 |
 |
26
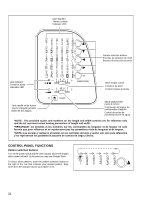
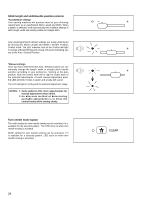
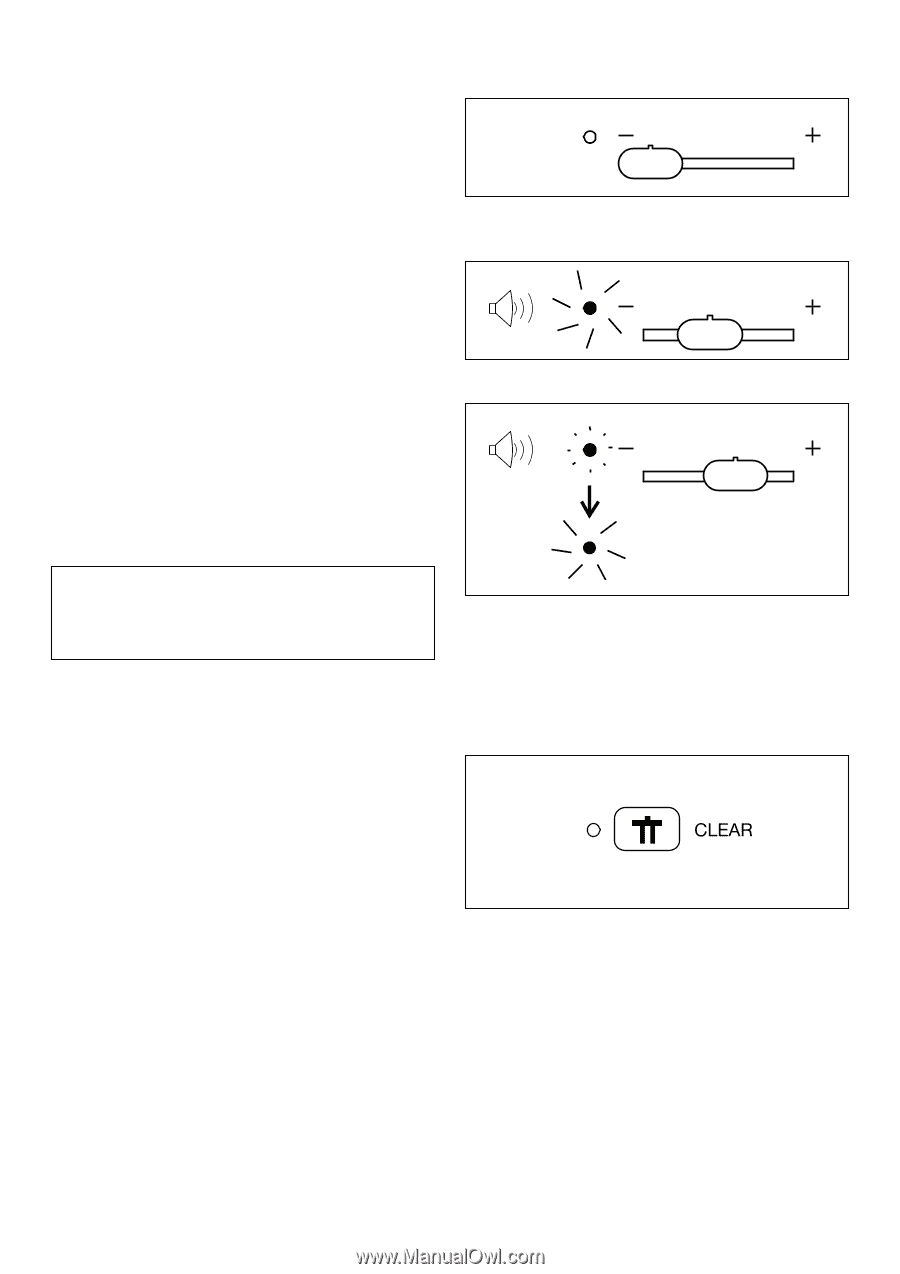
Stitch length and width/needle position controls
*Auto/Default settings
<RXU VHZLQJ PDFKLQH ZLOO SURGXFH PRVW RI \RXU VWLWFKLQJ
requirements at an Auto/Default Stitch Length and Width. When
a pattern is selected, it will automatically sew at default settings of
stitch length, width and needle position for straight stitch.
Auto (preprogrammed) default settings are easily determined
by moving the Stitch Length and Width / Needle Position
Control Knob. The LED Indicator next to the Control will light
LQ RUDQJH ZLWKRXW EOLQNLQJ DQG D EHHS ZLOO VRXQG LQGLFDWLQJ \RX
are at the Auto / Default Position.
*Manual settings
Once you have determined the Auto / Default position you can
manually change the length, width or straight stitch needle
postition according to your preference. Starting at the Auto
SRVLWLRQ± VOLGH WKH FRQWURO NQRE OHIW RU ULJKW WR ORFDWH HDFK RI
the potential adjustments. At each manual adjustment point,
WKH /(' ZLOO EOLQN º WLPHV LQ JUHHQ DQG D EHHS ZLOO VRXQGµ
The LED will light in red beyond the potential adjustment range.
NOTES:
1. Some patterns offer more opportunities for
manual adjustments than others.
2. An alternate method of determining
available adjustments is to move the
control knobs while sewing slowly.
Twin needle mode button
The width setting for twin needle sewing can be activated if it is
available for the selected pattern.
The LED turns on when twin
needle sewing is activated.
Width setting for twin needle sewing can be activated, if it
is available for a selected pattern. LED turns on when twin
needle sewing is activated.